AbinadiWitness
Member
- Joined
- Oct 25, 2017
- Messages
- 33
***Part 2 of 2 of my 2017 trip to Chicago Basin in Colorado. My hiking partner, Dave, and I also overnighted near the rim of the Black Canyon of the Gunnison before also heading out to summit Utah's Mount Peale, the highpoint of the La Sal Range near Moab because we had a bit of extra time. Check it out! ") ***
***
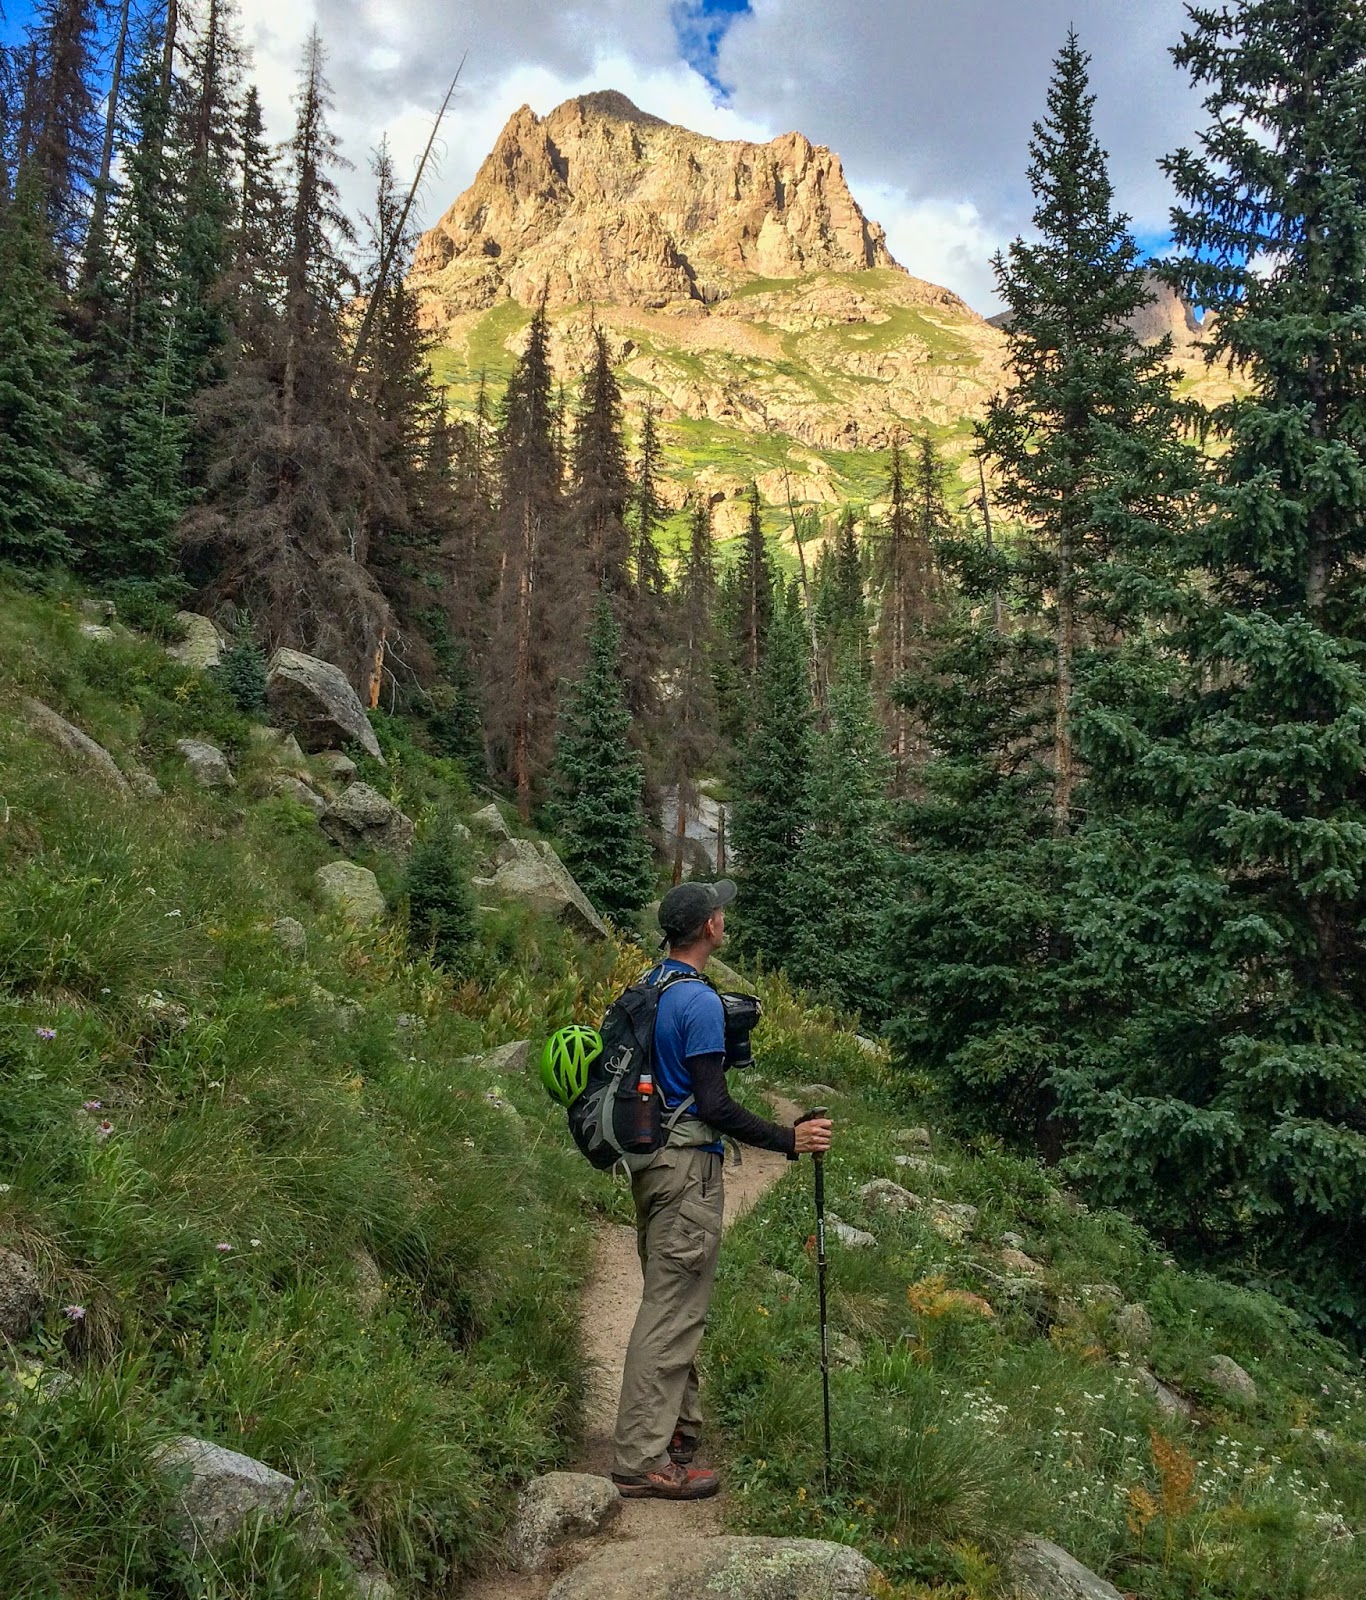
Picking up where the last trip report left off, we got our nice pre-dawn start and began pounding up the trail toward Twin Lakes again. Eolus/North Eolus and Sunlight/Windom Peaks both share a common approach to the Twin Lakes area from Chicago Basin, so we were re-treading the same ground, but we knew what we were in for this time.
***Picking up where the last trip report left off, we got our nice pre-dawn start and began pounding up the trail toward Twin Lakes again. Eolus/North Eolus and Sunlight/Windom Peaks both share a common approach to the Twin Lakes area from Chicago Basin, so we were re-treading the same ground, but we knew what we were in for this time.

One of the two brothers we met on Sunlight Peak makes the thrilling class 4 jump move on his descent from the extremely exposed summit block after Dave and I had successfully summited.
Happily, my energy was back where it ought to be and I was able to move much more energetically up the steep terrain.
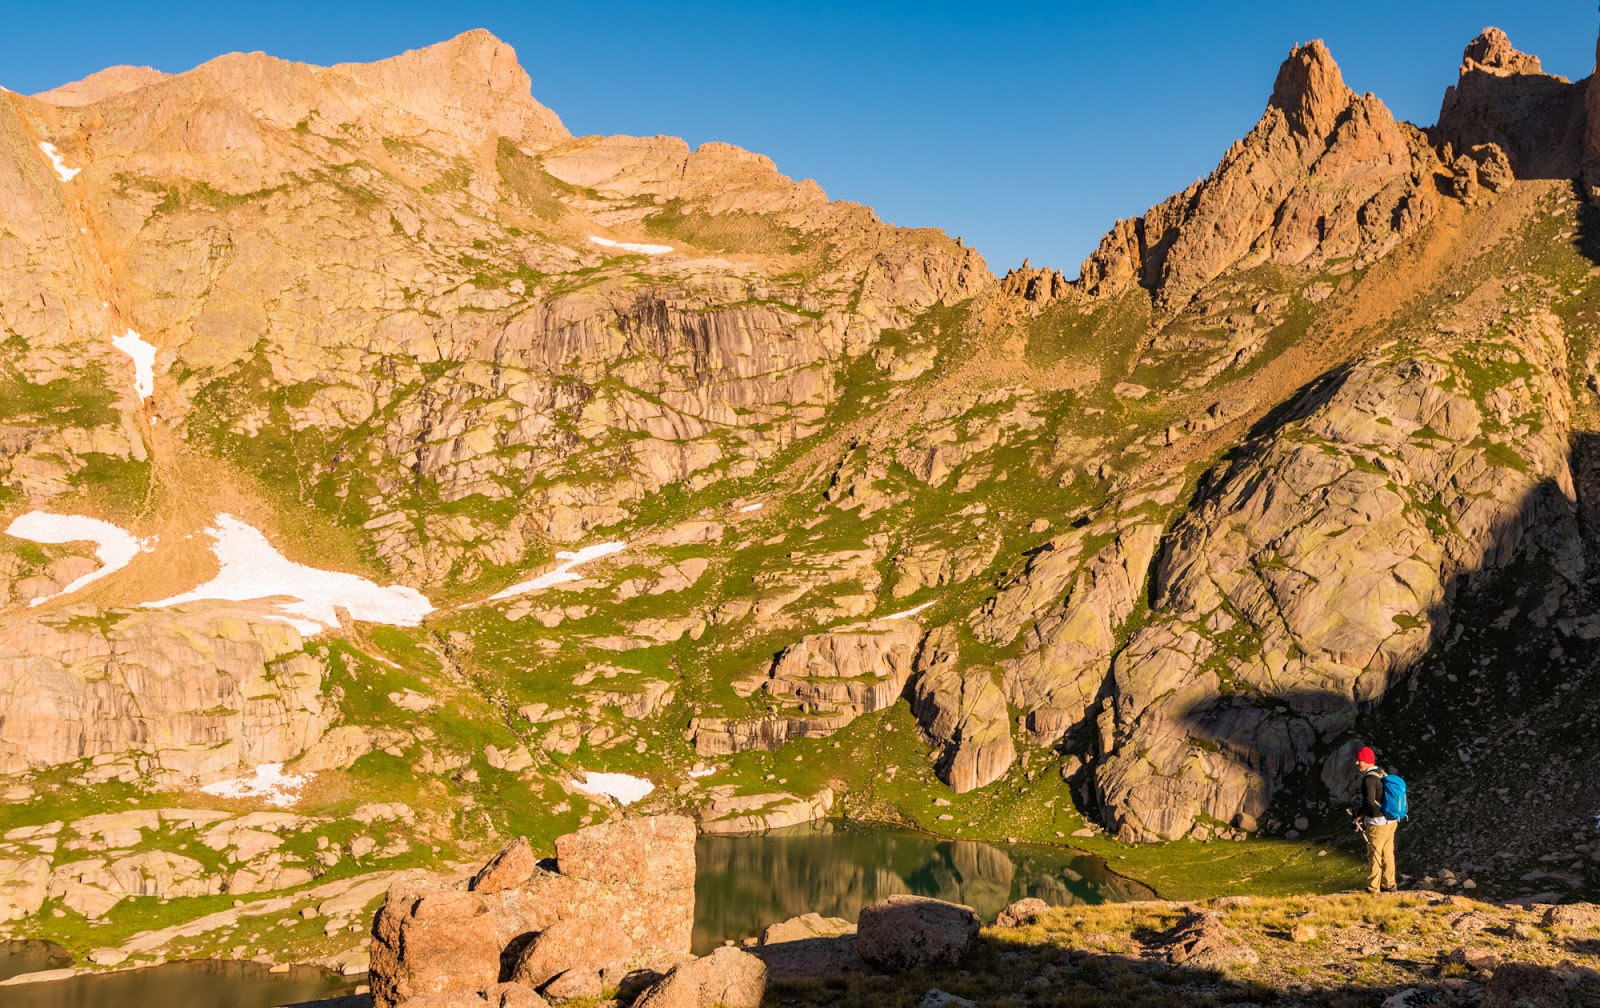
Arriving at Twin Lakes we once again beat the sun's cresting of the dramatic ridgeline, and were also welcomed by our mountain goat friends. I was able to get some lovely pictures of them as the light gradually came into the Twin Lakes area.
Arriving at Twin Lakes we once again beat the sun's cresting of the dramatic ridgeline, and were also welcomed by our mountain goat friends. I was able to get some lovely pictures of them as the light gradually came into the Twin Lakes area.

This goat was somewhere in the midst of the process of dropping its winter coat.
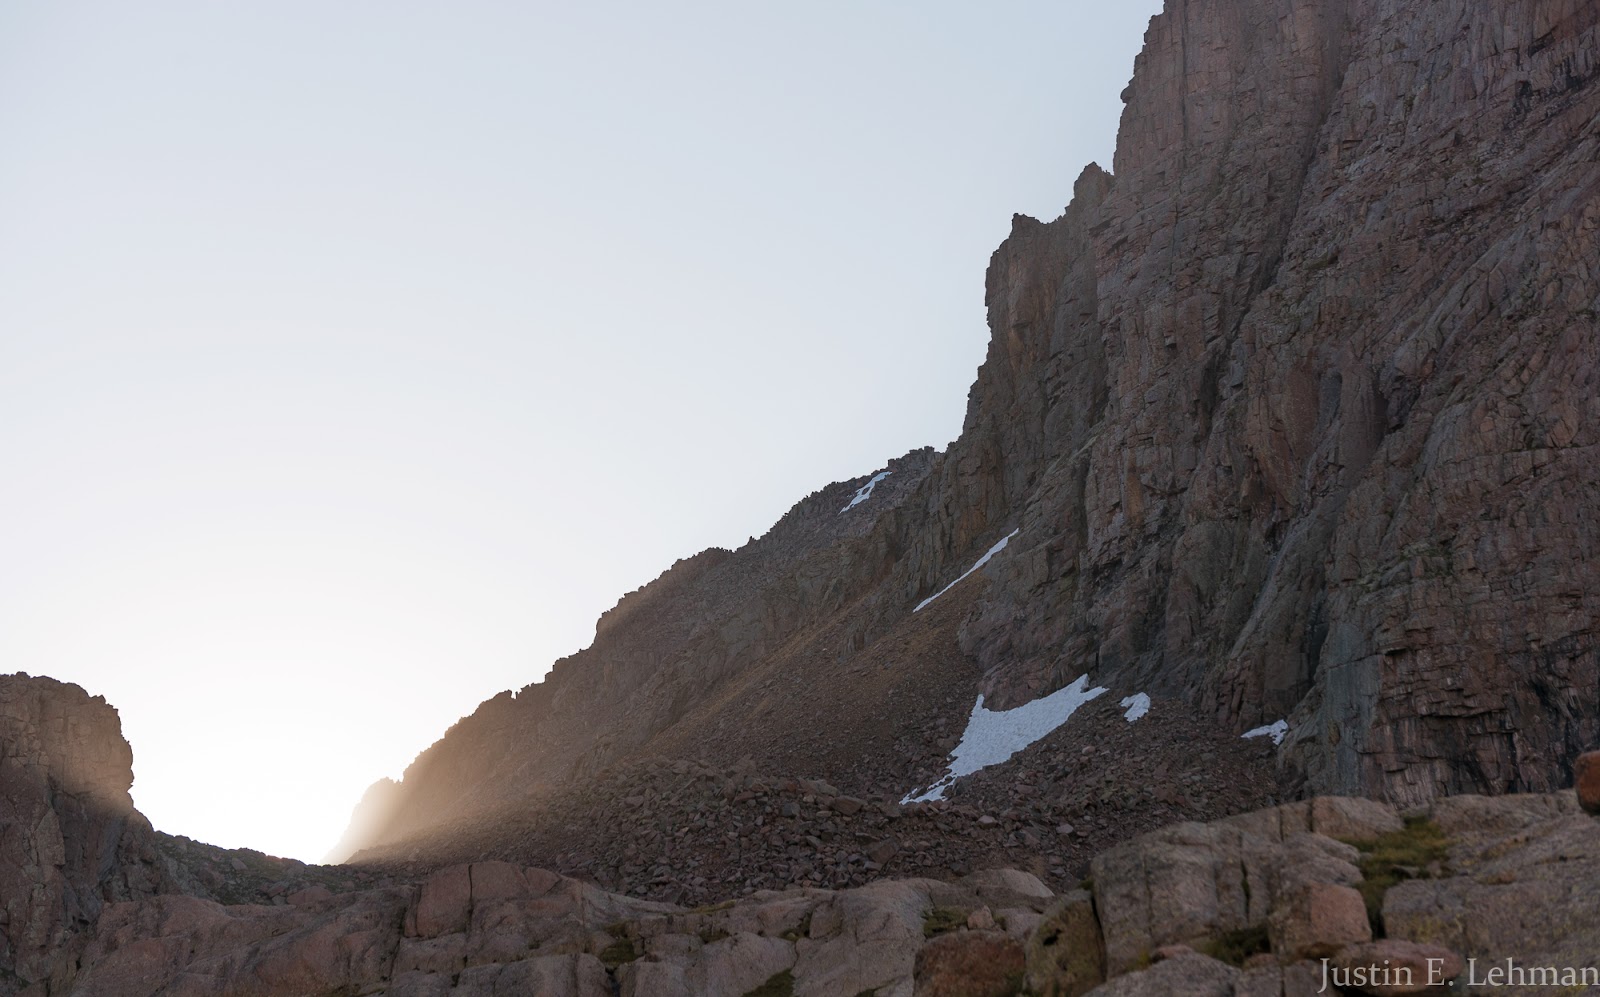
Just before the sun broke over the high ridge above Twin Lakes...
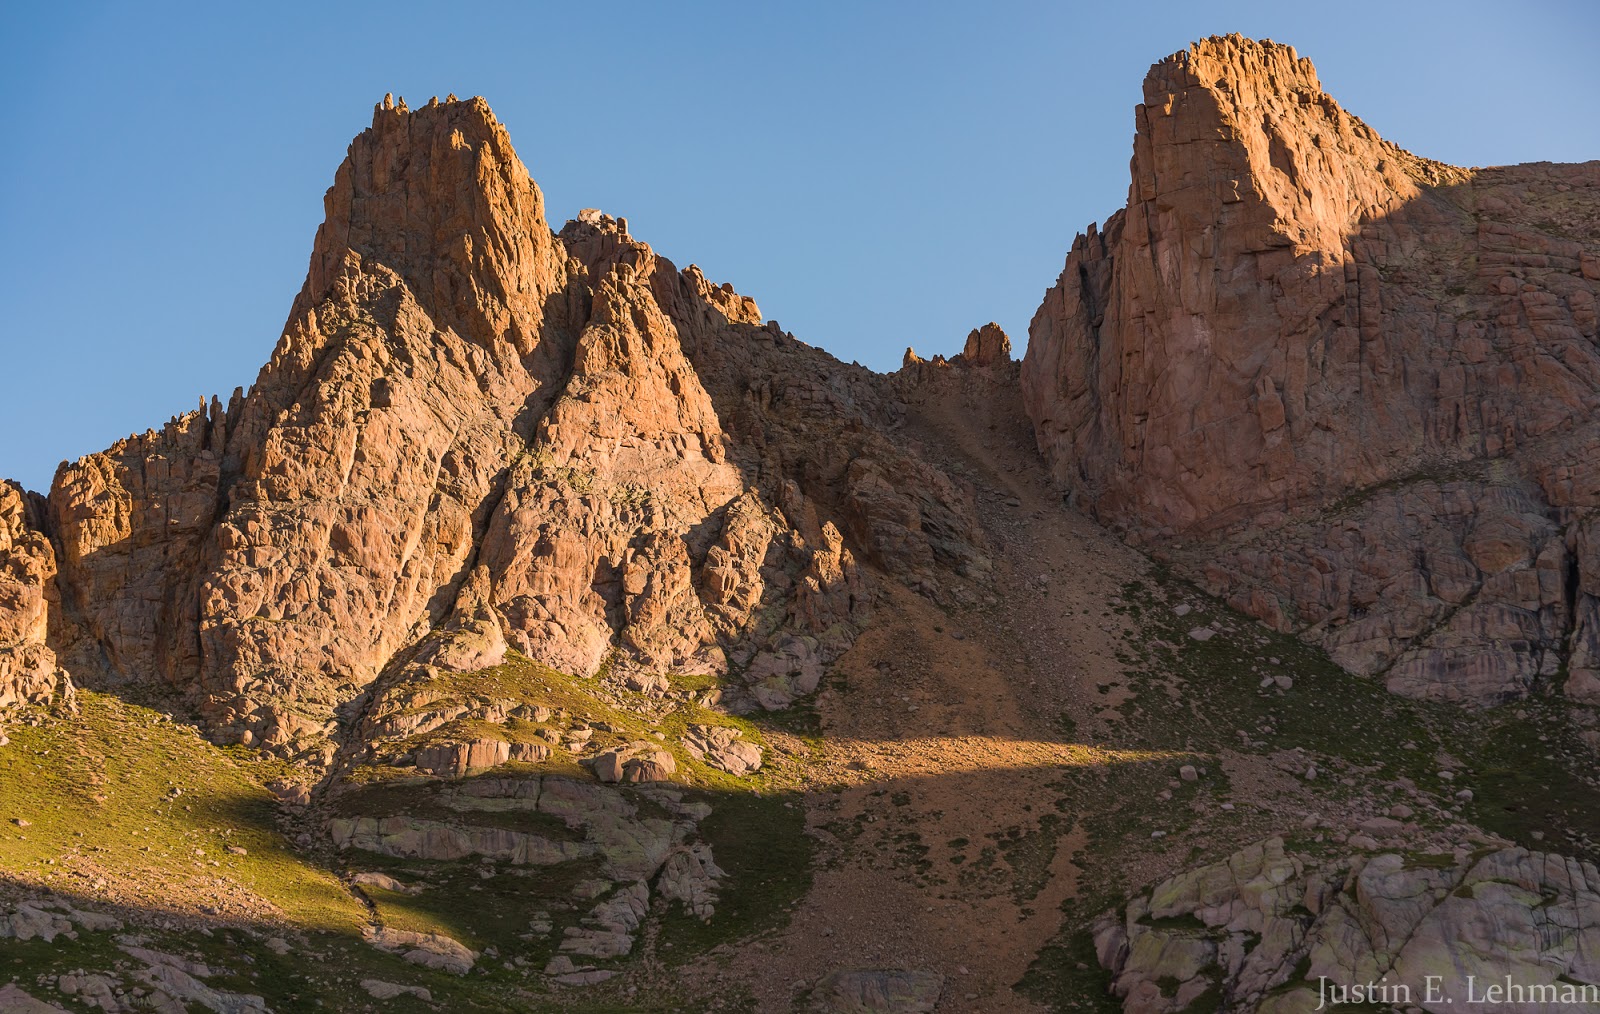
Amazing tower formations near Twin Lakes.

The moment when the sun just crests the high saddle across from Twin Lakes.
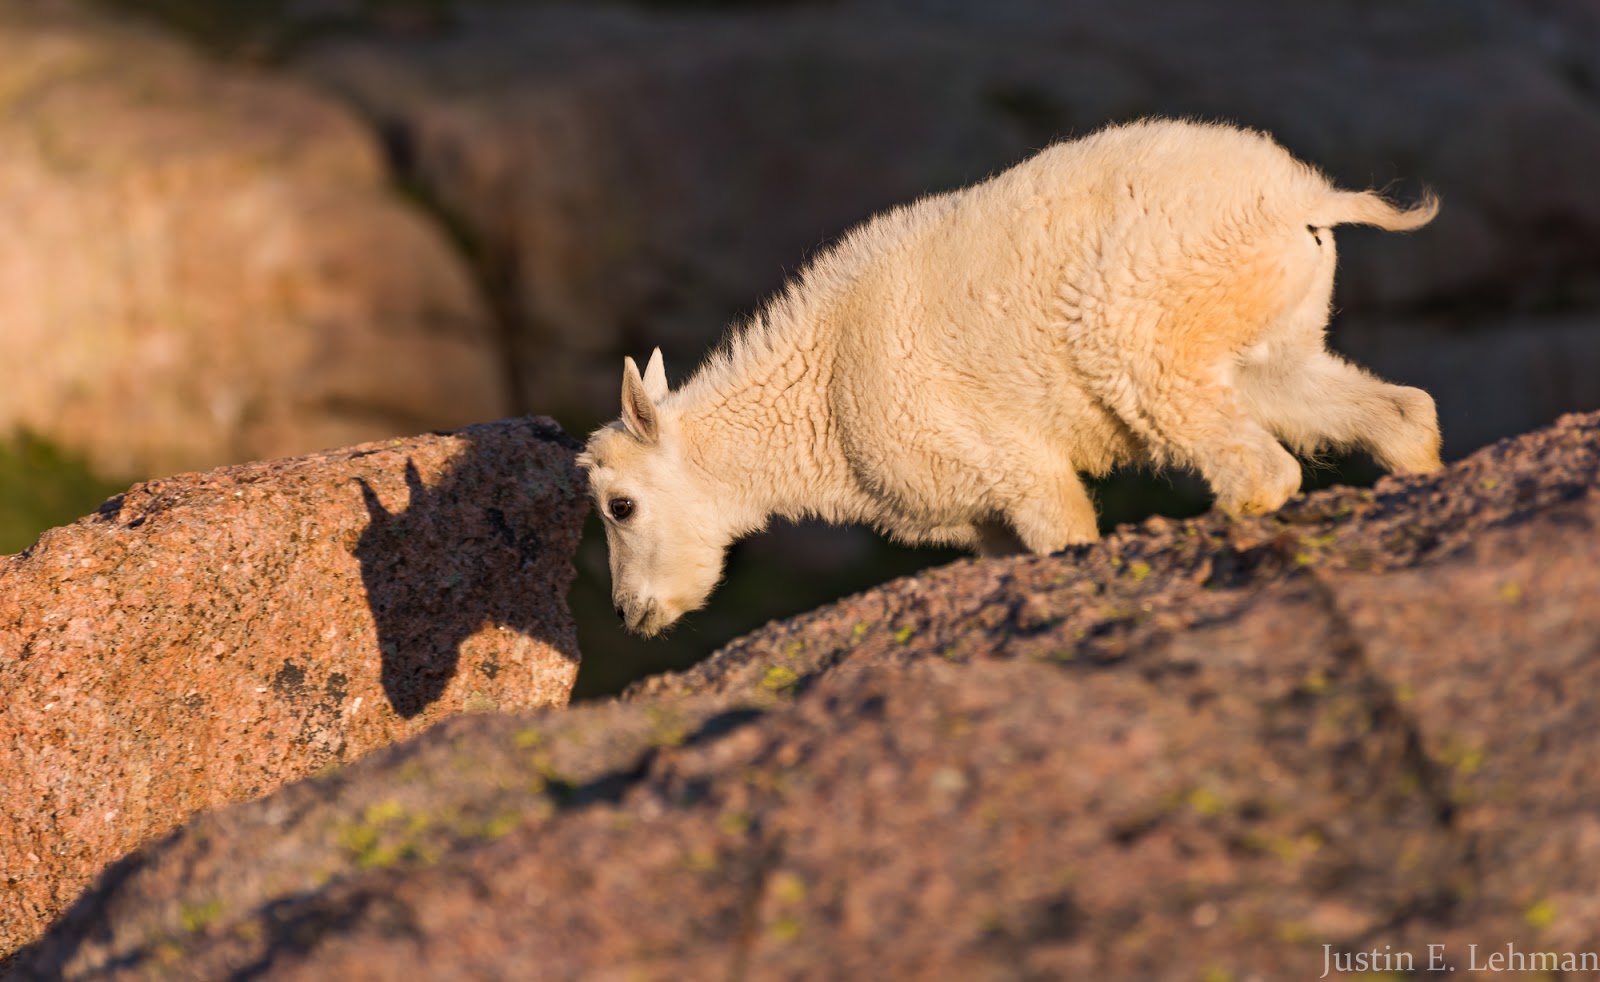
Baby mountain goat.
Baby mountain goat.
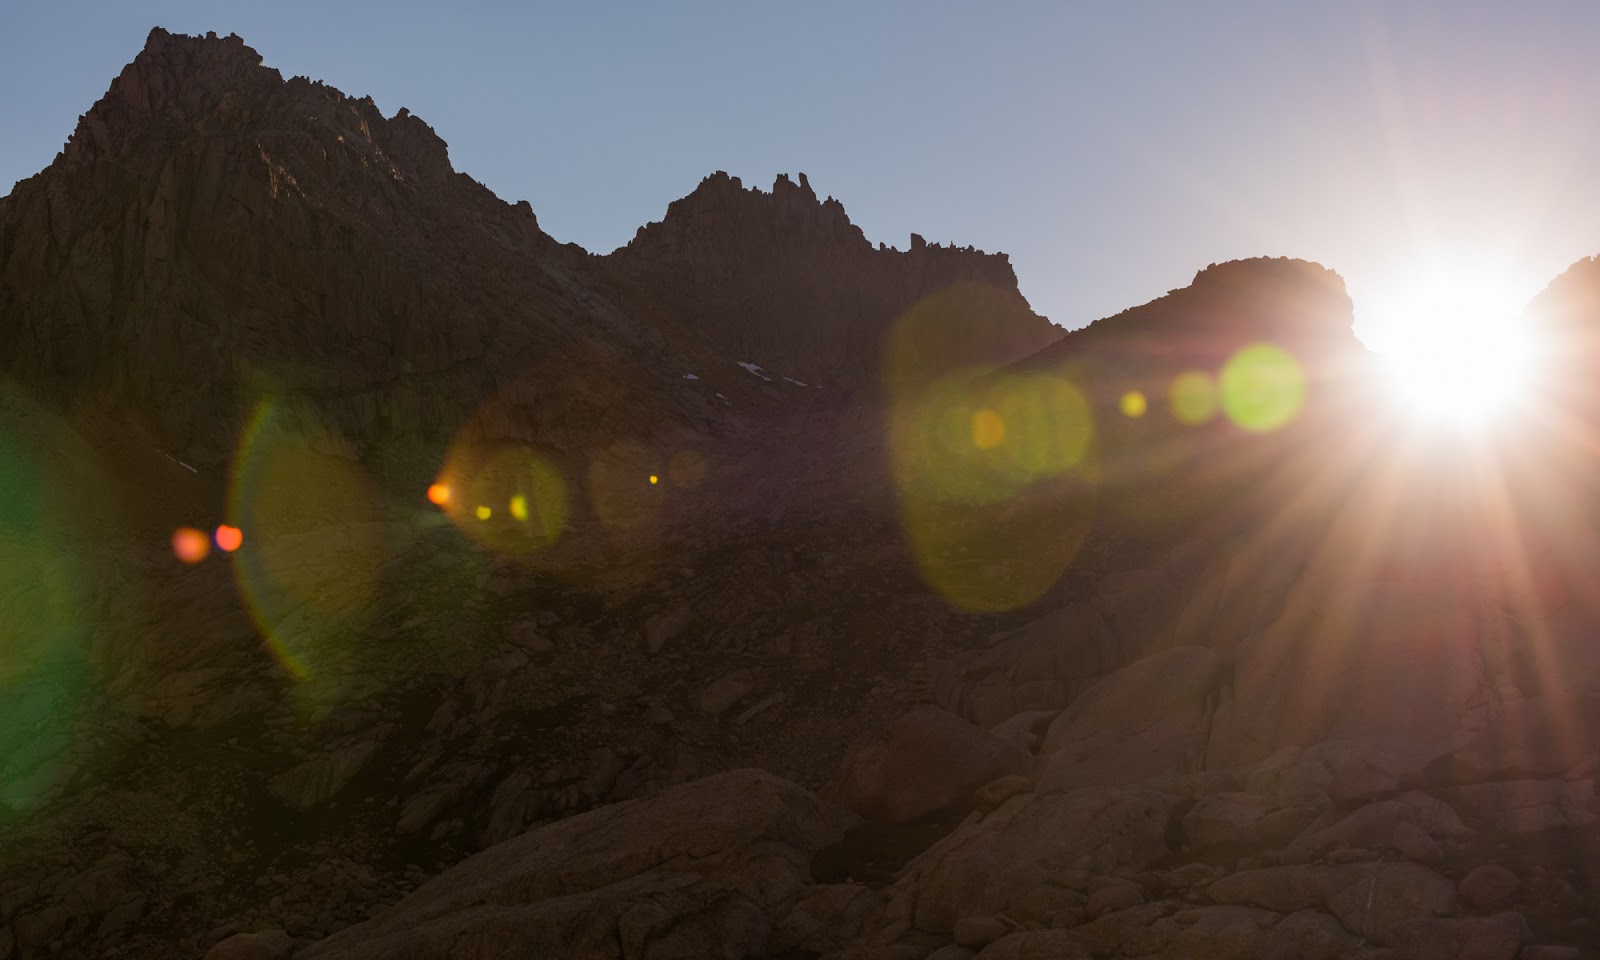
Sunlight Peak and Sunlight Spire and a very dramatic sun flare.
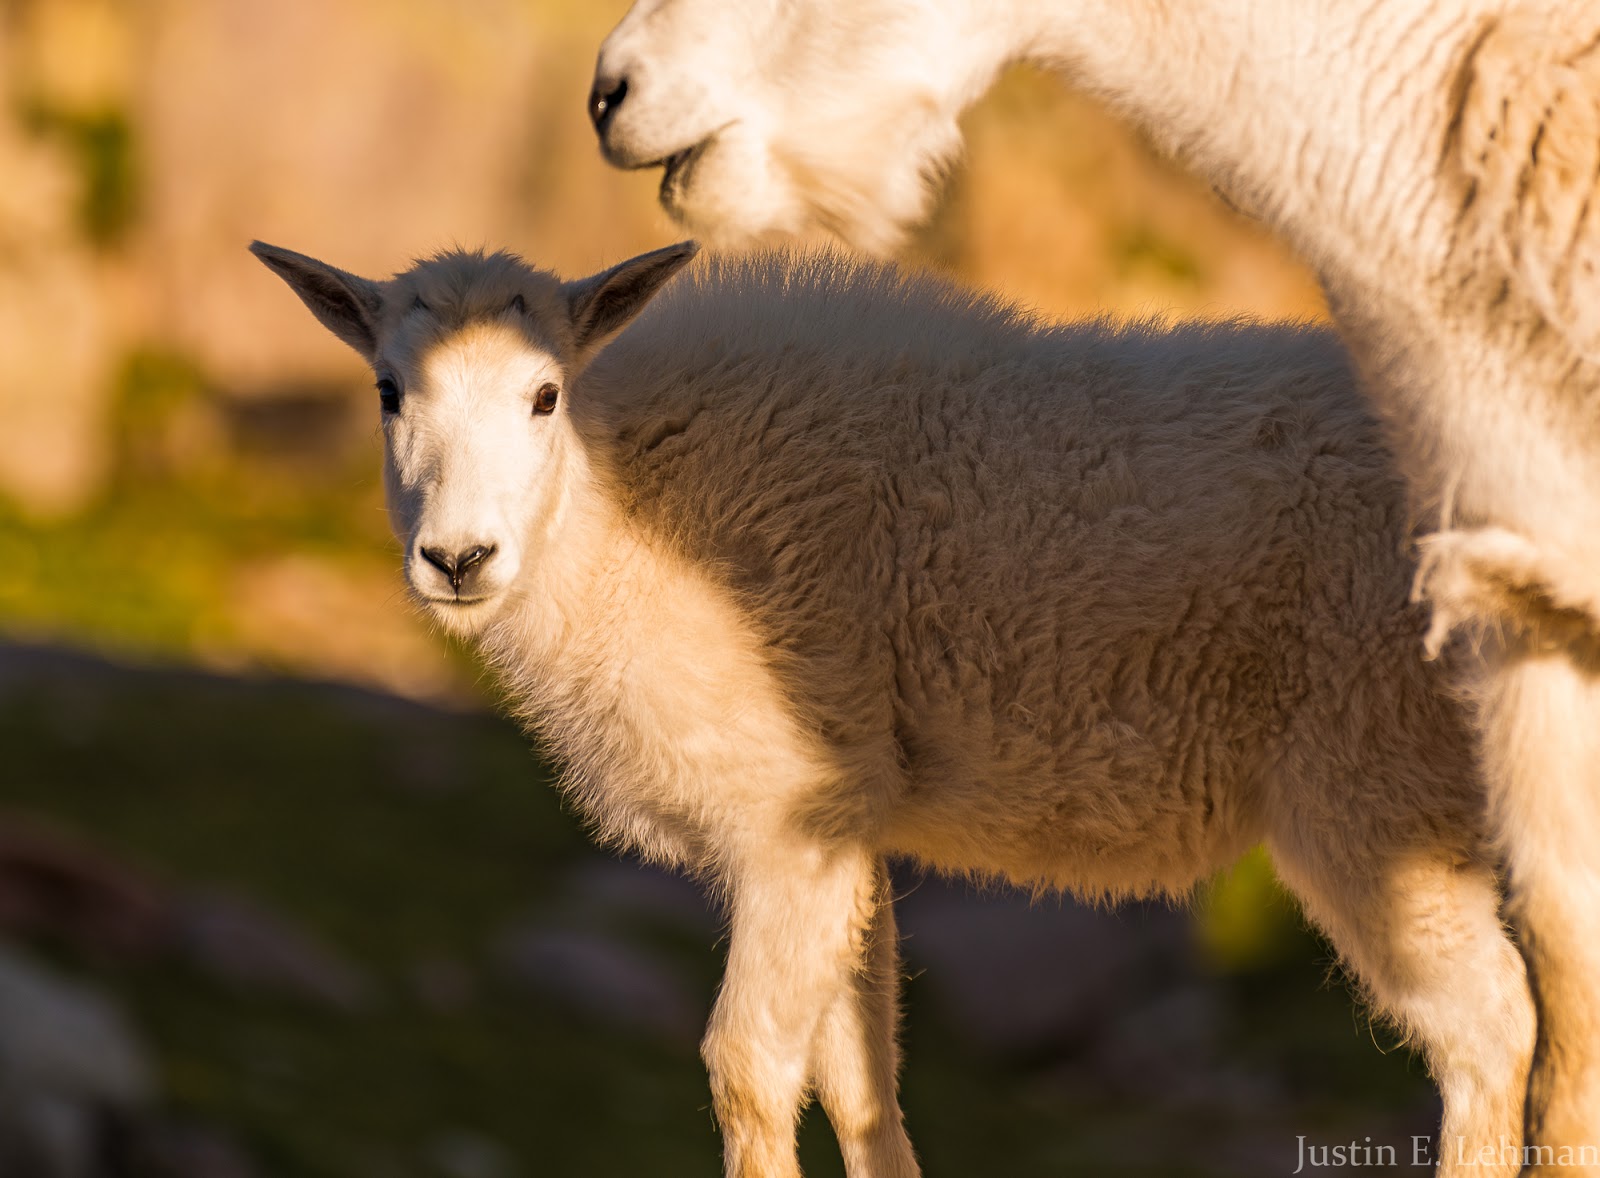
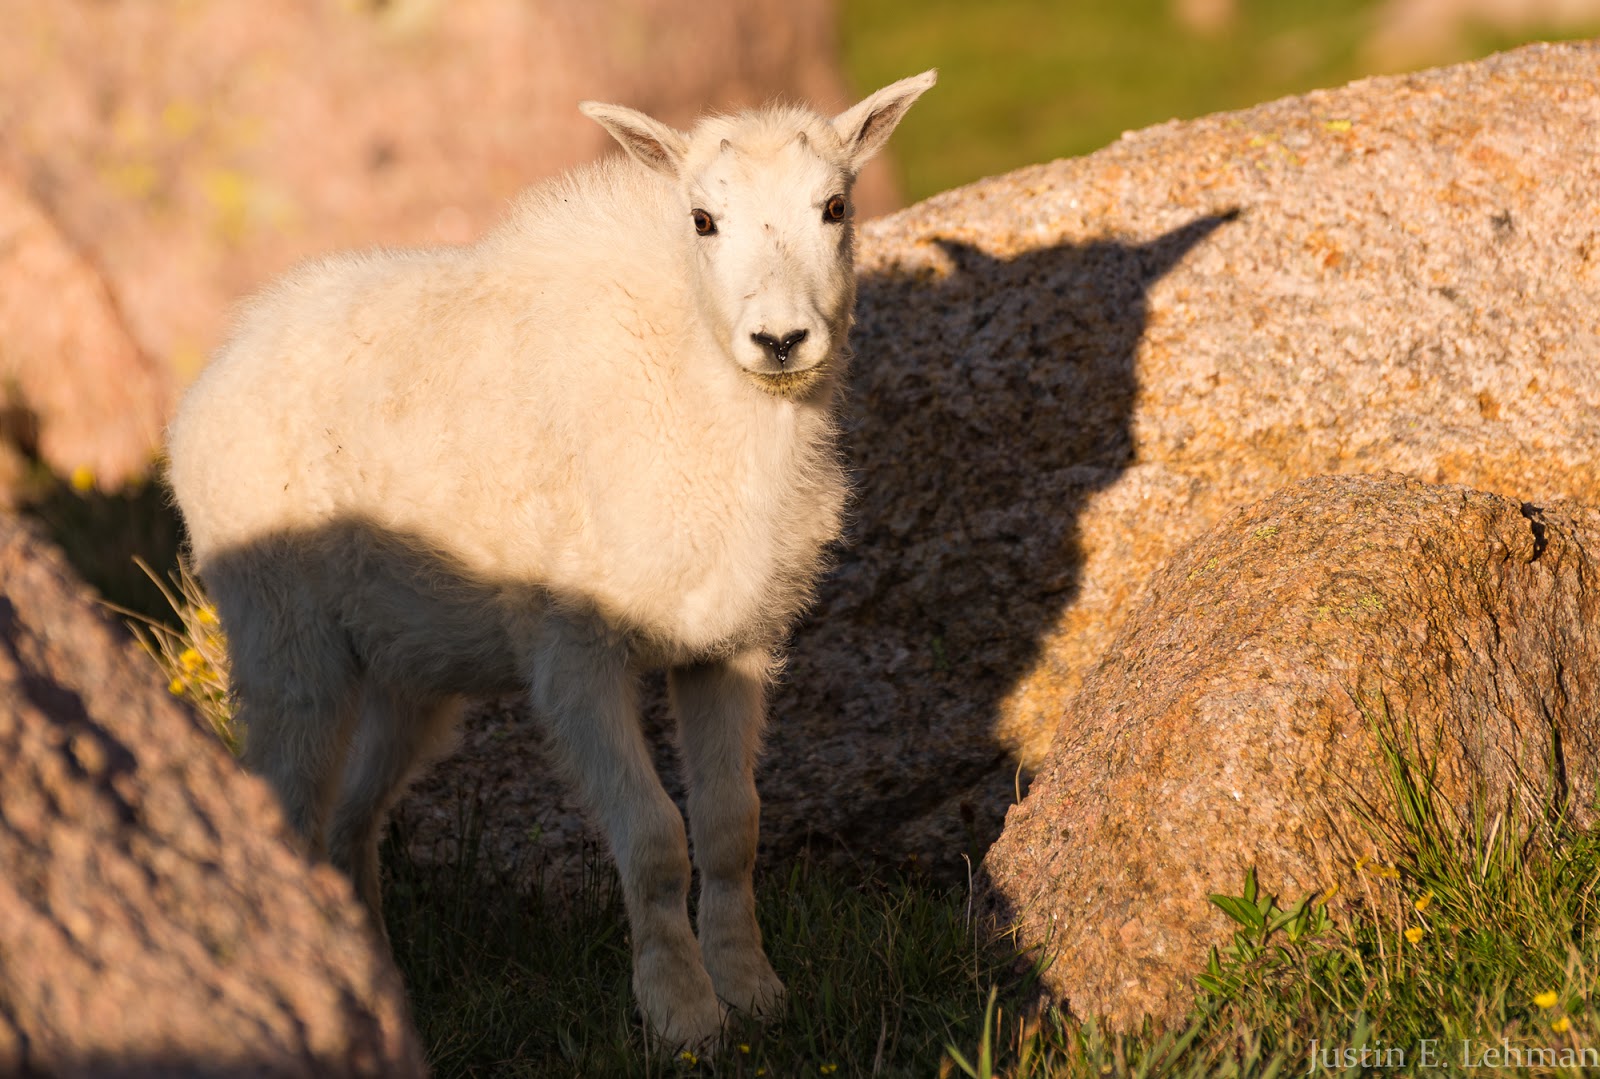
This was my favorite mountain goat shot of this trip, and, coincidentally, my favorite mountain goat shot I've ever taken to this point.
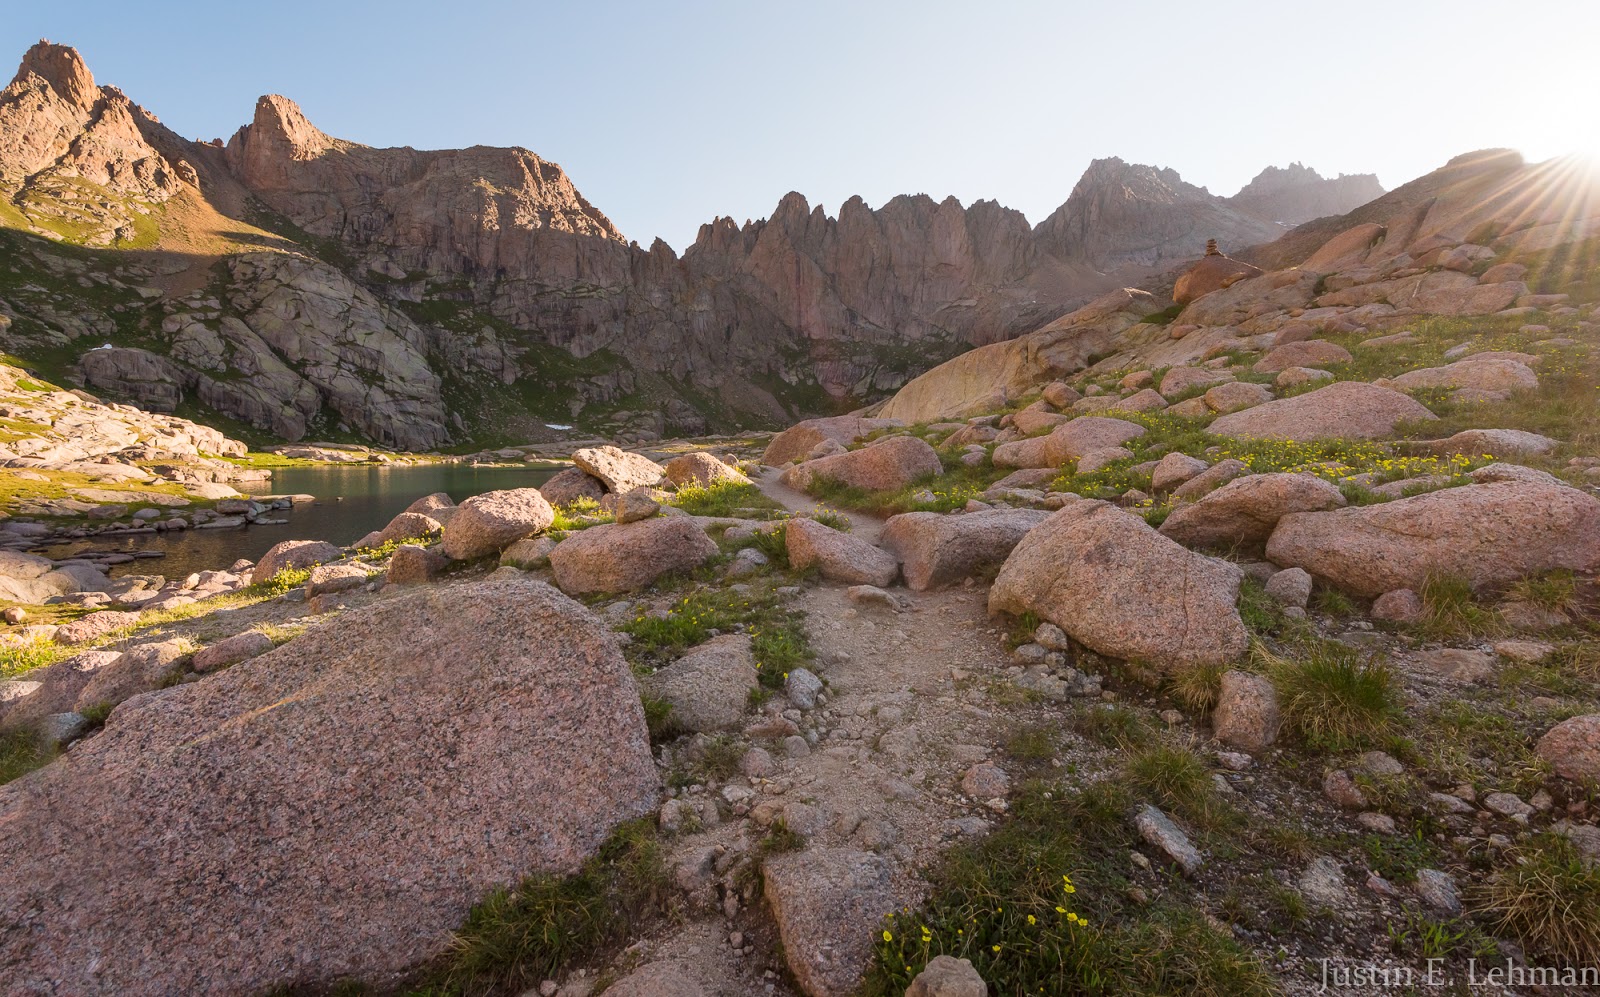
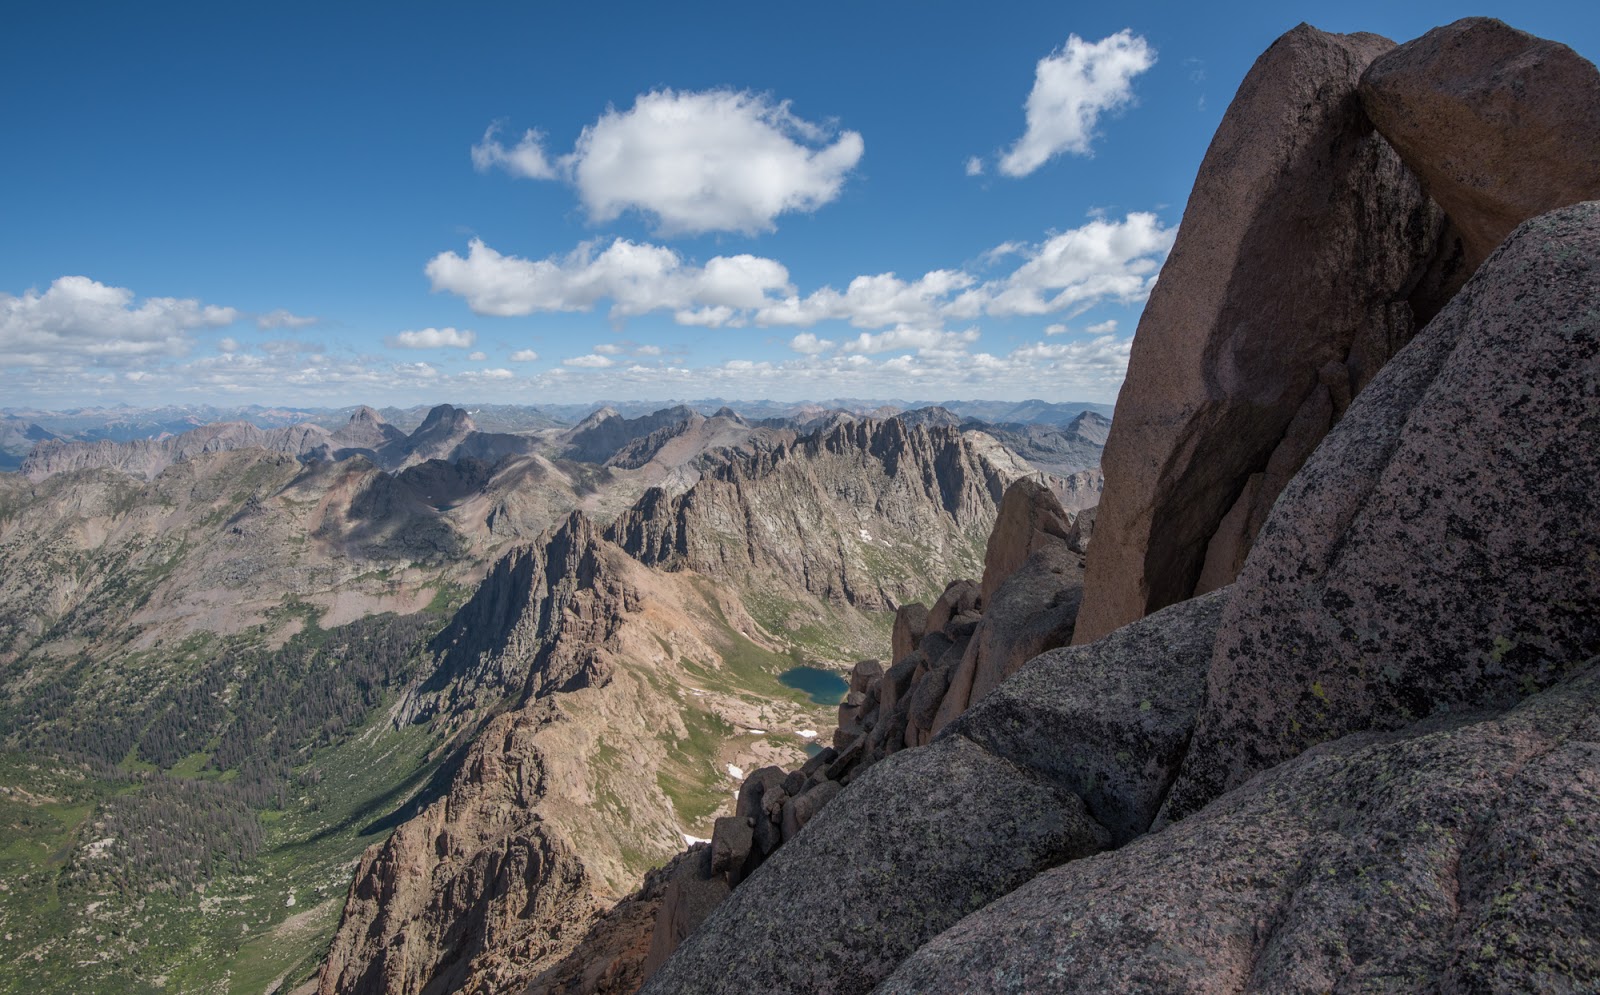
Twin Lakes area in the early morning light.
After a little time re-fueling and hydrating ourselves we continued our ascent out of the Twin Lakes area, this time in the opposite direction from the day before. We'd decided to hit Sunlight Peak first, since there terrain there was substantially more complicated and we figured we could make a quicker ascent and descent of Windom Peak if necessary thereafter in case the weather started looking chancy...

Caught this little stoat running around; he was actually pretty hard to capture at all - very erratic running pattern and quite fast...maybe ten inches long or so.
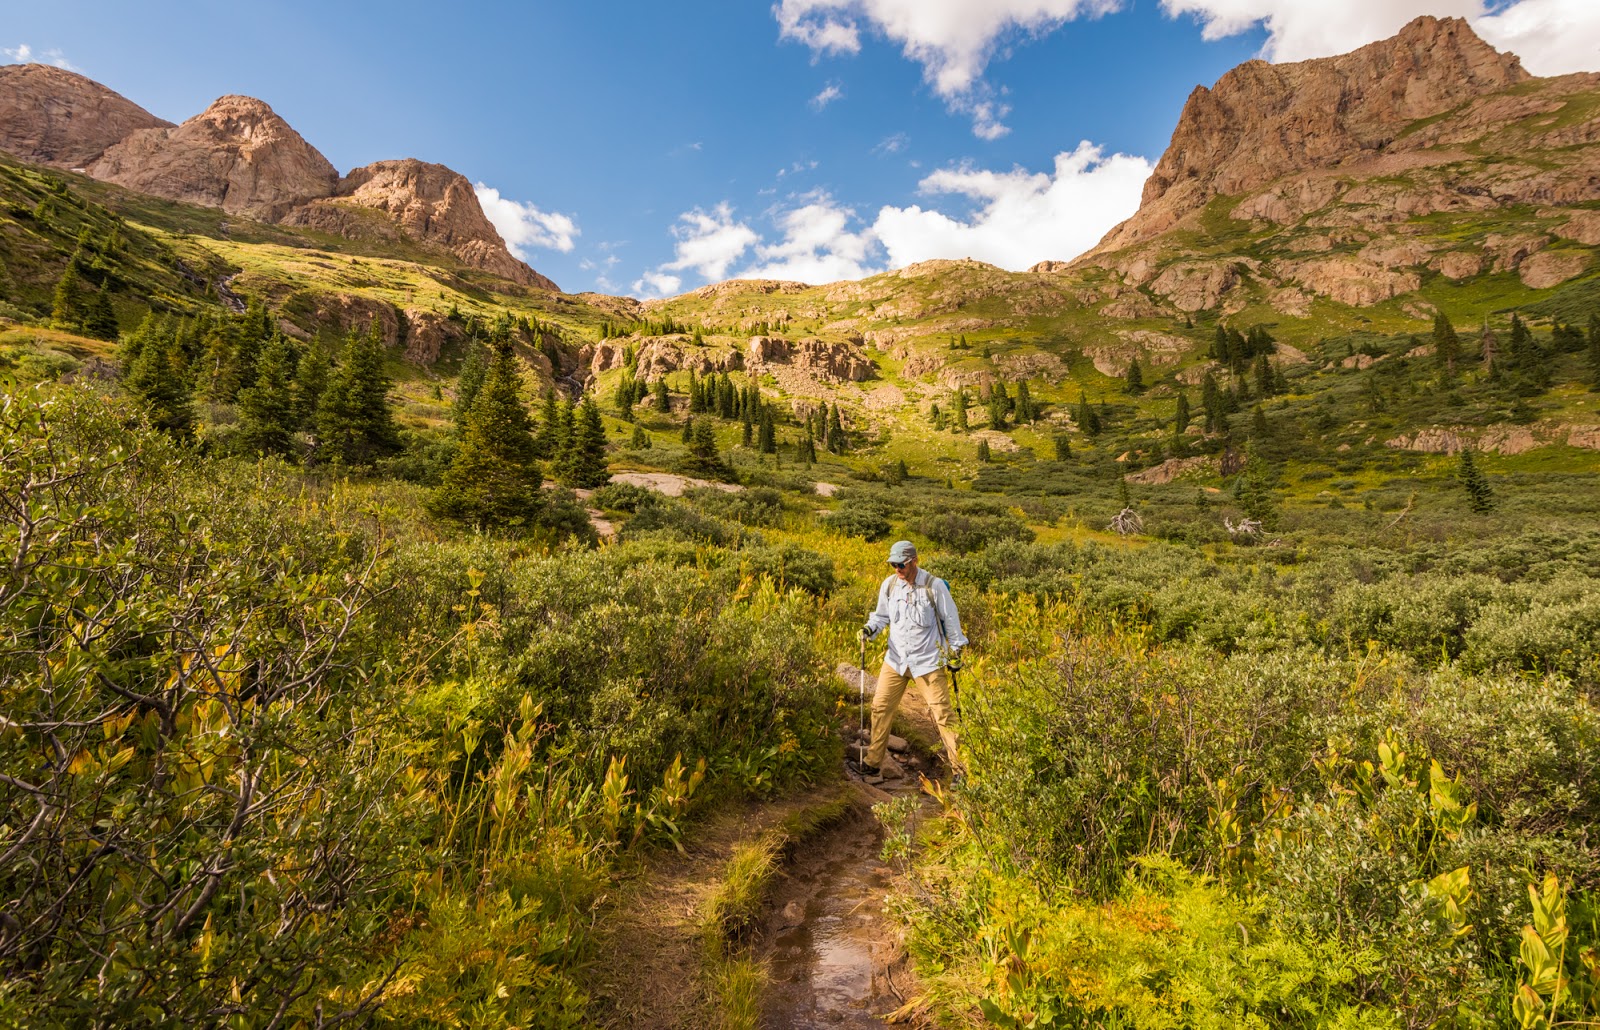
Enjoying the views from the Twin Lakes area.
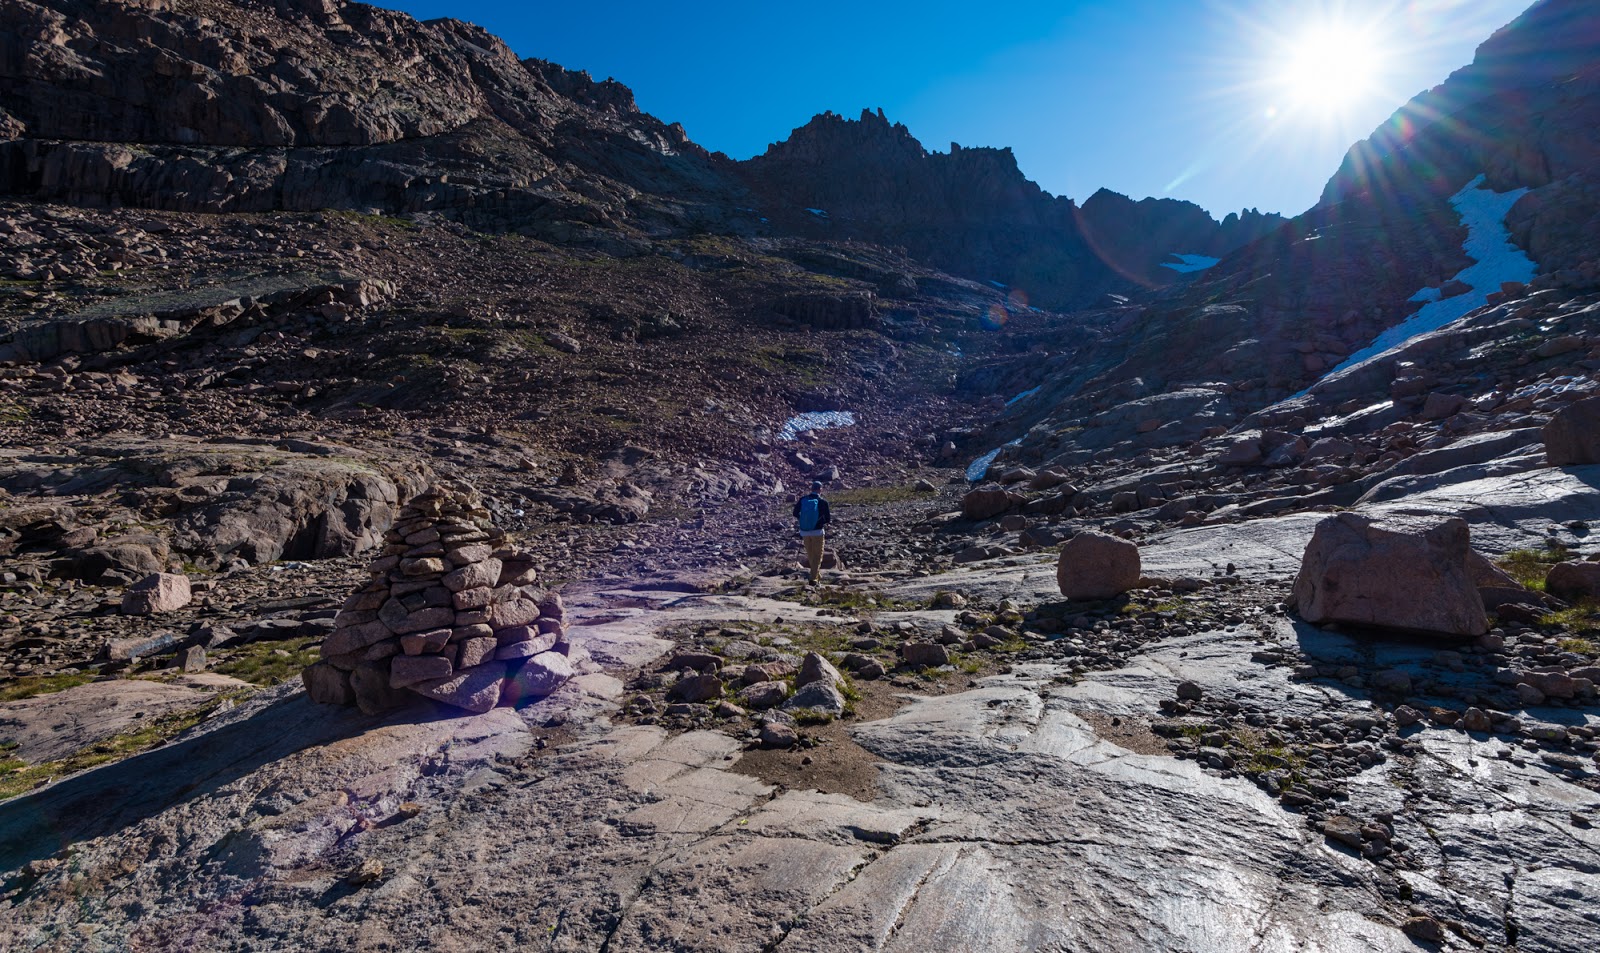
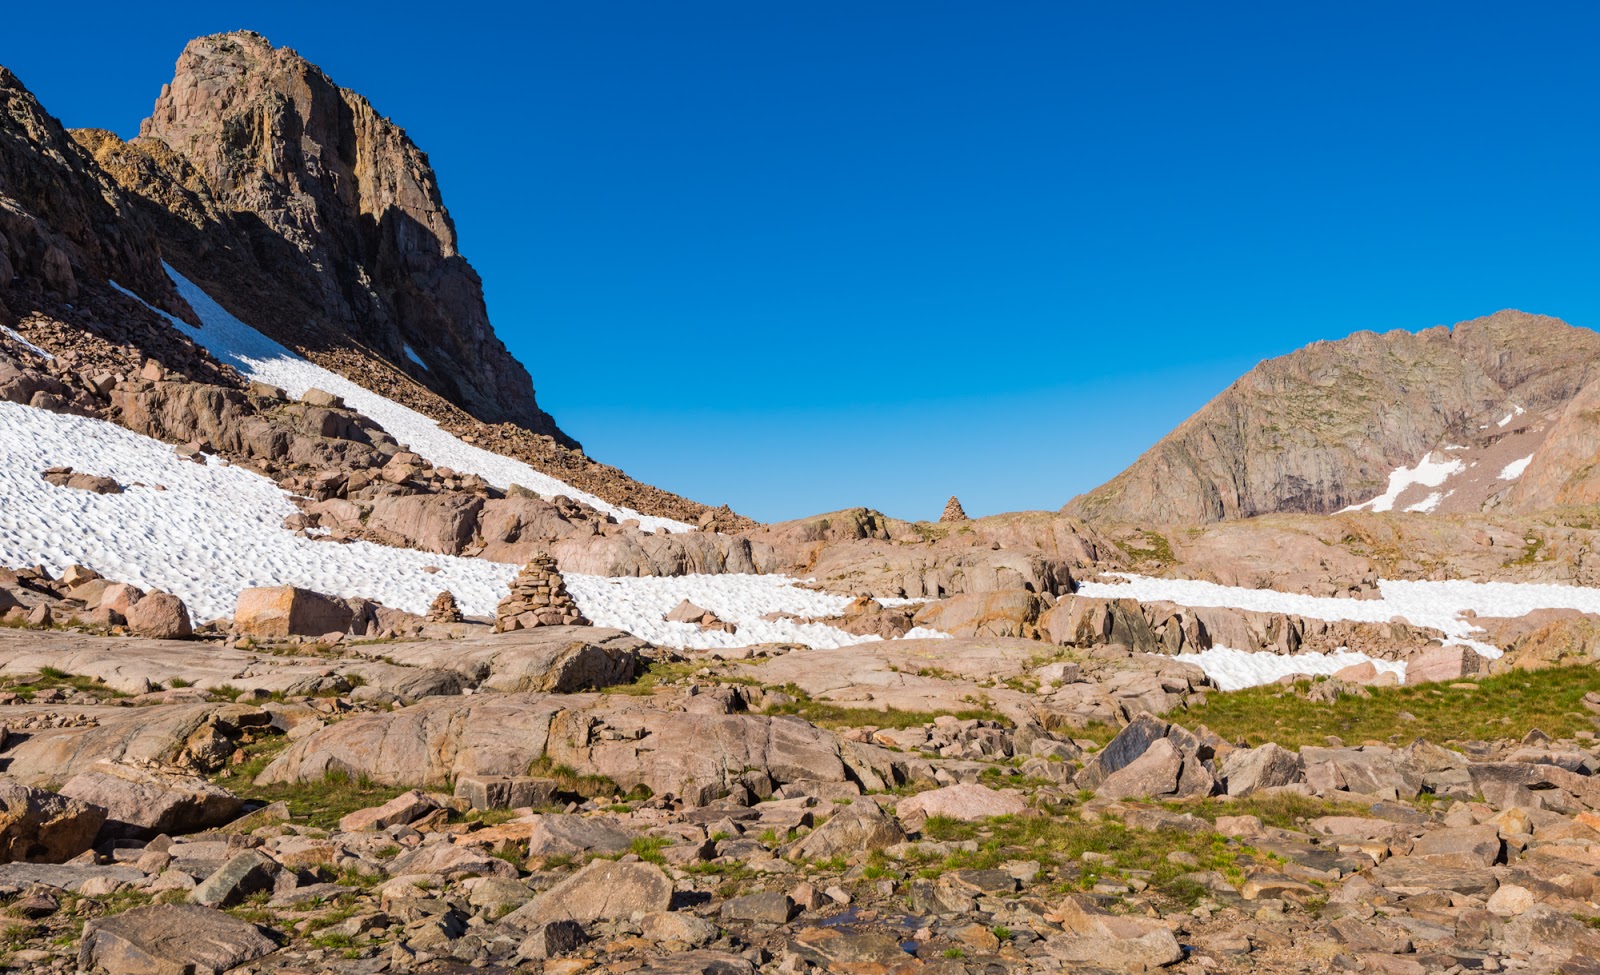
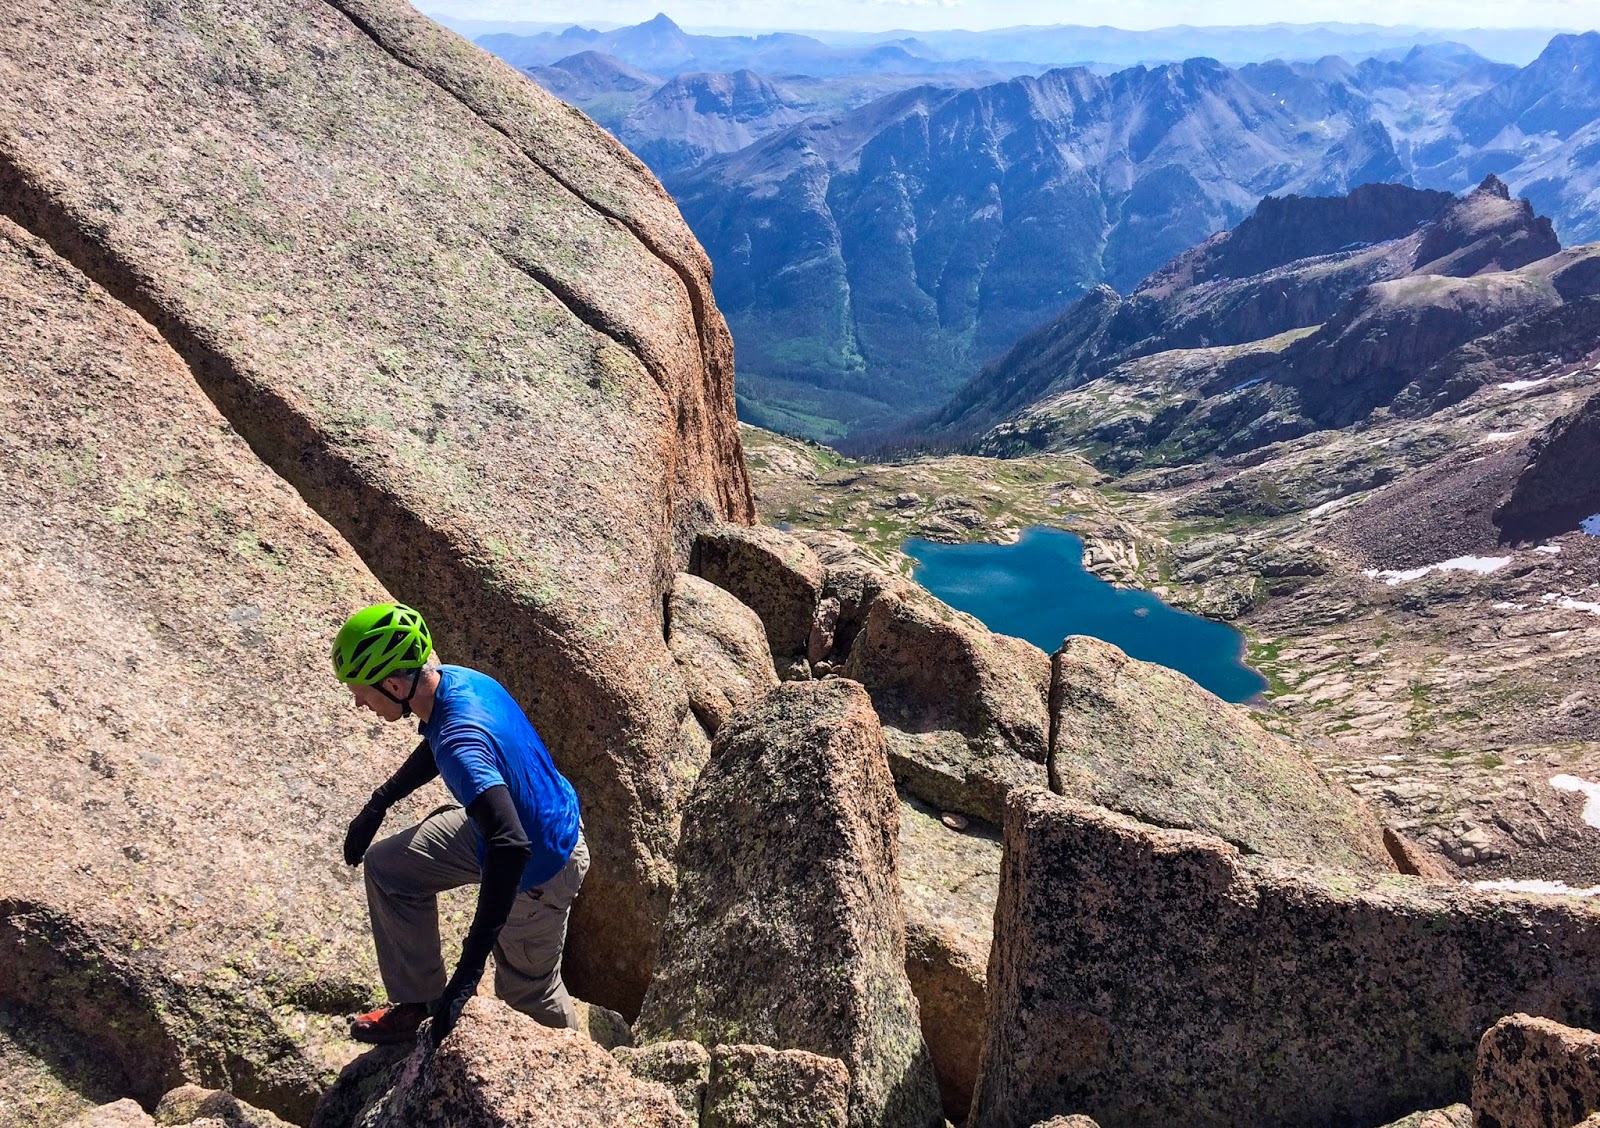
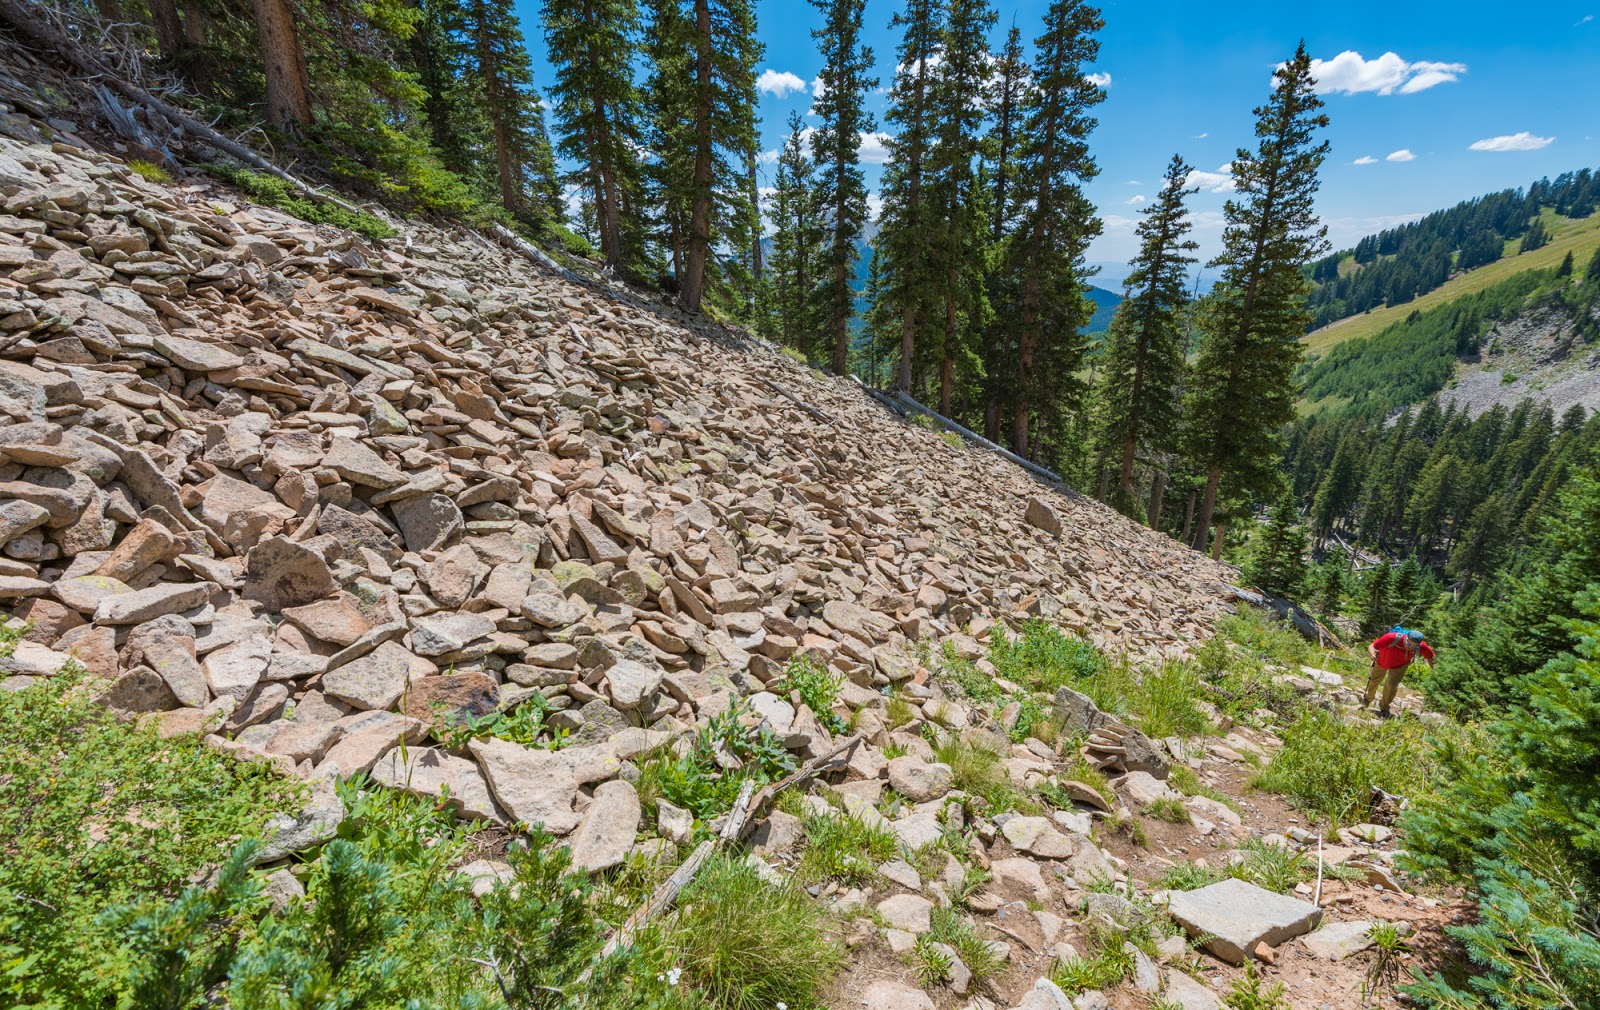
Climbing above the Twin Lakes as we begin our direct approach to Sunlight Peak, our first major objective for the day, and what would prove to be our most significant scrambling challenge of the trip...
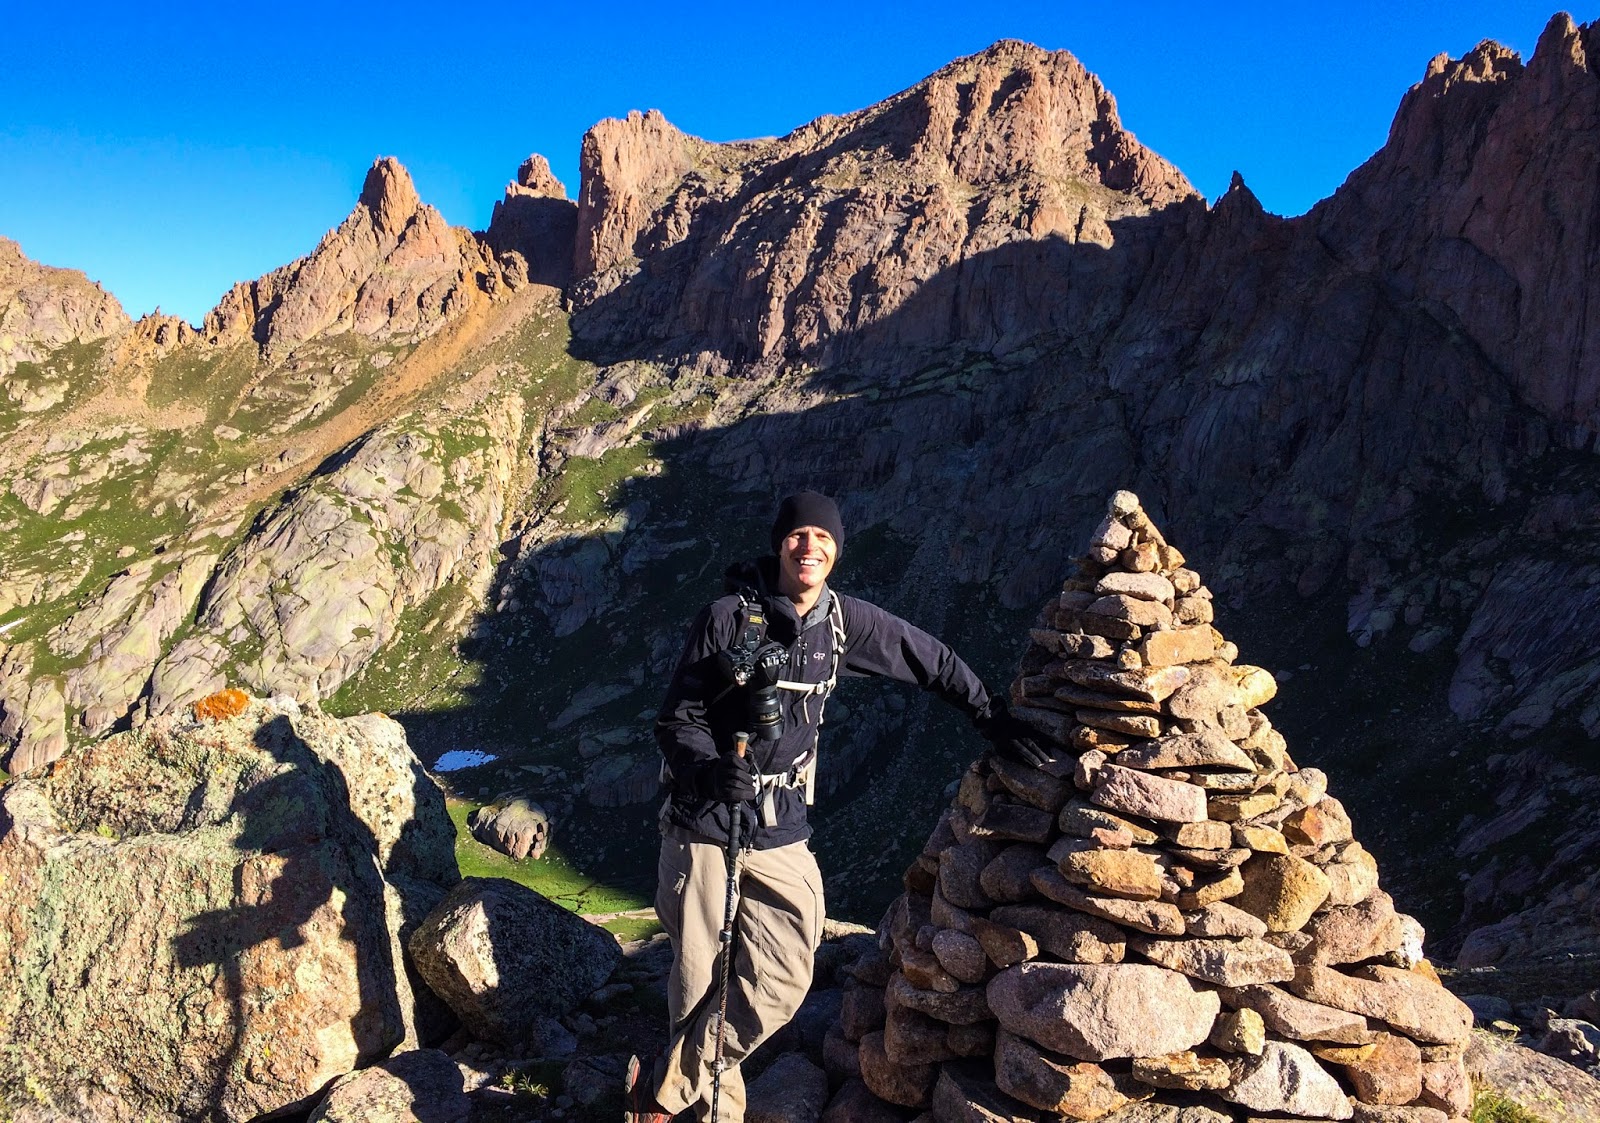
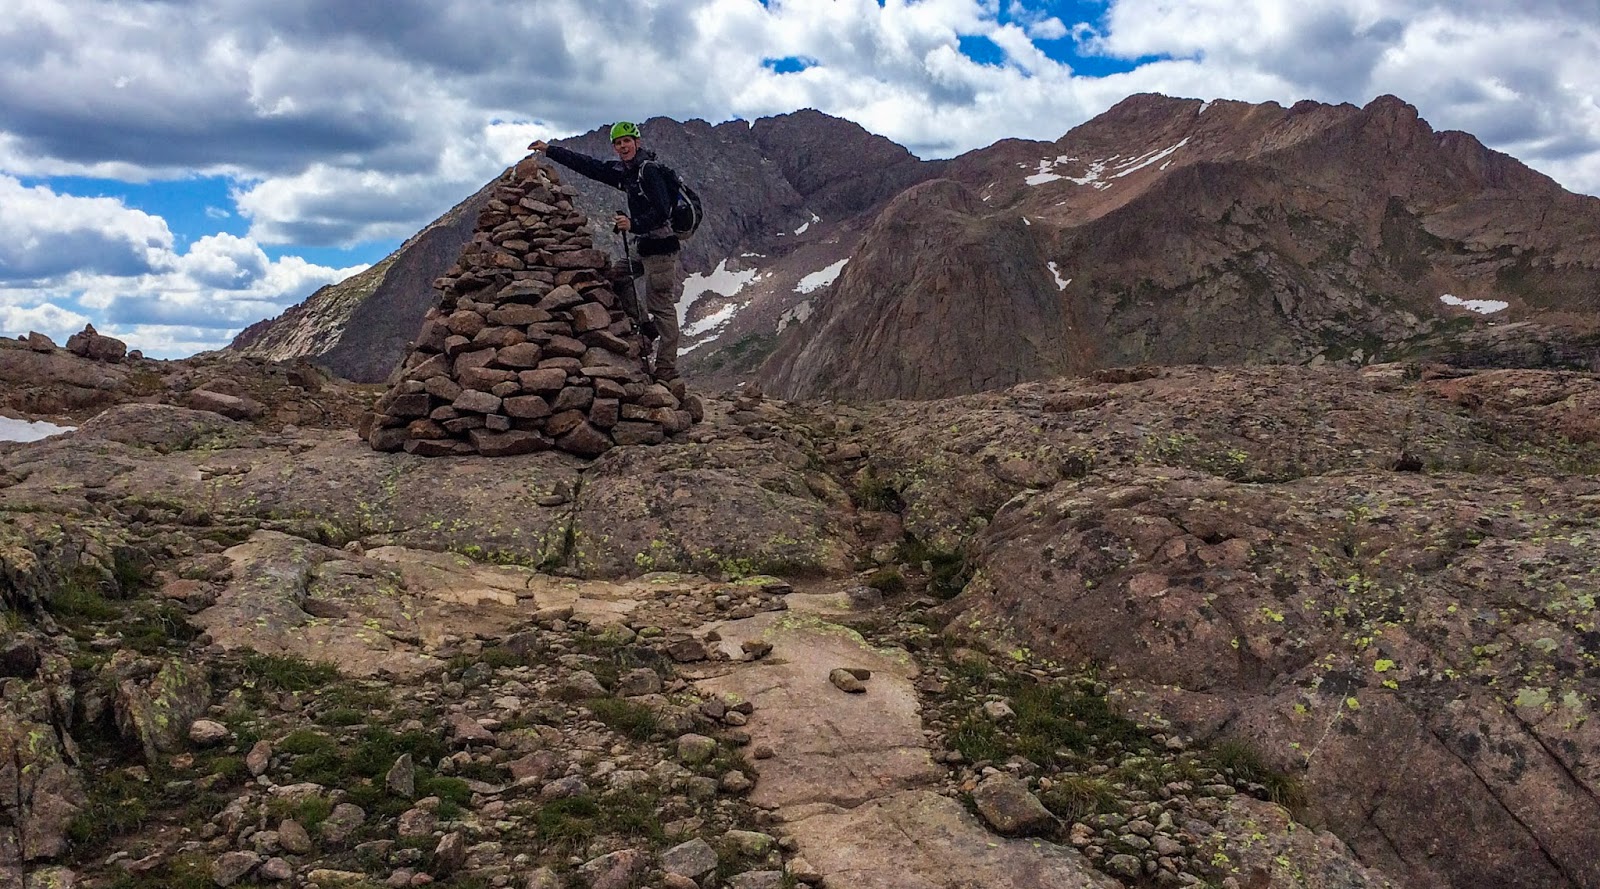
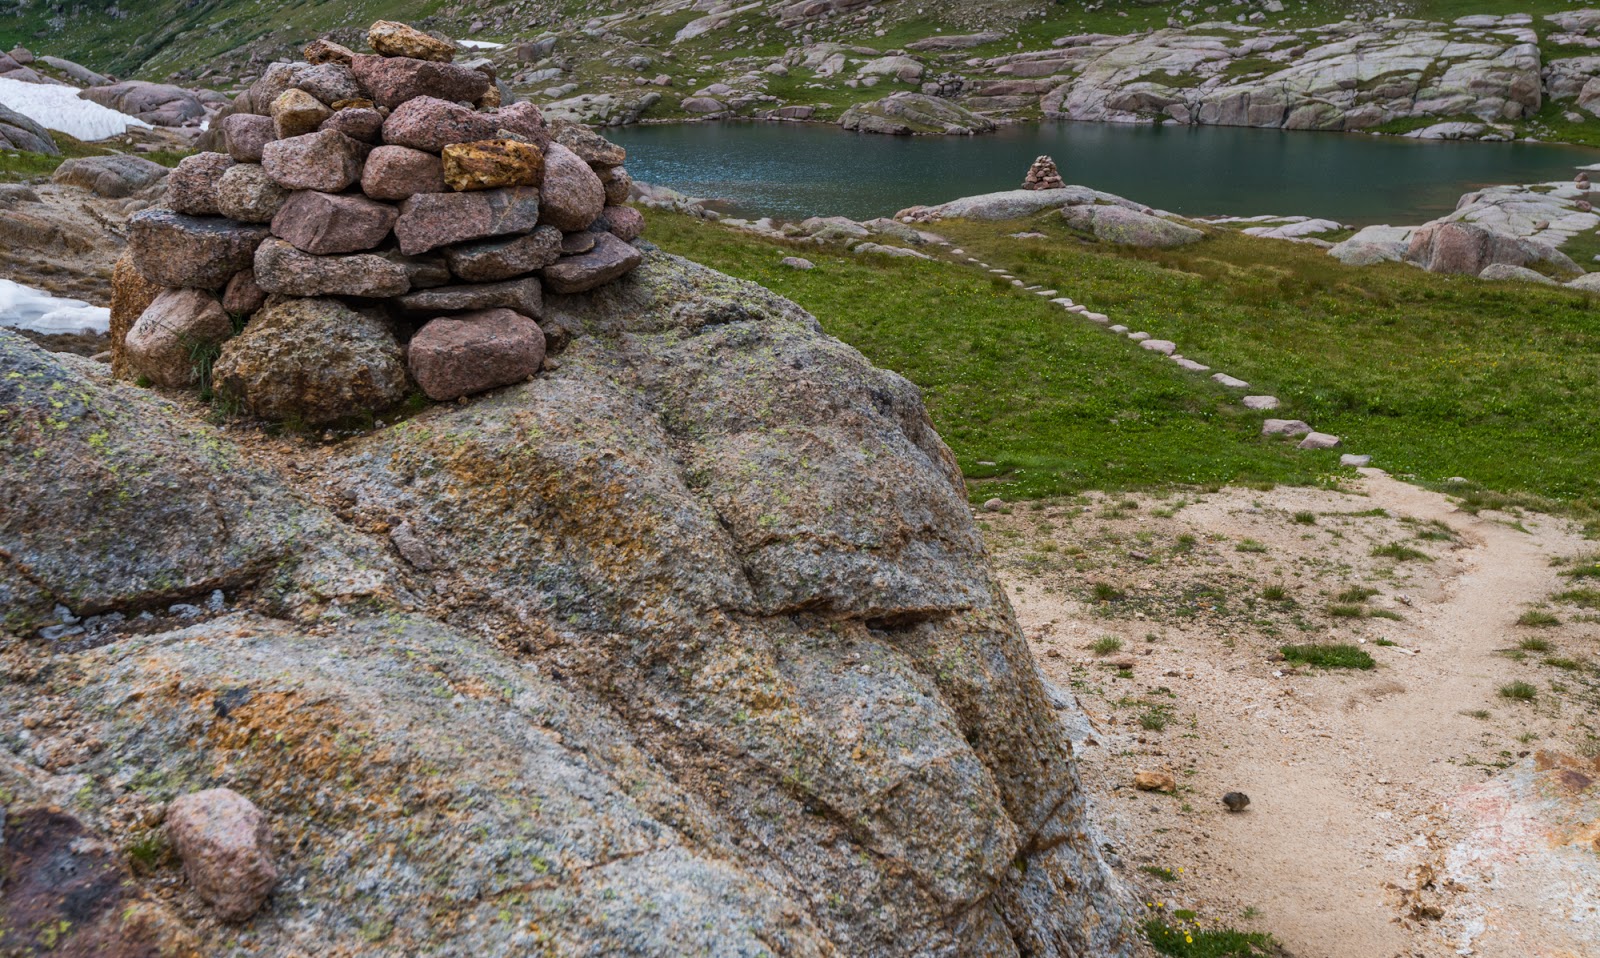
Me, standing by one of the massive cairns in the high basin above Twin Lakes. (Photo by Dave)
Dave takes a photo near one of the massive cairns, of which there area several. We thought these cairns were masterfully constructed...The one in this image is a bit over six feet tall and solid all the way through as near as we could tell.

Snowfield we traversed on the way to some "boiler plate" rock slabs on the way to Sunlight Peak. Windom Peak is visible to the upper right here and Sunlight Spire to the upper left; the lower reaches of Sunlight Peak are visible in the uppermost left.
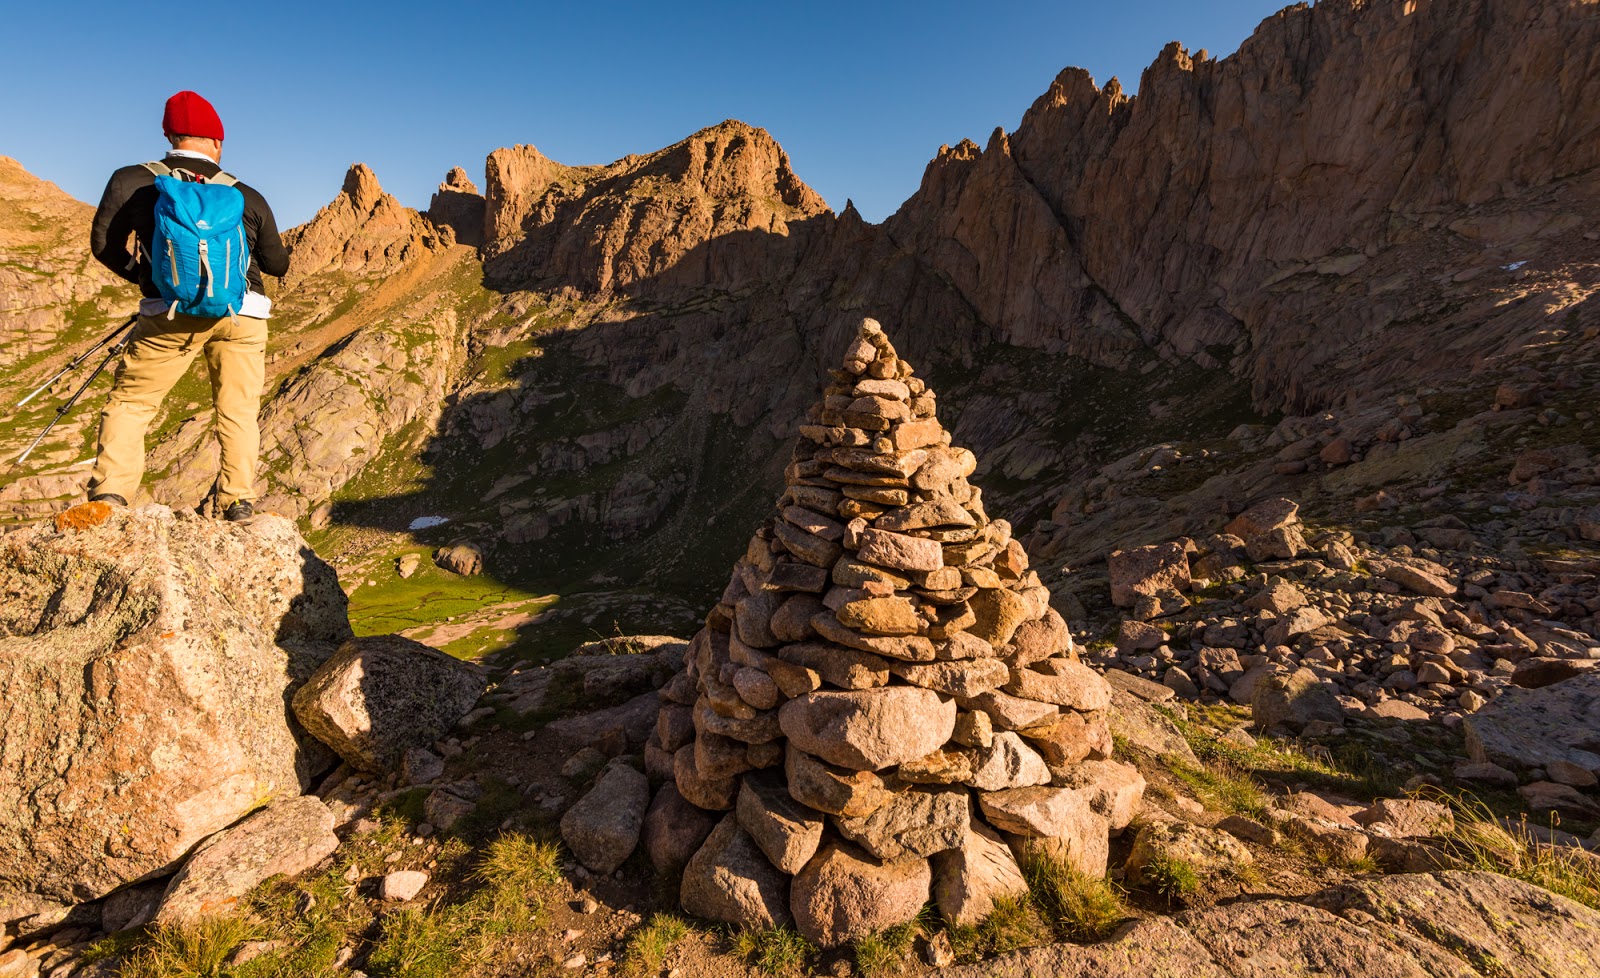
Another massive cairn as we traverse across the section of "boiler plate" rock. We're aiming for that saddle ahead...and it's a lot steeper than it looks there...

Sometimes Dave takes a picture of me taking a picture...so, here's Dave's perspective...
...and here's my perspective...Sometimes I wasn't entirely convinced we were hiking in mid-August...
Looking back in the direction we'd come; you can see some of those huge cairns popping up occasionally. The Twin Lakes would be visible well below the edge of that saddle area in the middle of this shot.

Neat terrain near Sunlight Peak/above Twin Lakes.

Me, taking a snack /rest break as we work up toward the steeper slopes of Sunlight Peak. (Photo by Dave)
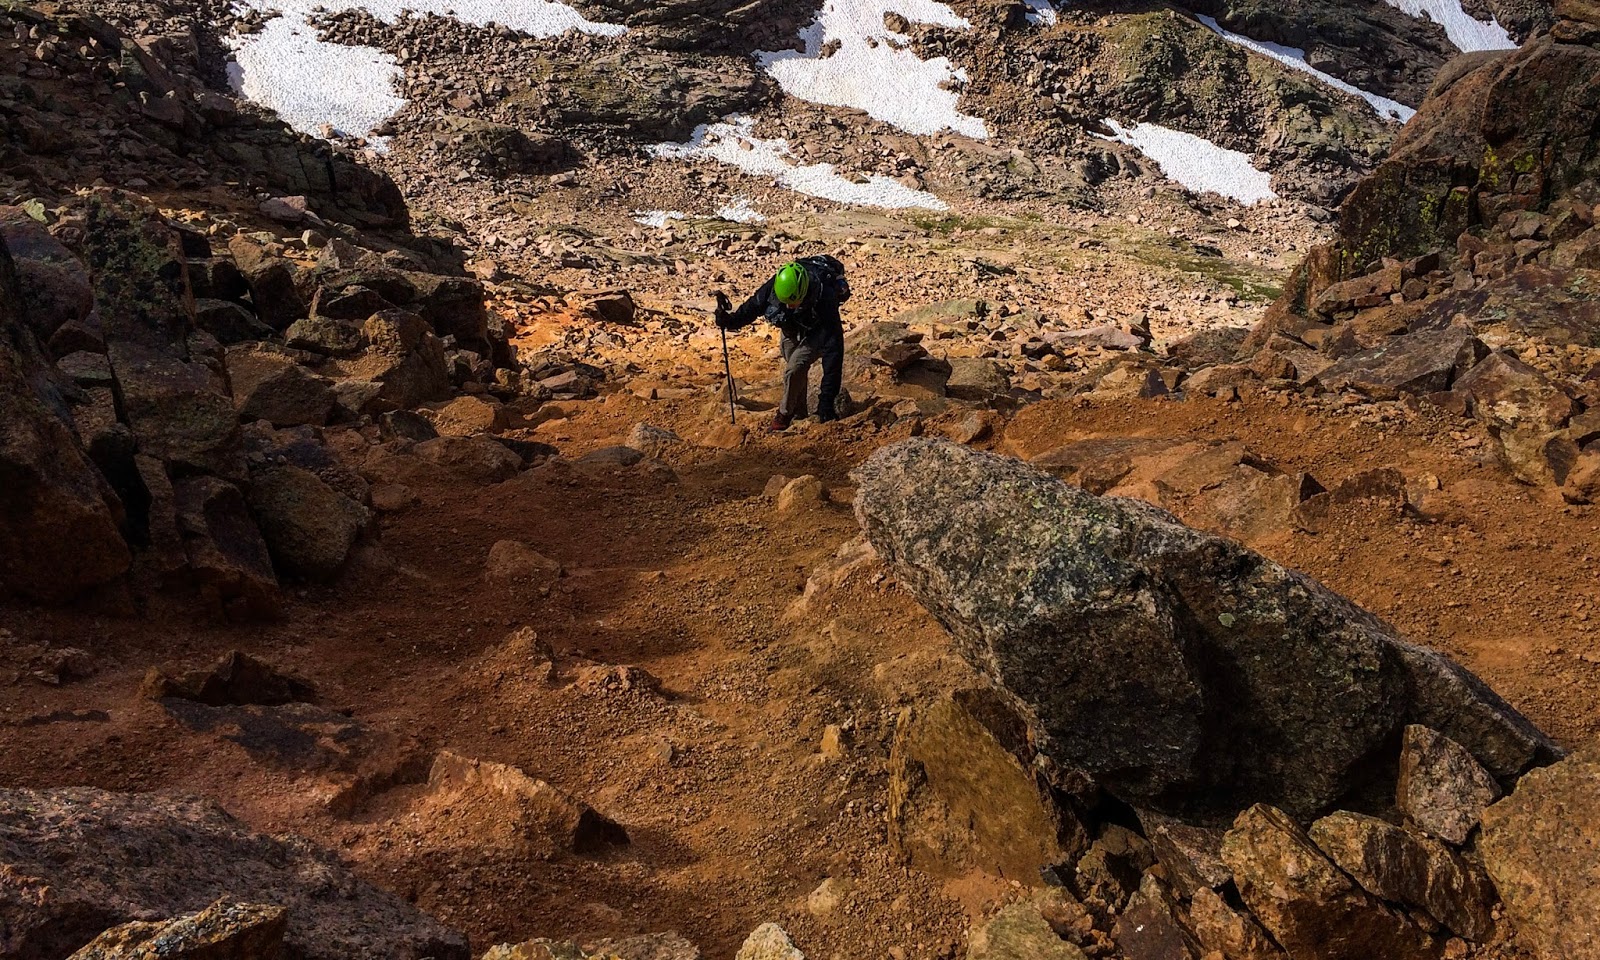
Me, coming up the terrible chute...hundreds of feet of this...not my favorite... (Photo by Dave)
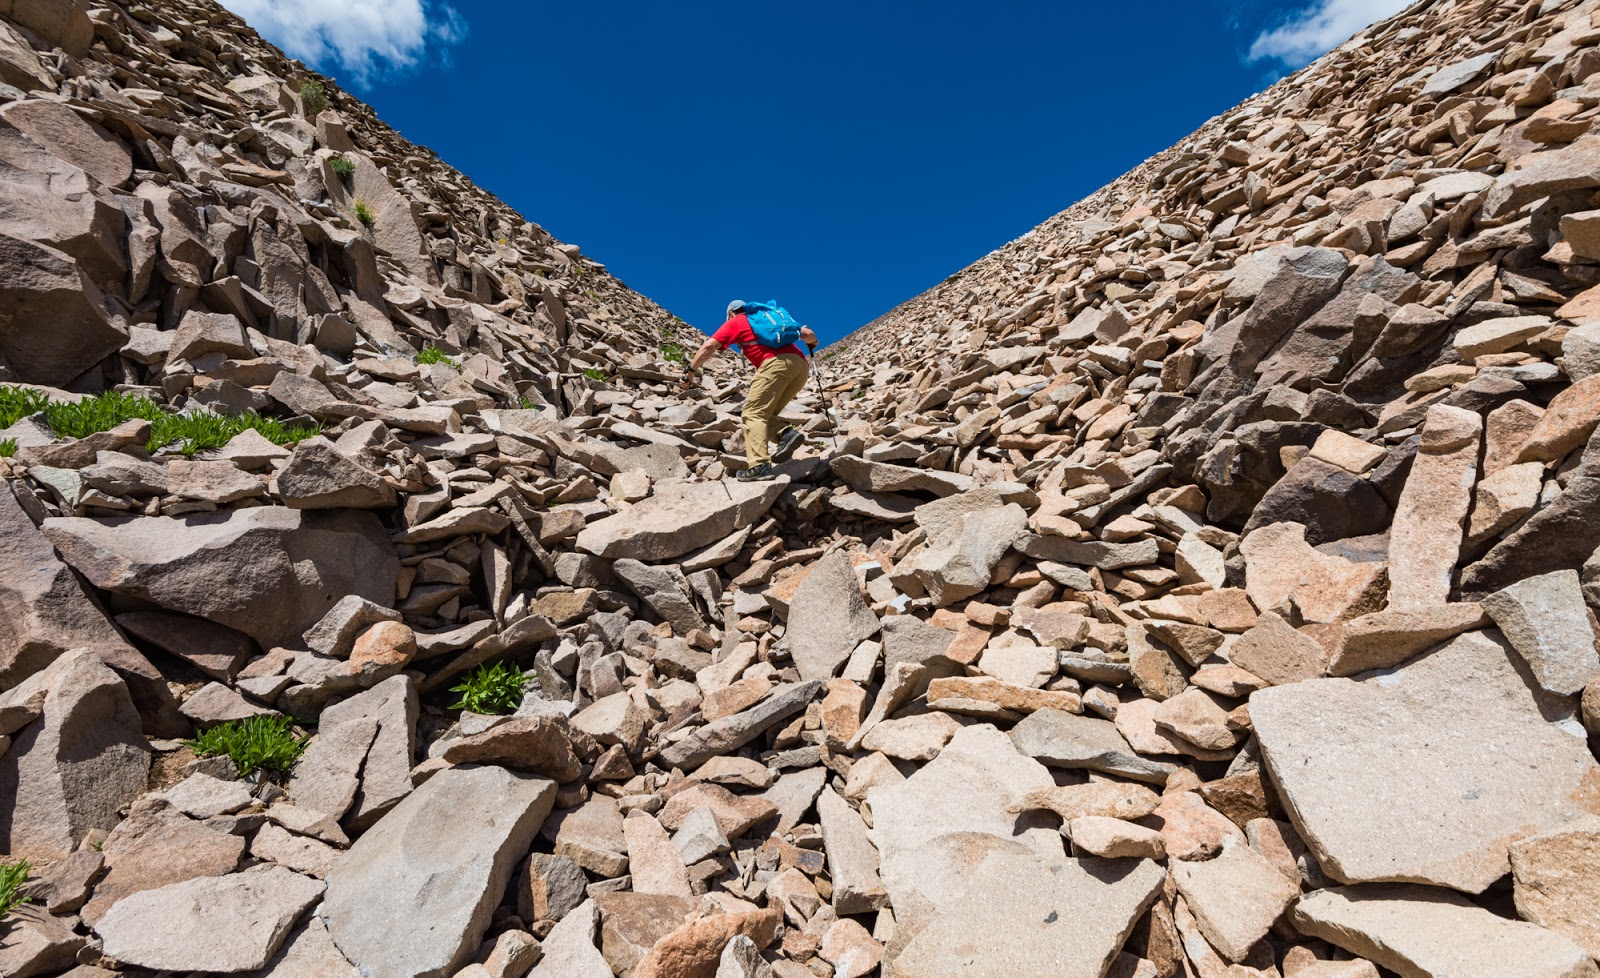
Once you get up to the high saddle at the top of the terrible chute the terrain changes - becoming much more rocky. I strongly recommend having some good beta (route detail) with you on your ascent here; there were cairns but they weren't as numerous or as clear as what we had seen on Mount Eolus the previous day. Also, much of this scrambling is quite physical - meaning big moves are required to advance - big steps and reaches, and some interesting postures required at various times. A lot of the scrambling isn't really exposed, but the moves required to advance across the terrain were the most physically intense of the whole trip, without question.
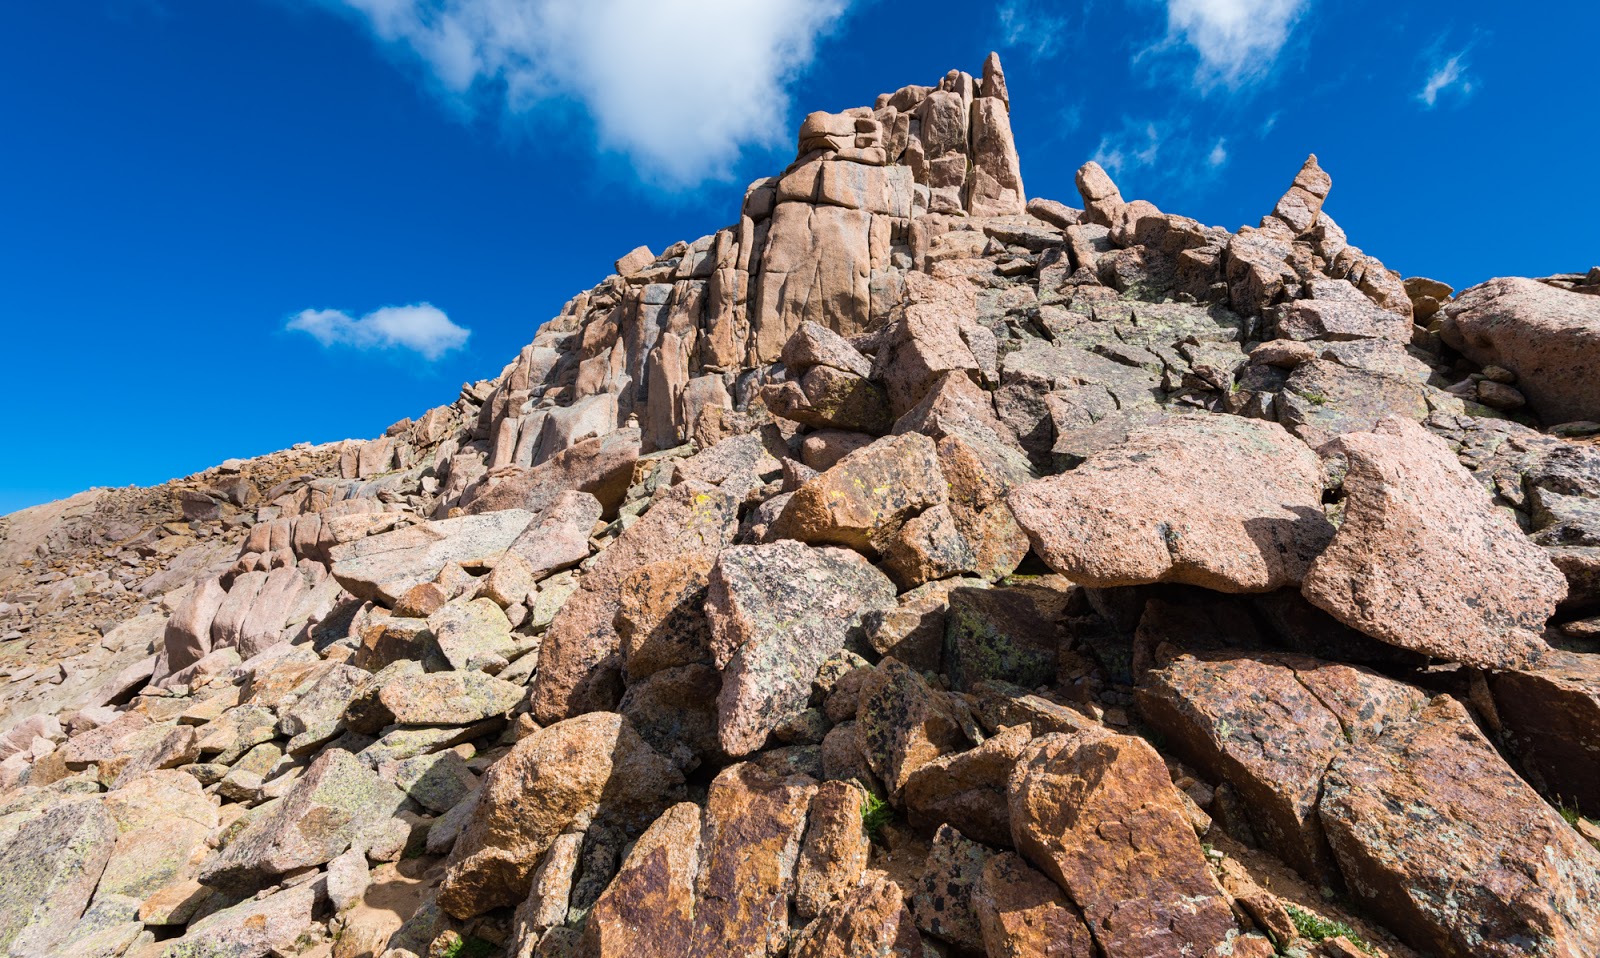
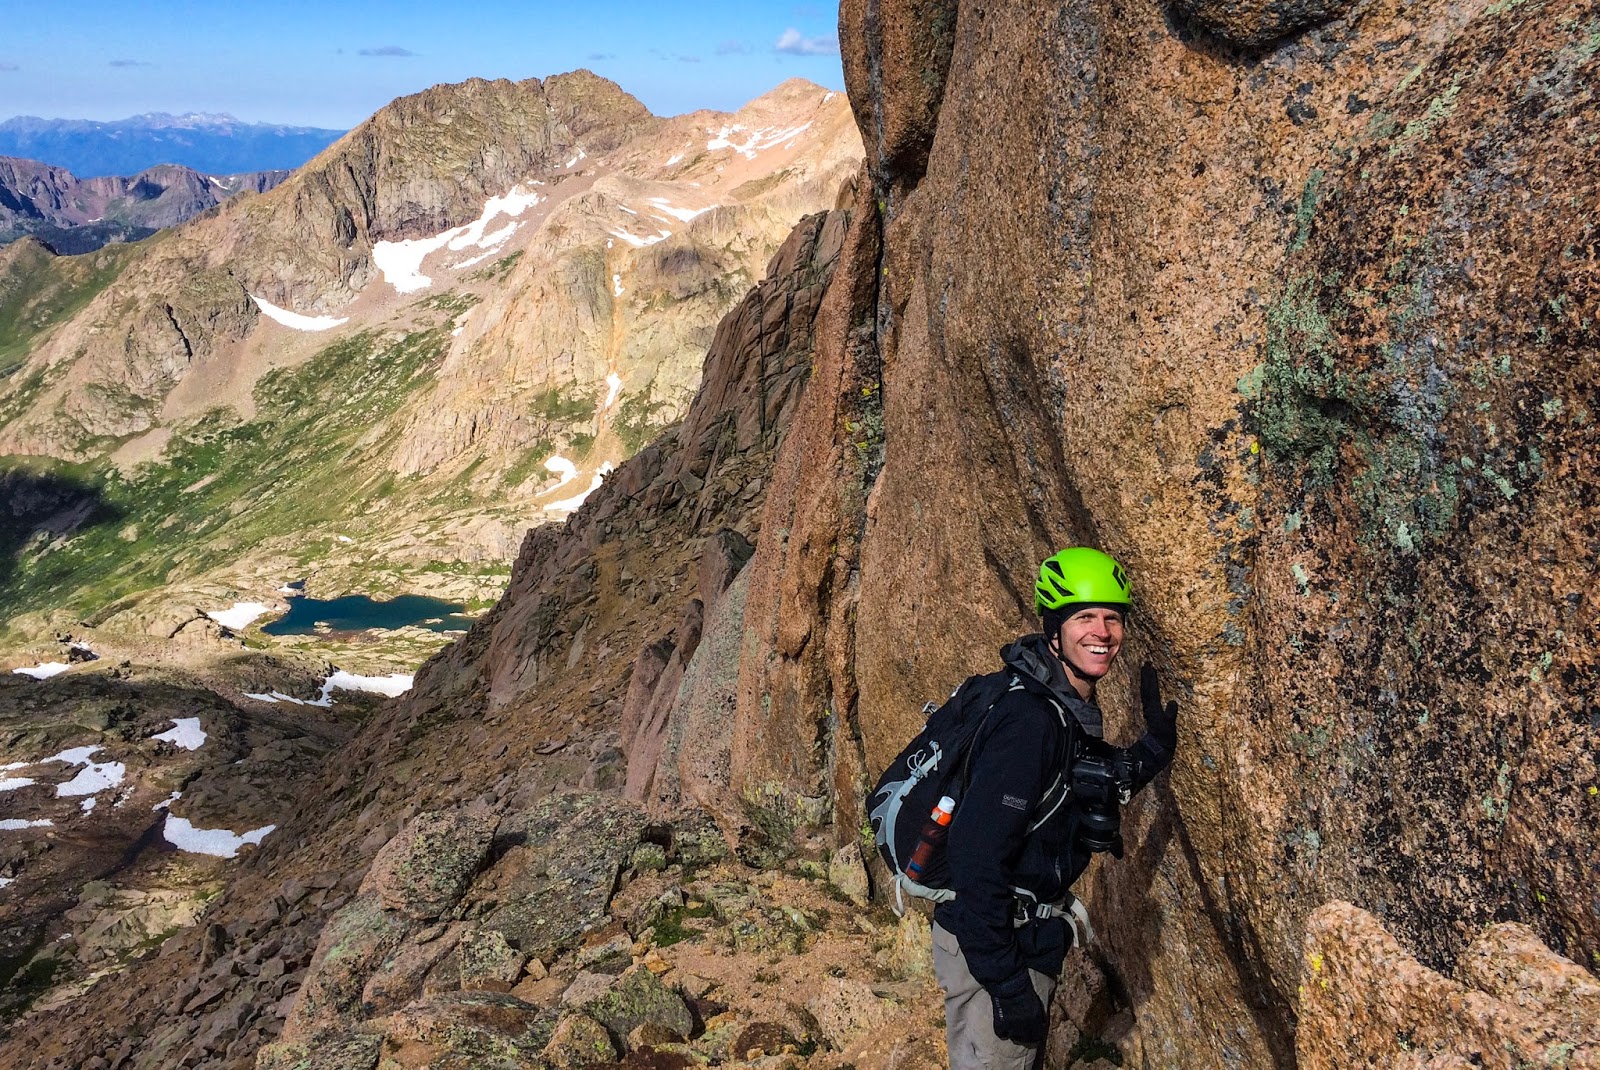
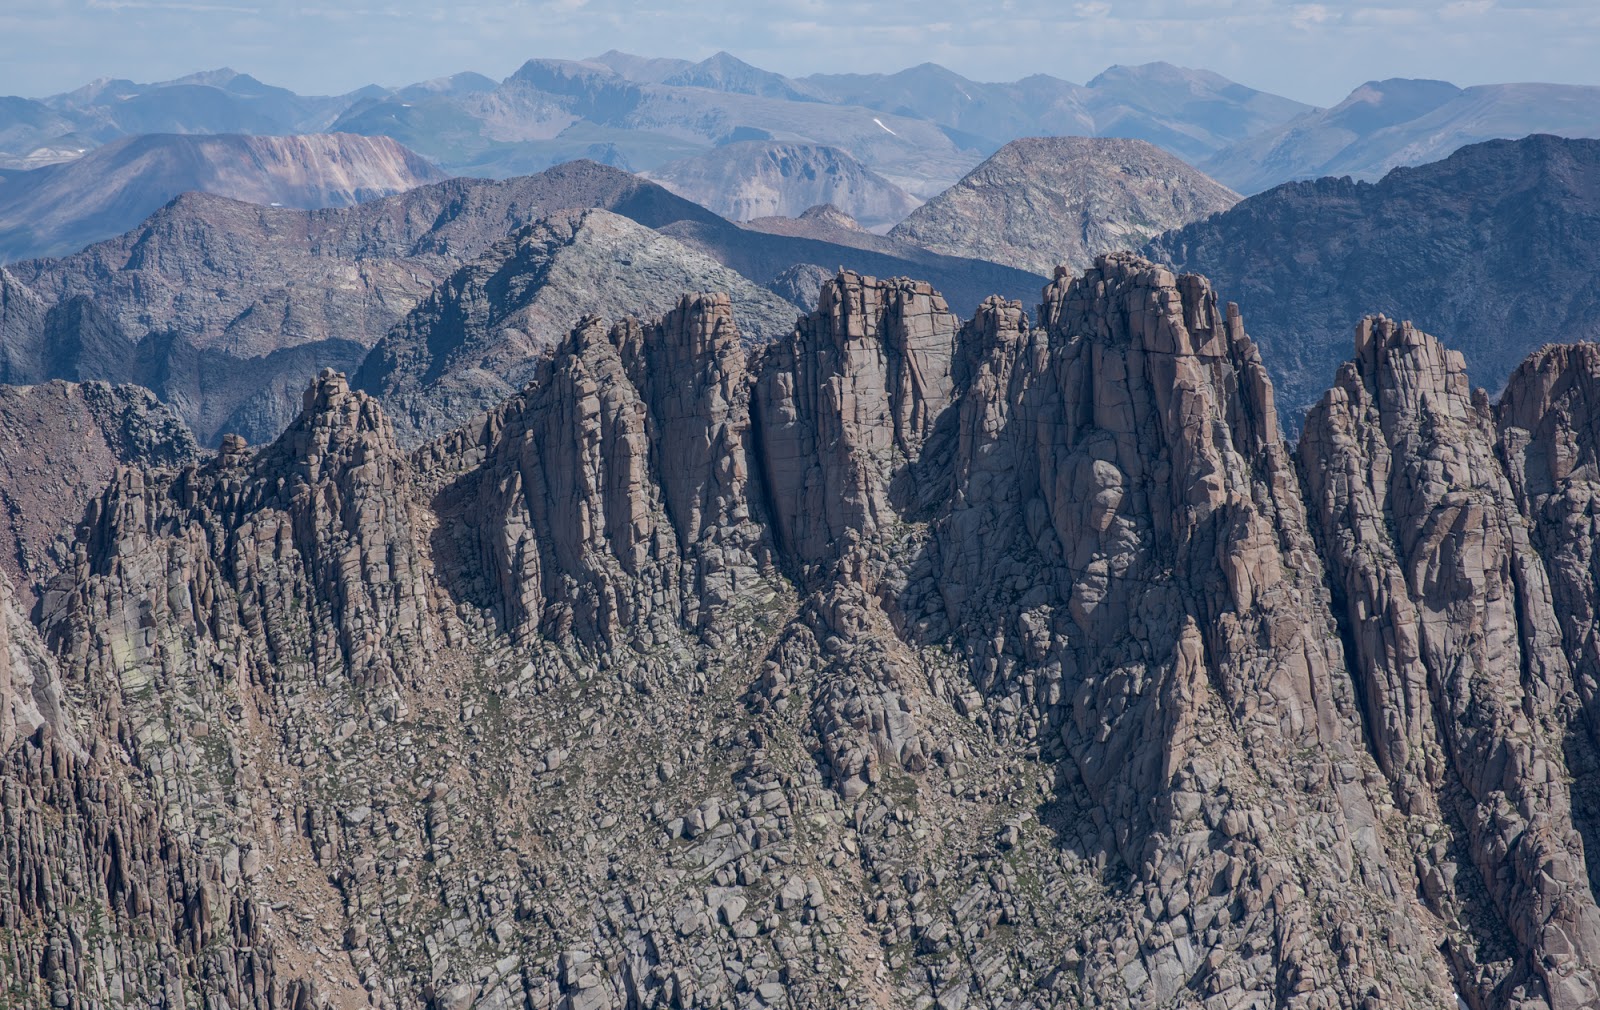
The pictures of Sunlight Peak's upper reaches generally don't convey how large the blocks are throughout most of this upper area - they're human-sized, vehicle-sized, etc. Navigating these massive, jumbled blocks constitutes both the challenge and the fun of this particular summit.
The pictures of Sunlight Peak's upper reaches generally don't convey how large the blocks are throughout most of this upper area - they're human-sized, vehicle-sized, etc. Navigating these massive, jumbled blocks constitutes both the challenge and the fun of this particular summit.
The upper reaches of Sunlight Peak (not all of what you have to traverse/scramble can be seen here in this view). Many of he blocks here are, generally, much larger than they appear. It was somewhere climbing up the left side of that steep massive blocky tower (top-center) that Dave, who was ahead of ,and above, me by about 10 - 15 feet at the time, unintentionally dislodged a very large boulder that unexpectedly shifted under his weight as he went to move over and past it...Providentially this very large rock stopped before it could get much momentum down the slope and I didn't have any harm come to me - but Dave was especially rattled by the experience. After that boulder shifted and crashed down the slope as far as it did (which wasn't very far, but still quite dramatic since it was several feet across) the unique smell of shattered rock was in the air pretty powerfully...it almost smells like something was burnt, which is what I usually equate the smell with after a substantial rockfall has happened nearby. Most of the rock up high on Sunlight is very solid (after that terrible red-orange chute) but not that one almost-consequential block...This, among other reasons is why we always pray before we go out into the mountains - sometimes you need protection beyond your own efforts, like in this instance.

The climb up toward Sunlight Spire from a bit above that terrible chute where the super-steep red-orange dirt is) looks just as imposing close-up as it does form afar.
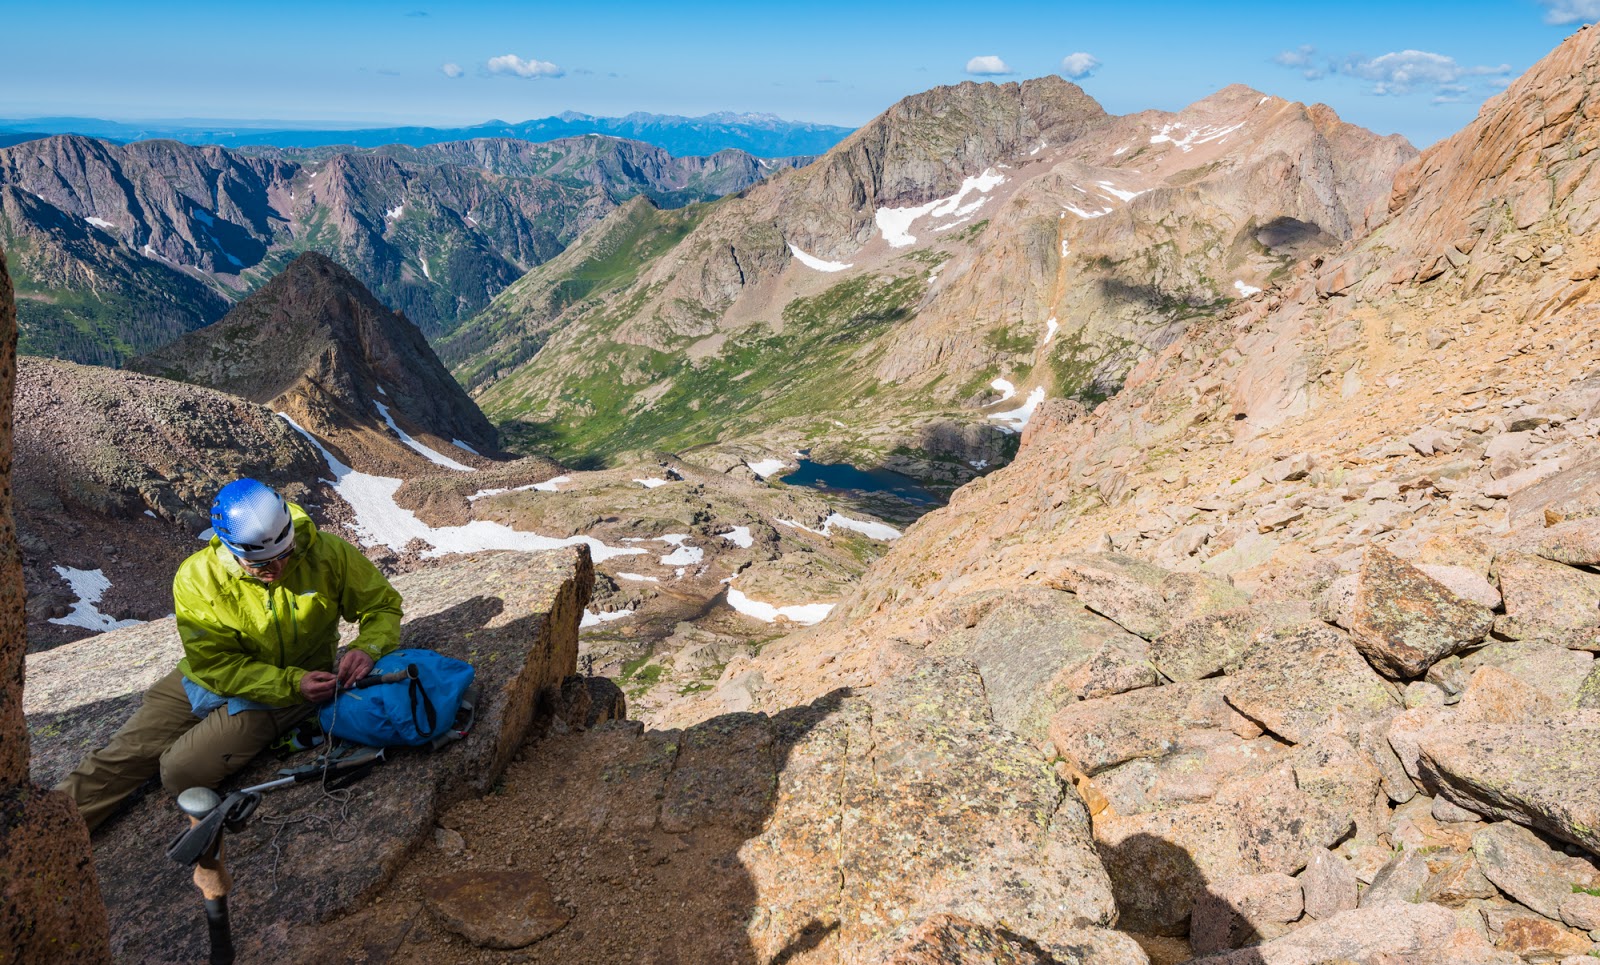
Dave's taking a moment to lash his trekking poles to the outside of his pack before we get into scrambling more difficult terrain above the terrible chute (which chute is now off to the left a bit here, out of view).
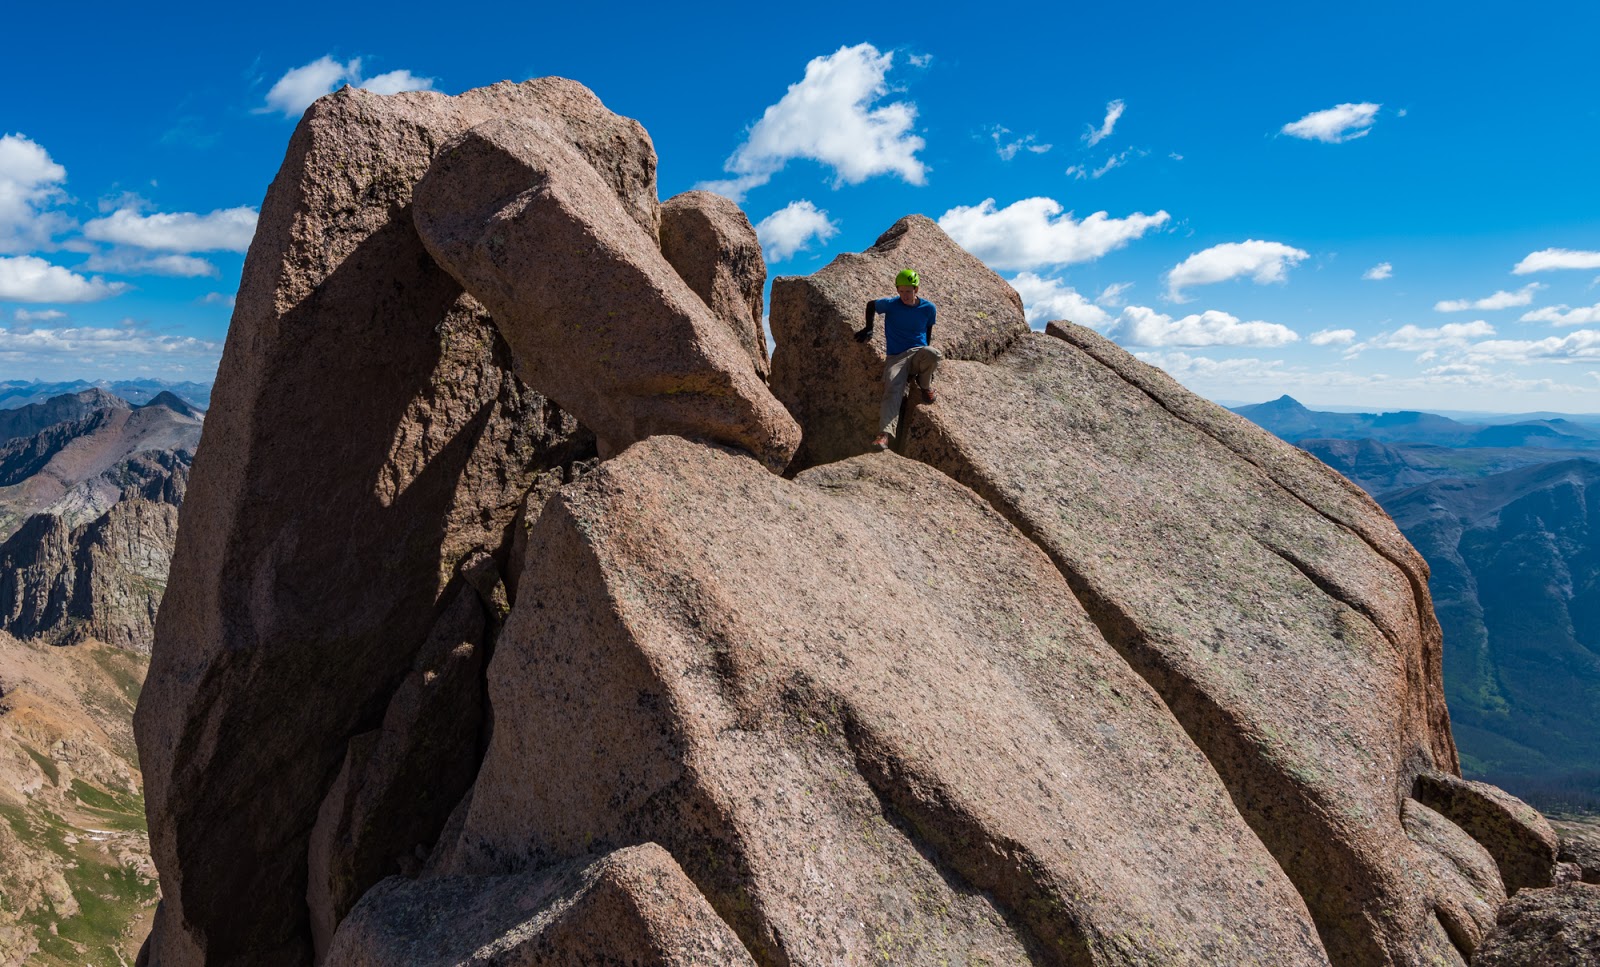
Route-finding along massive blocks high on Sunlight Peak. (Photo by Dave)
Route-finding along massive blocks high on Sunlight Peak. (Photo by Dave)

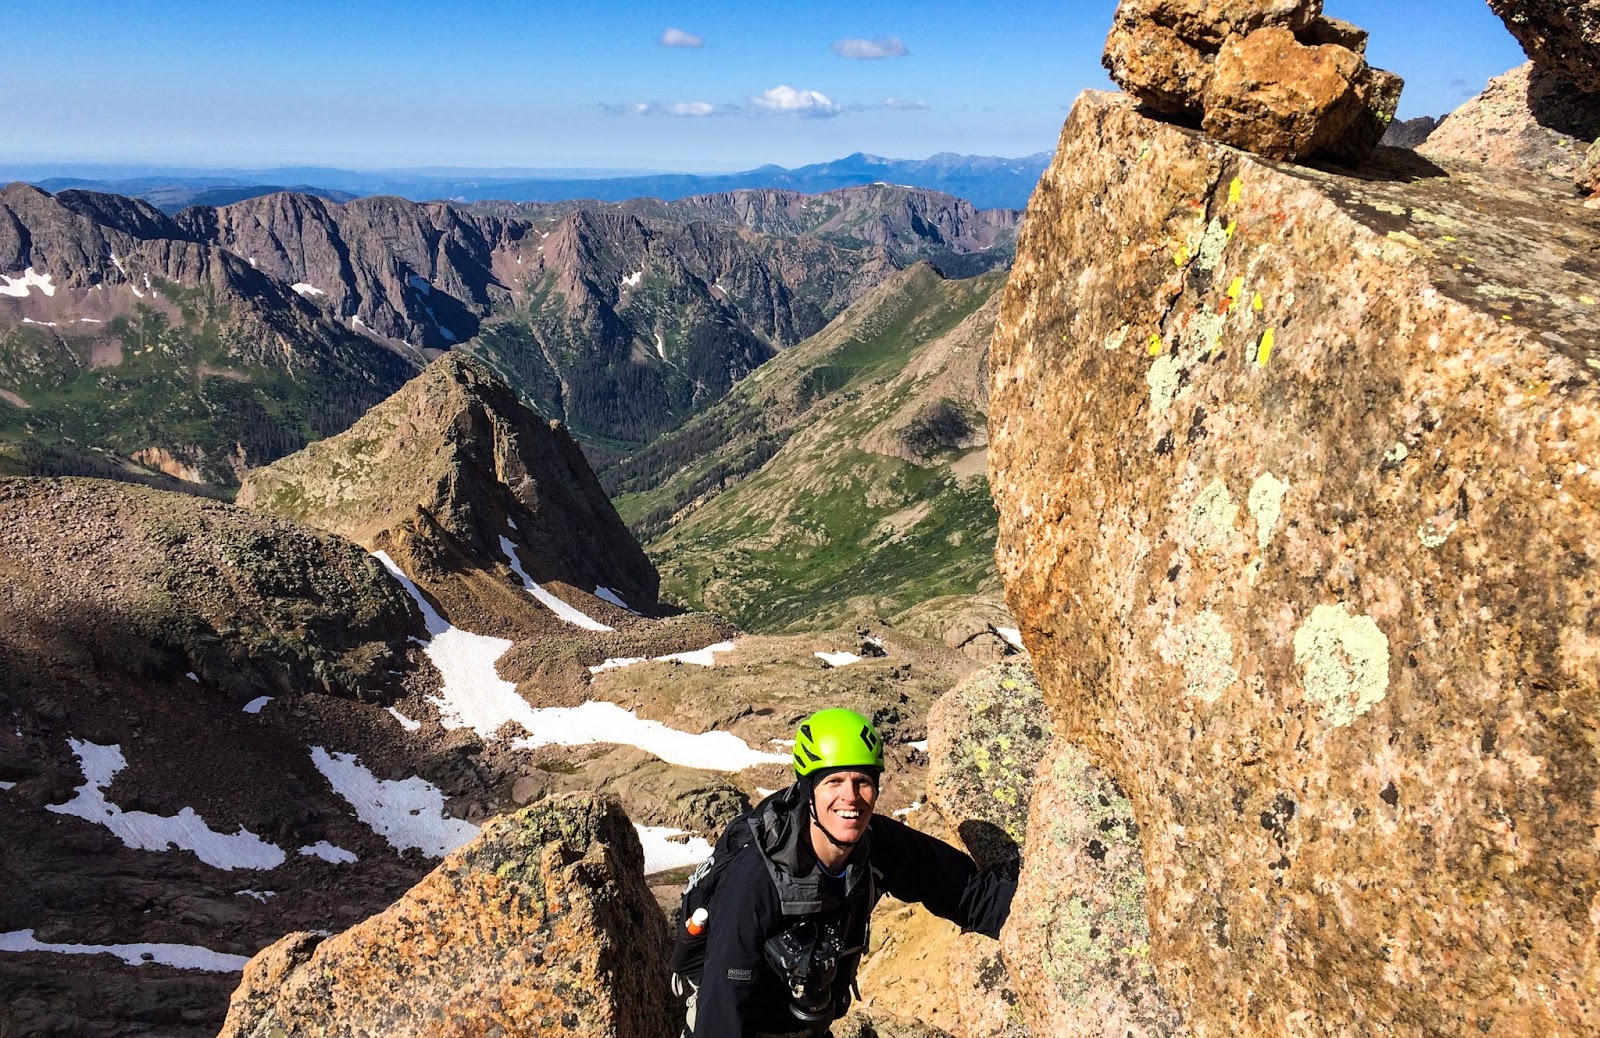
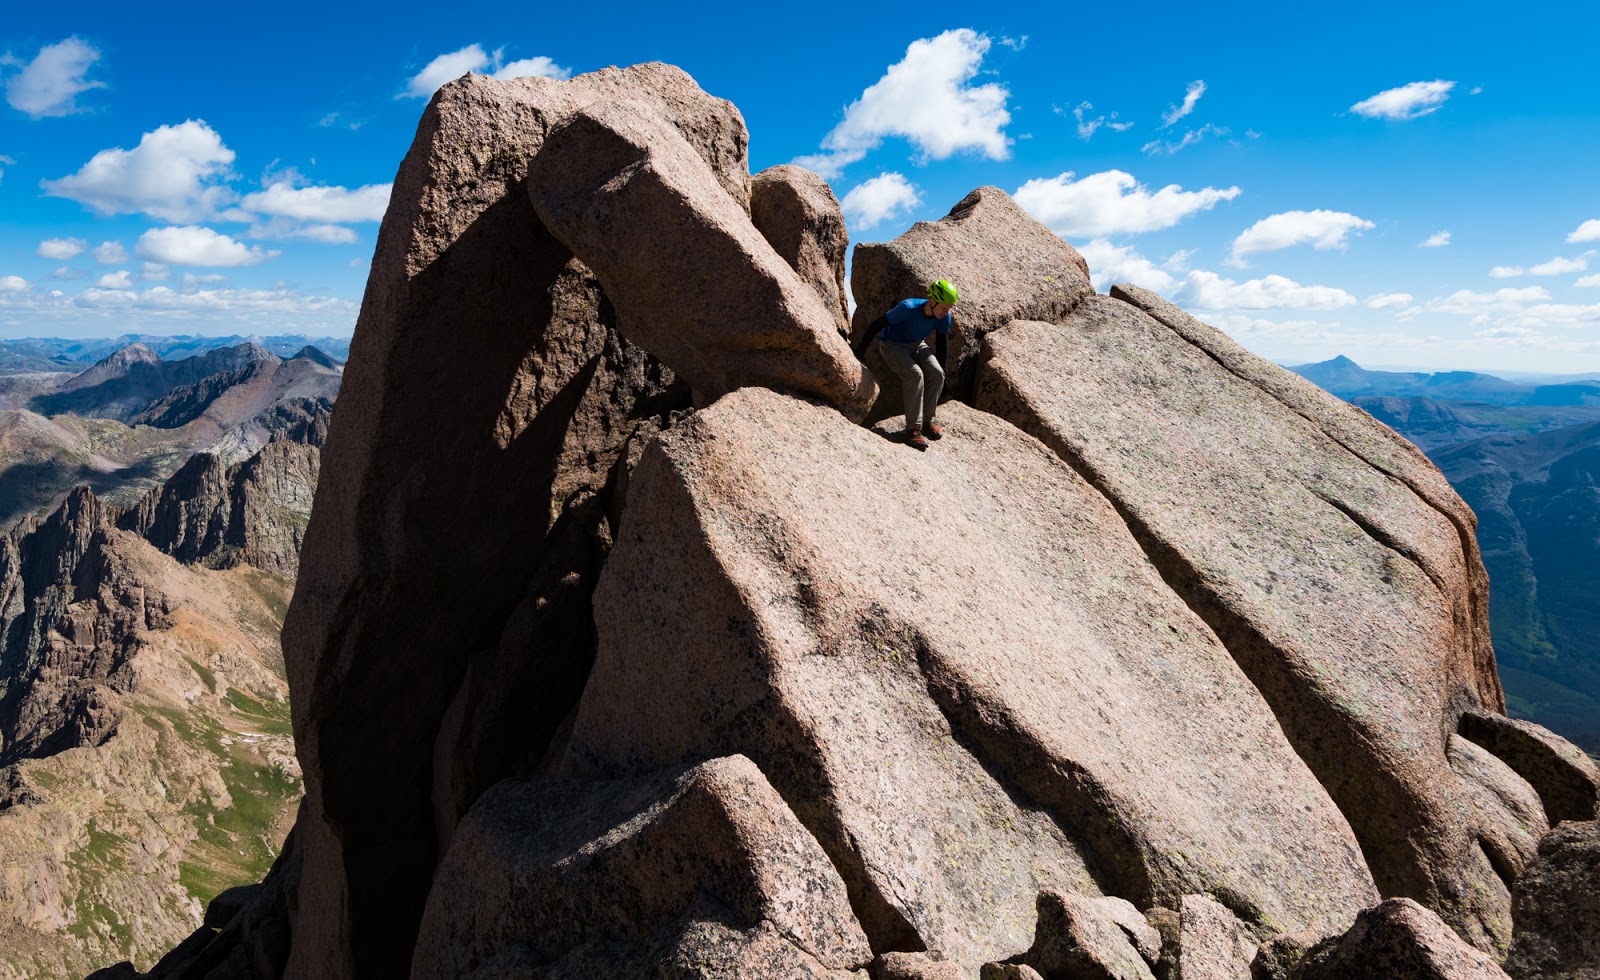
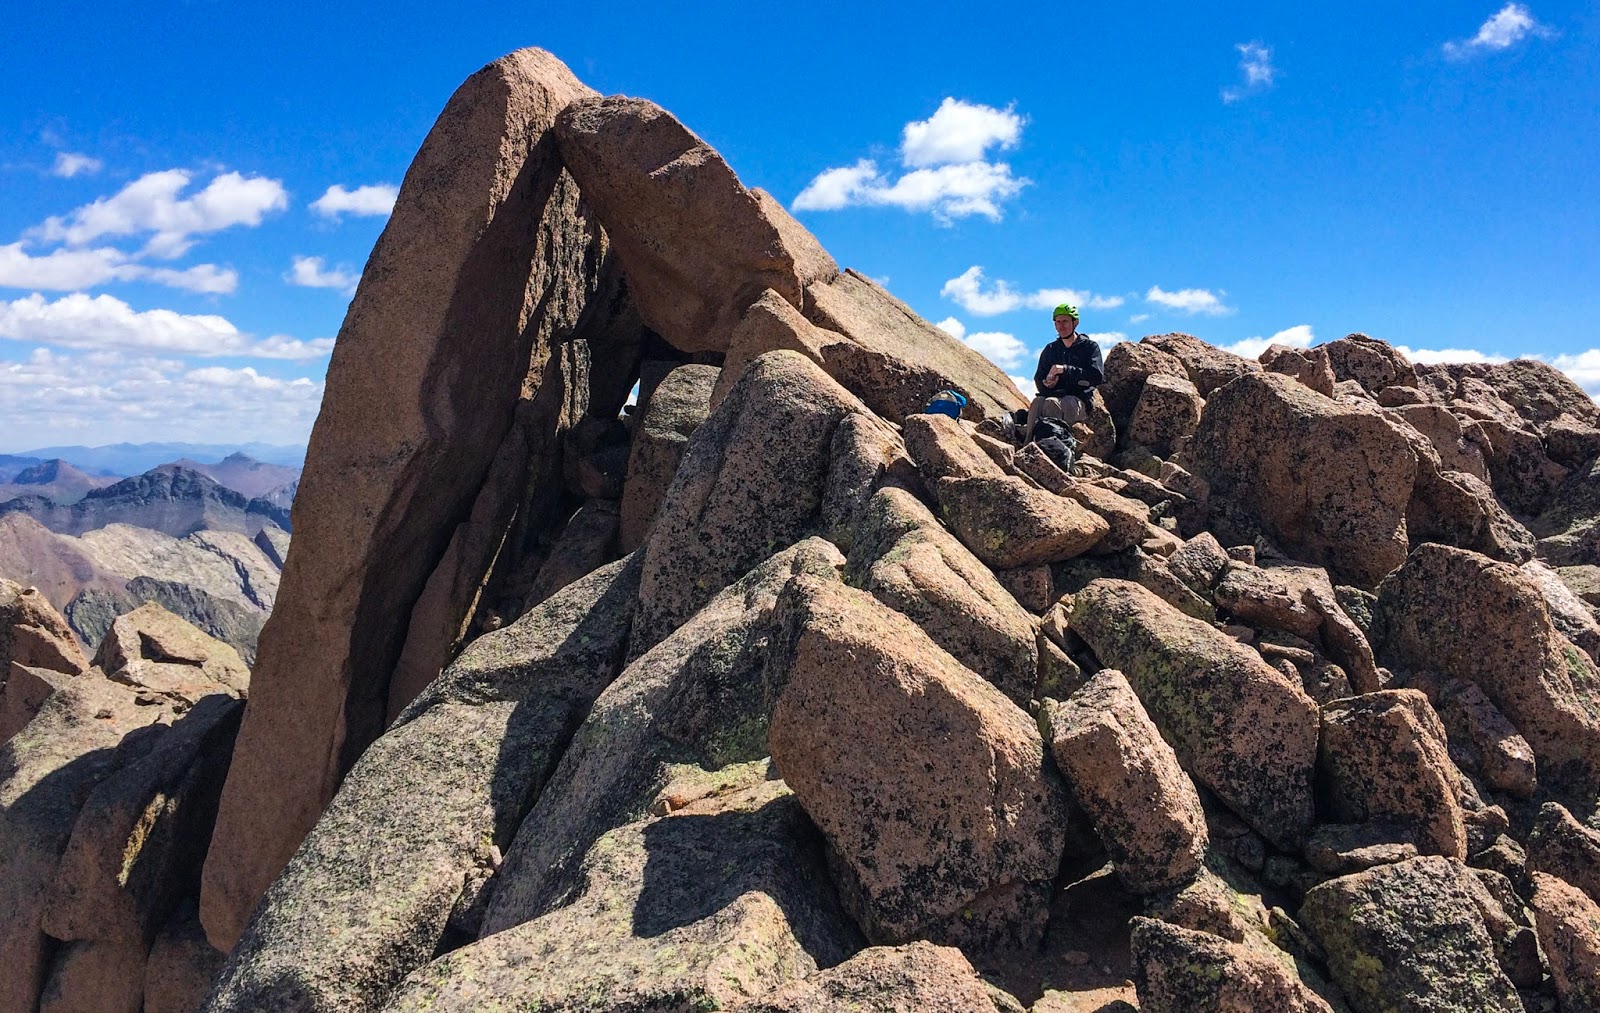
Scrambling up through a "hole" in the ridge; there are two holes along the ridgeline high on Sunlight Peak, the first one you don't go through and is smaller; this one is larger and longer and you do go up it to advance to the next section of ridgeline. (Photo by Dave)
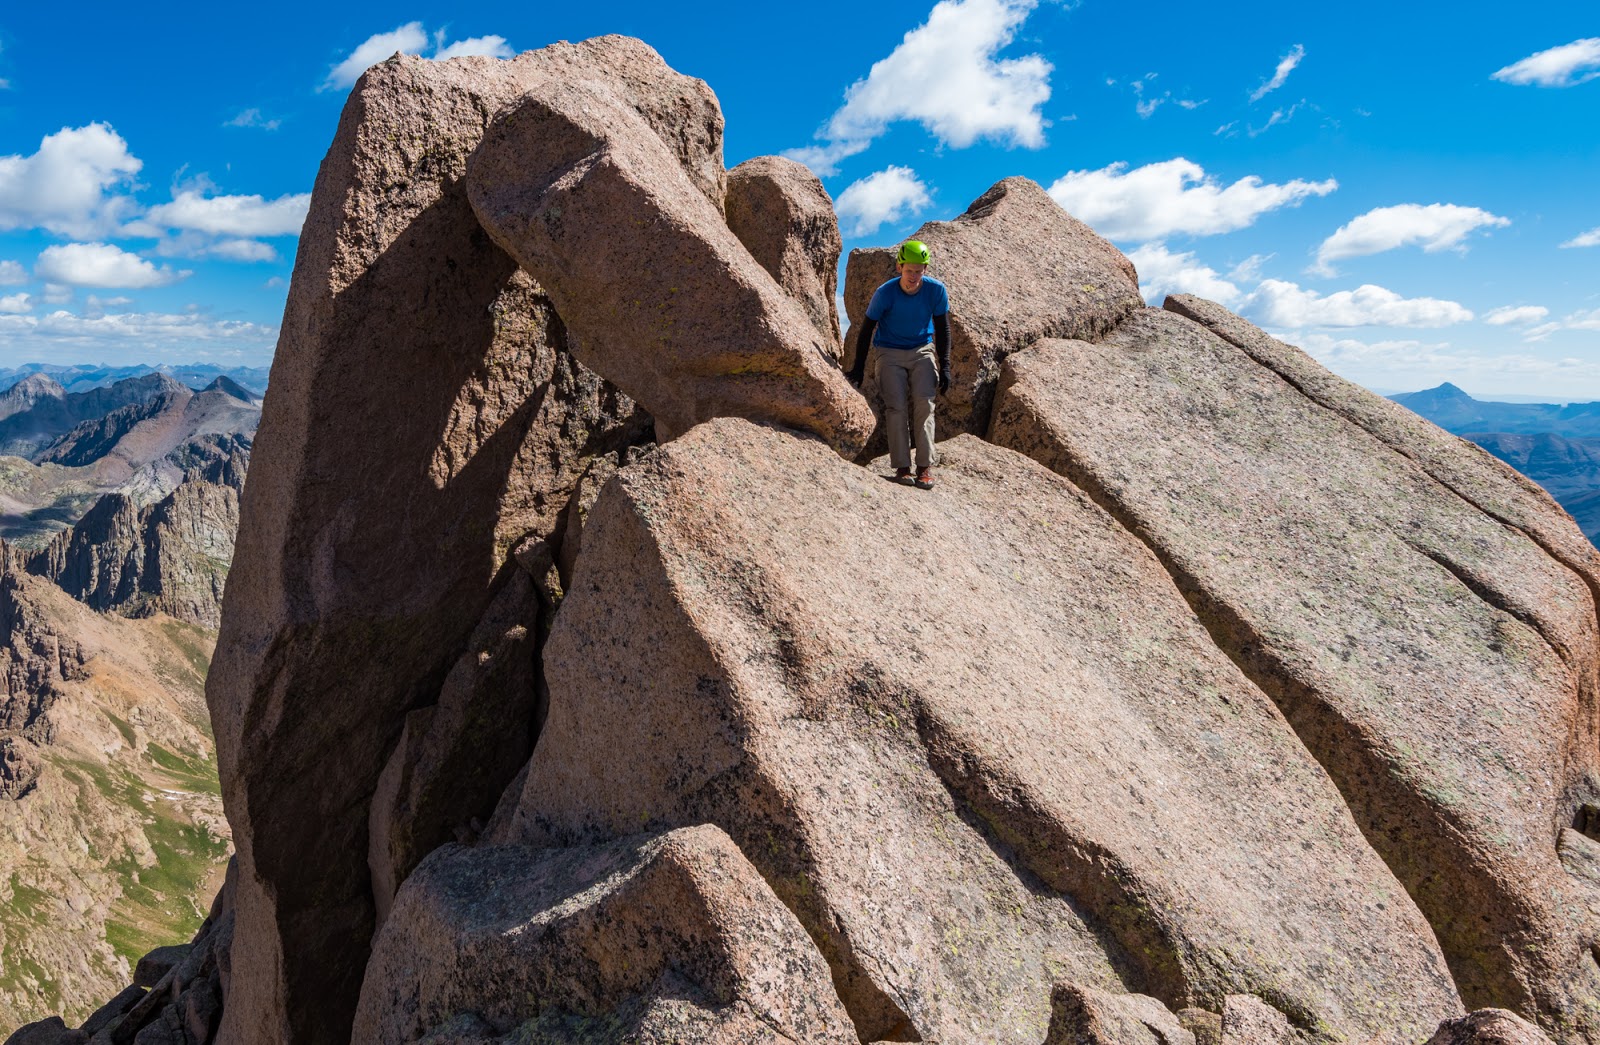
Me, enjoying the ascent high on Sunlight Peak. (Photo by Dave)
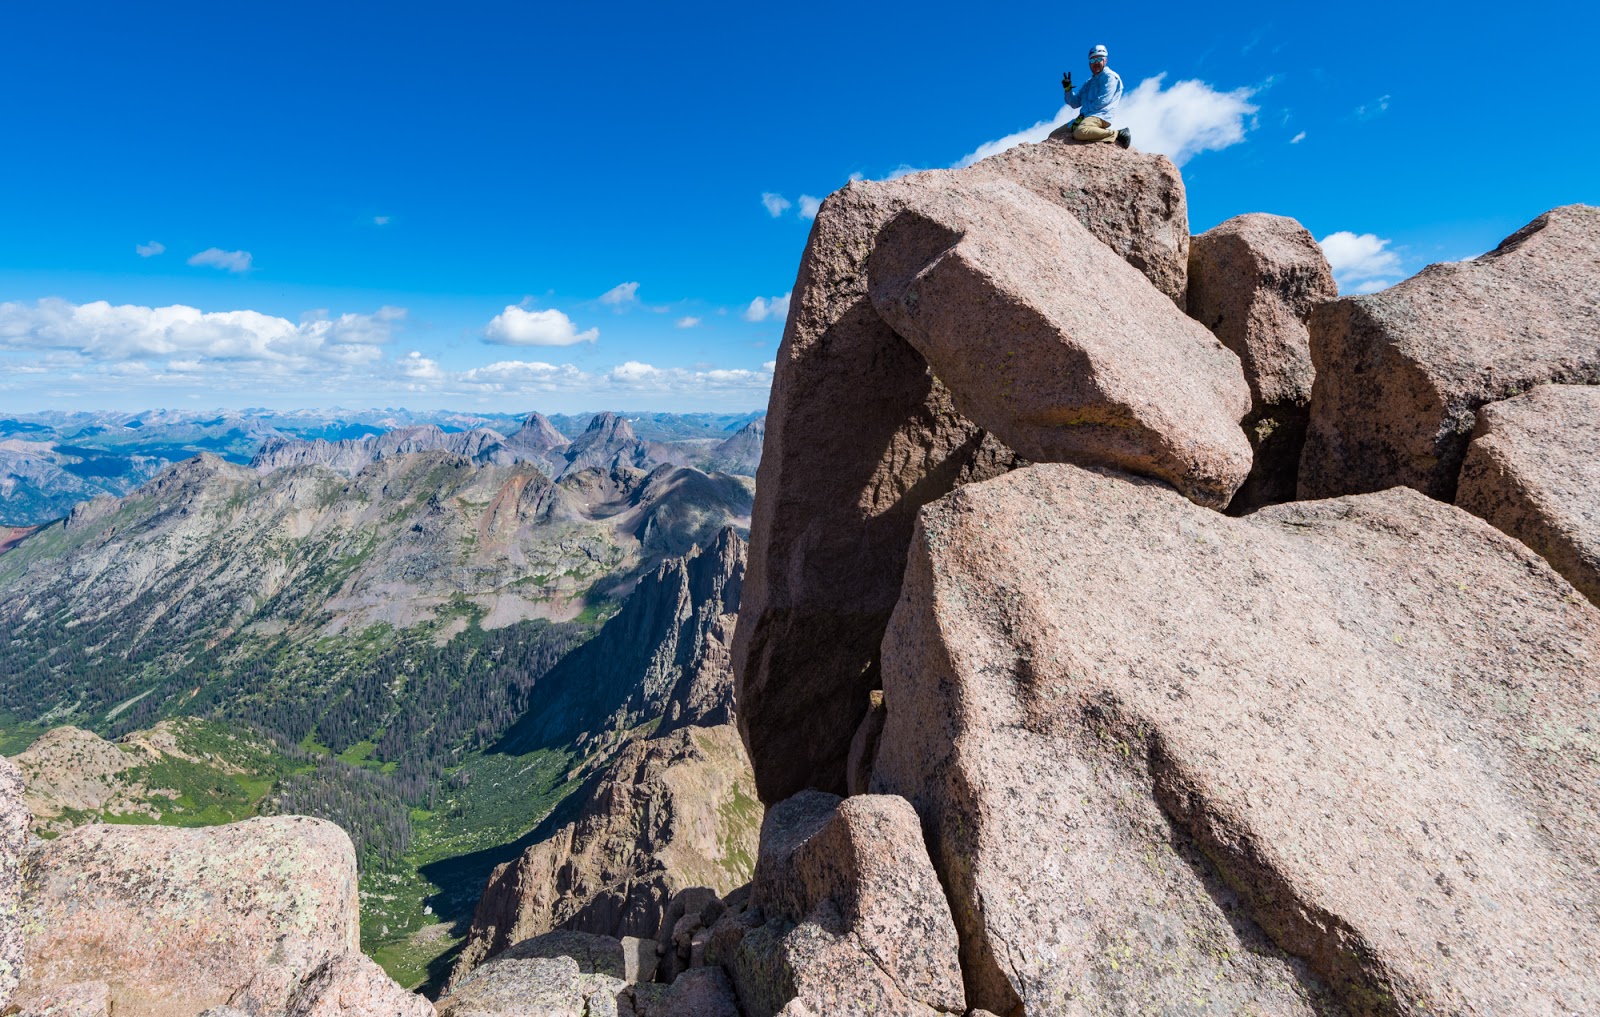
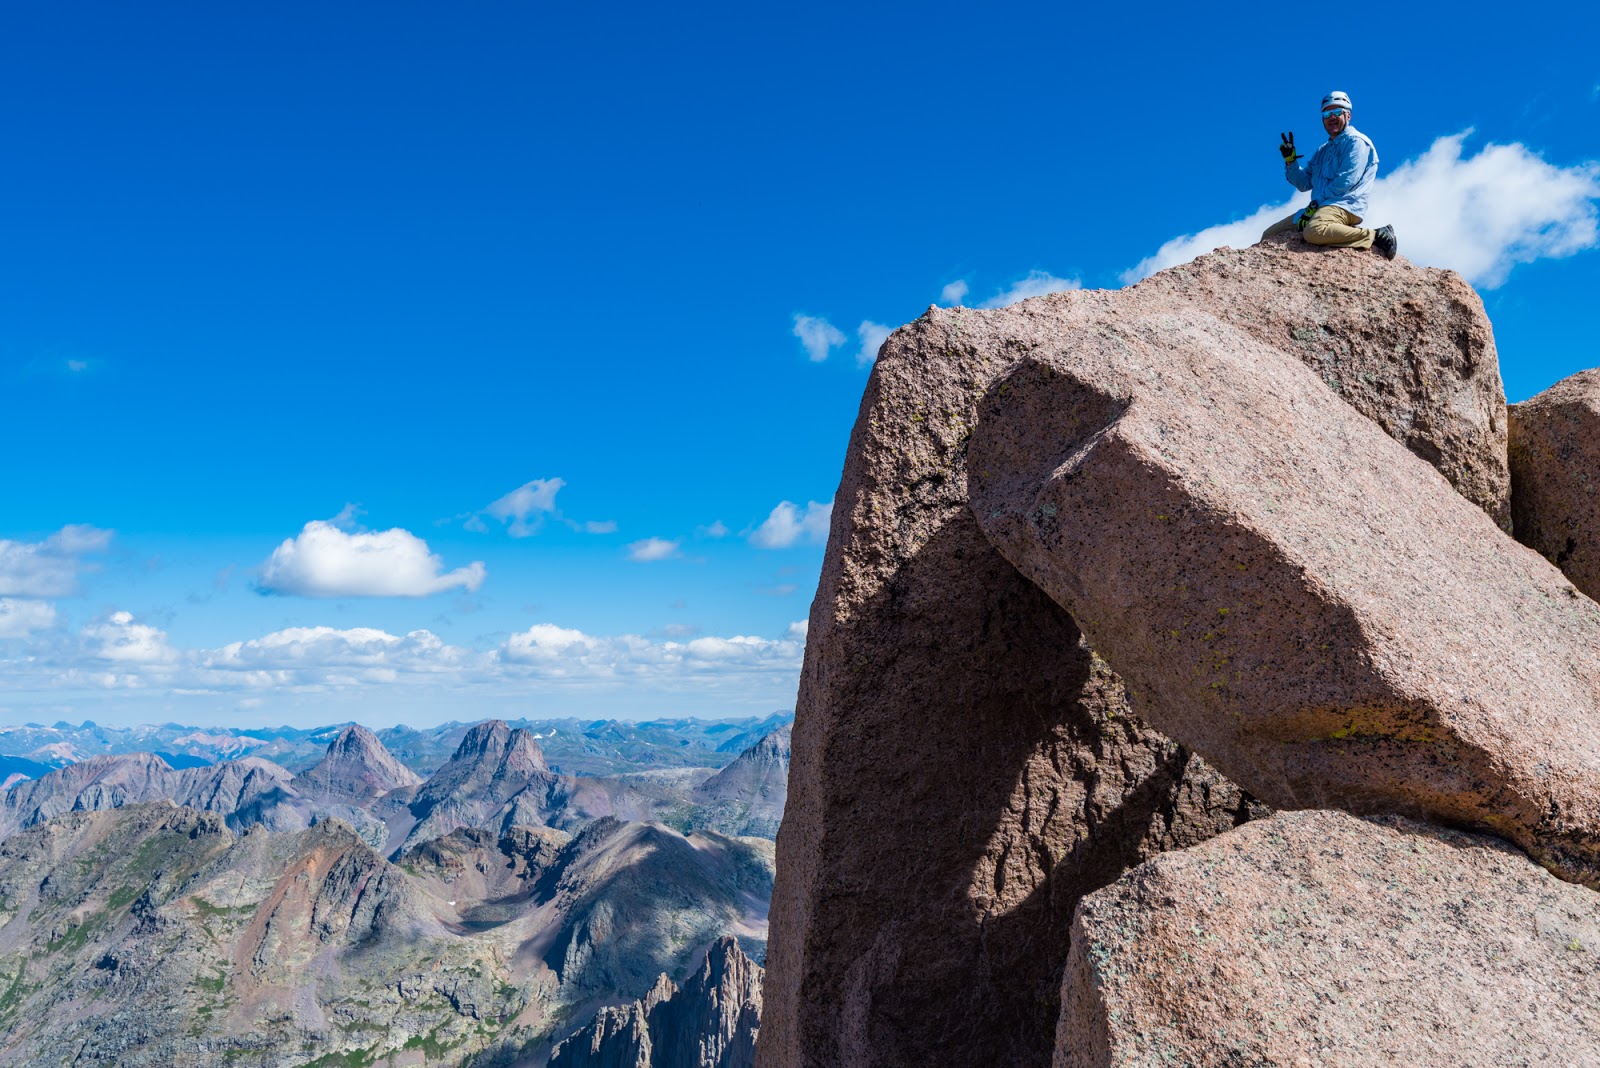
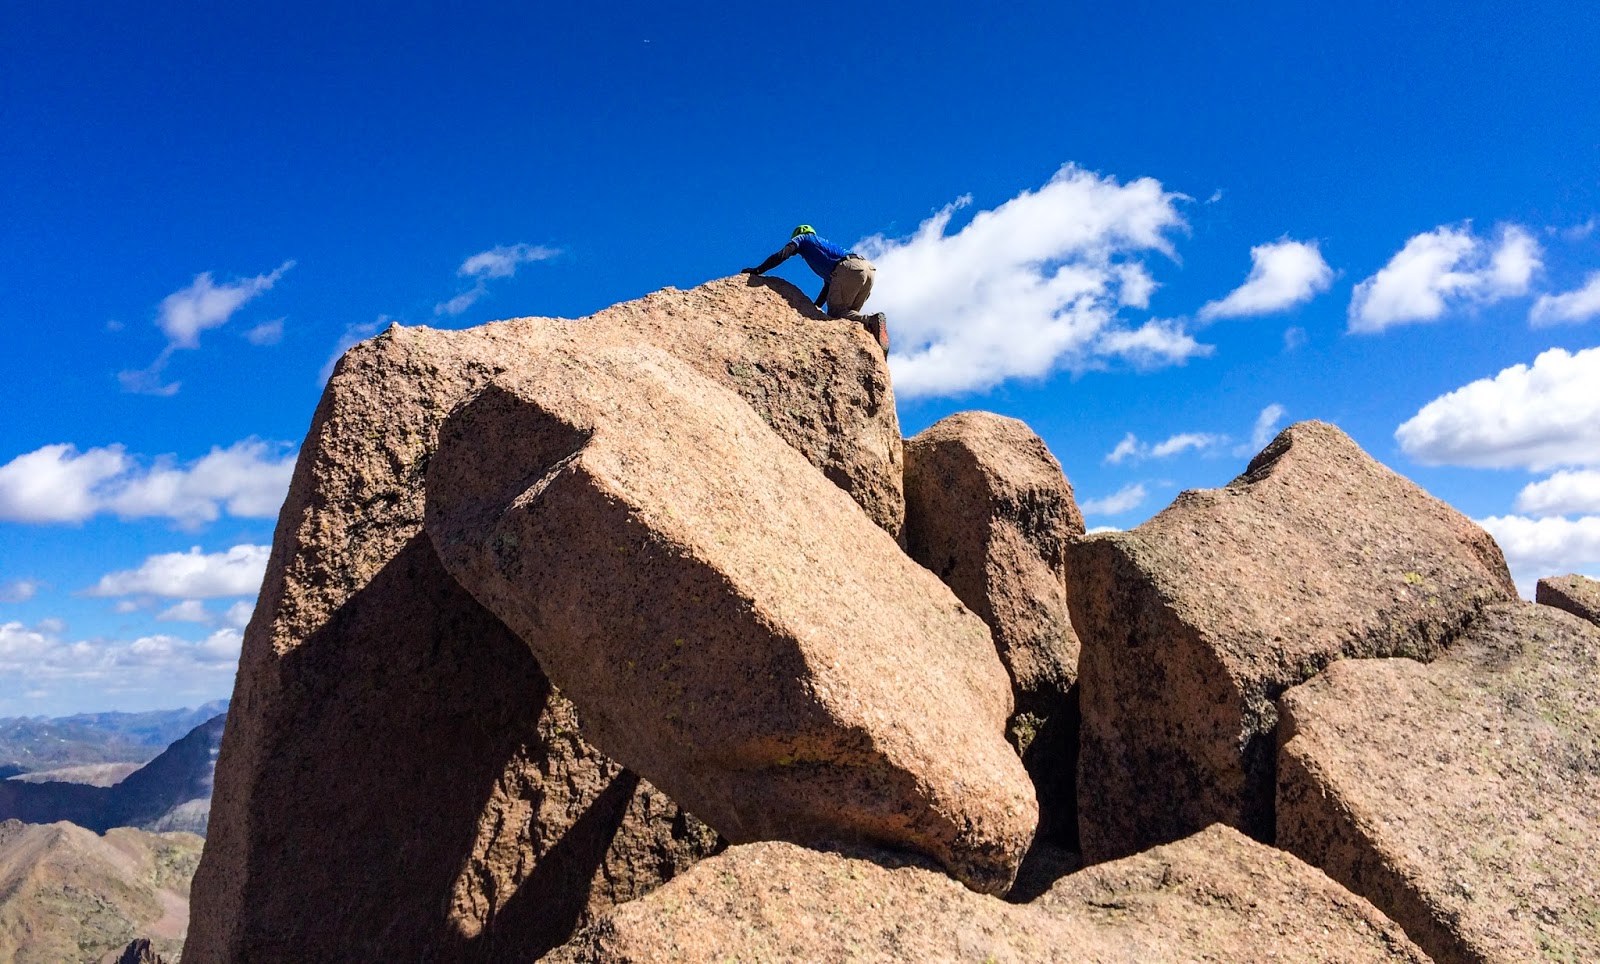
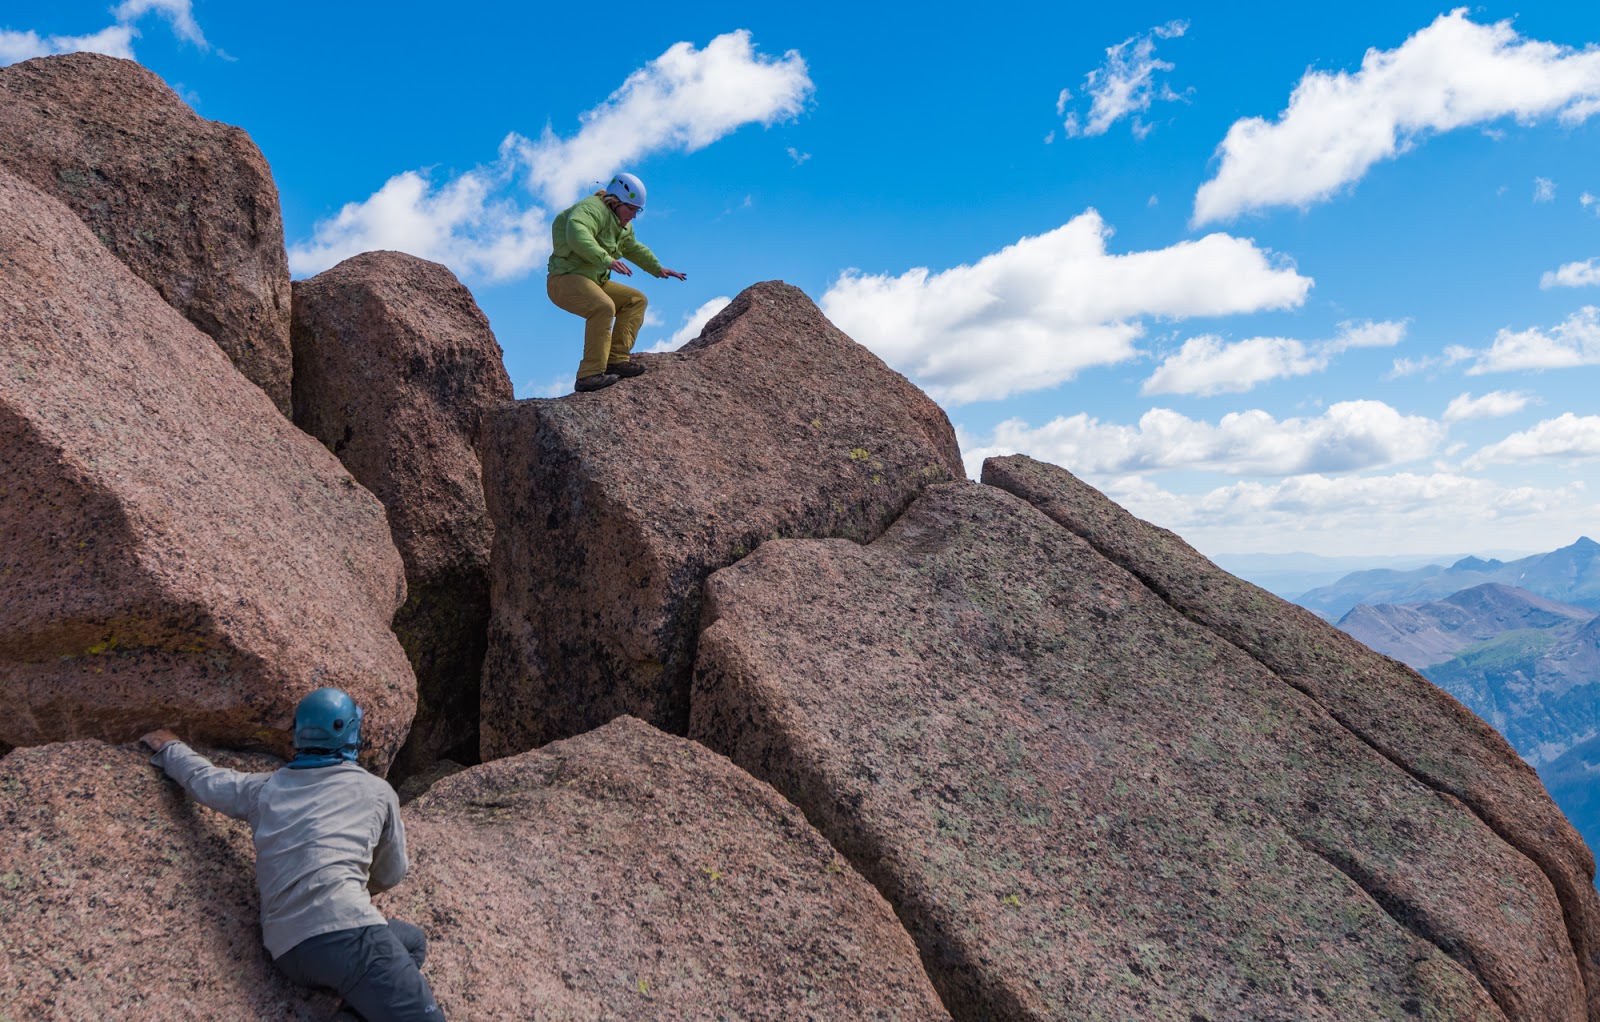
After we'd completed the somewhat complicated route-finding and scrambling up to the summit area of Sunlight Peak we saw it there in front of us, "the big bad" itself:
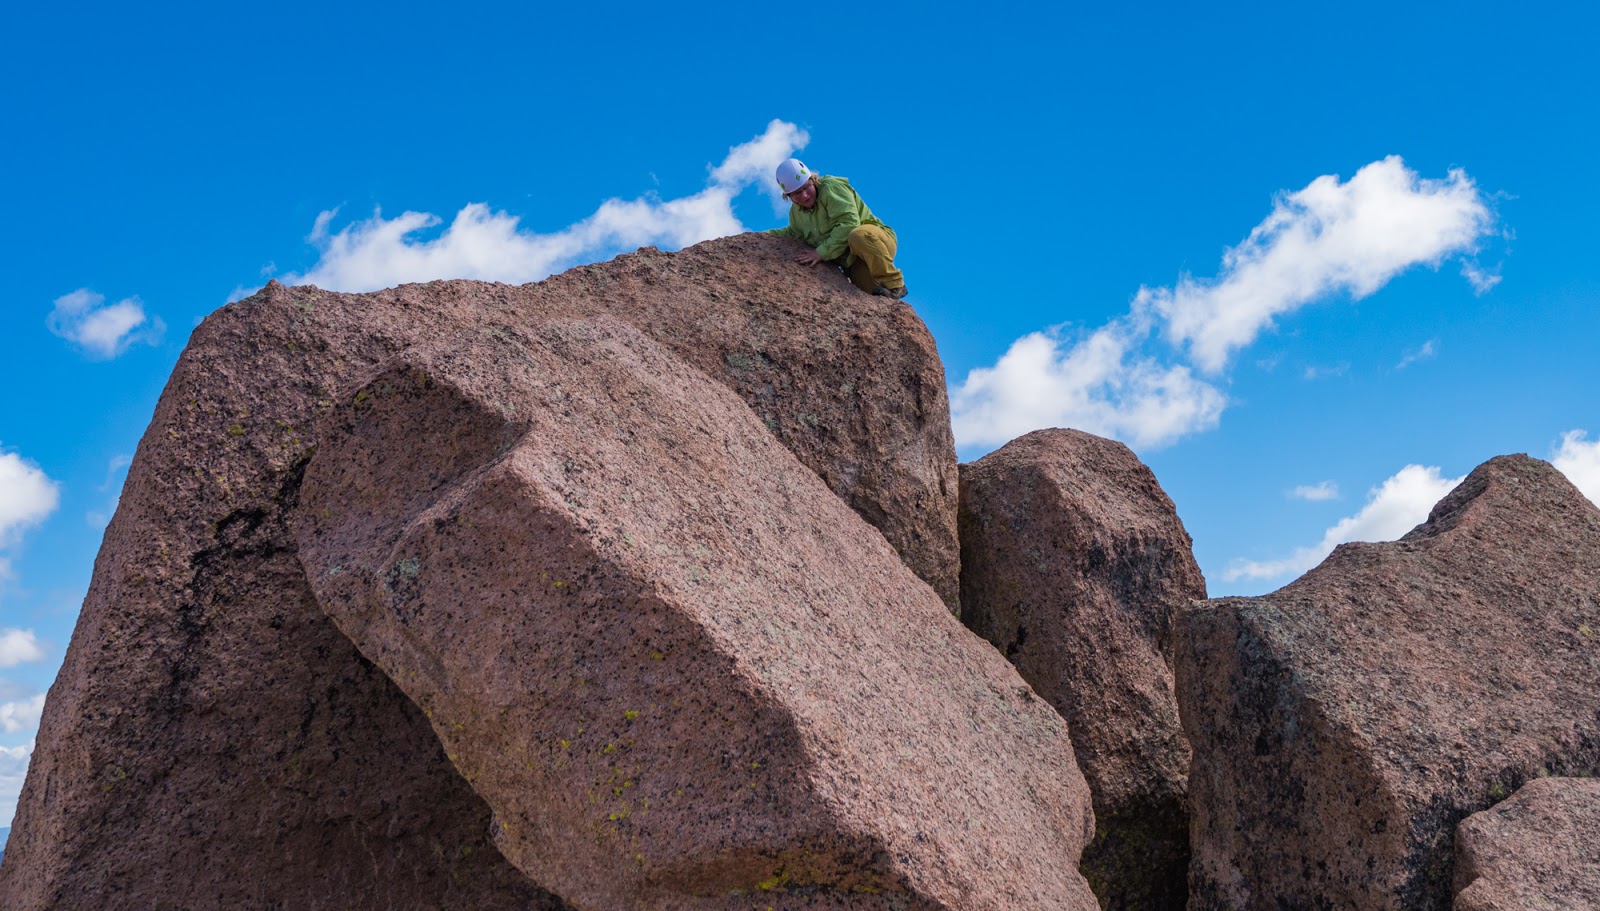
Sunlight Peak's summit is comprised of very large blocks jumbled together; these blocks are, on three sides, astonishingly exposed...far more so than what the pictures usually suggest. To gain the summit you have to scramble rapidly up and then carefully across a very large down-sloping block about 15 - 20 feet across (as soon as you make this first move the rest of the time you're exposed to a severe or fatal fall getting to the summit and back), then you work your way sideways across the top of the block toward the "far side" of the jumble of massive boulders (I used the top edge of the very large rock to grip on to as I moved sideways), then you have to scramble up a 6 foot or so slanted block, using a large crack between it and another block as a foothold, then you're presented with about a 3 foot horizontal gap with an 8 foot (or so) vertical gap between it and the rock you're standing on, and you have to stretch yourself across this gap to scramble up on top of a higher rock, maybe another three feet higher than the one you're standing on on your side of the gap. At this point you're two blocks away from the summit...You step carefully across the gap, and that's then you see it, from the second-to-last block - all the air - massive exposure in front of you just off the right side of the summit block (I remember calling over to Dave as I got to this point and saying something like "Wow, there's the exposure!")...The edge of the summit block itself that's facing you is another 3 to 4 feet tall, with drop offs on your left and right. Getting up on the summit block would be simple except for the very real mental game that happens there: You've got to get up this sheer-walled block (a simple up-climb of 3 - 4 feet) but there's a drop on your left leading to that eight foot hole - now about double that distance since you're higher up above the hole - and to your left is nothing for hundreds of vertical feet, basically a guaranteed fatal fall...so you get up on that last block quite carefully...
Some people actually stand on the summit block...we're crazy, but not that crazy. Both Dave and I ultimately straddled the block, which leaves your left foot resting somewhere near the top of the block (it slants out at a steep angle for a couple of feet on the left side as you climb up onto it); while you're on the summit block your right foot is dangling over empty space off the sheer right side while you balance on the crest of the huge (but narrow) block that constitutes the summit of Sunlight Peak. It is the opinion of some that this is the most difficult 14er in Colorado to summit by its standard route; nigh-doubtless there's some subjectivity there, but it's the most "interesting" summit block I've ever been up on - and the adventure doesn't stop once you get up on the summit block...it's the getting down where the most adventurous aspect of Sunlight Peak lies...Check out a few glorious pictures of Dave and I on the summit of Sunlight Peak and I'll talk about the getting down part thereafter...
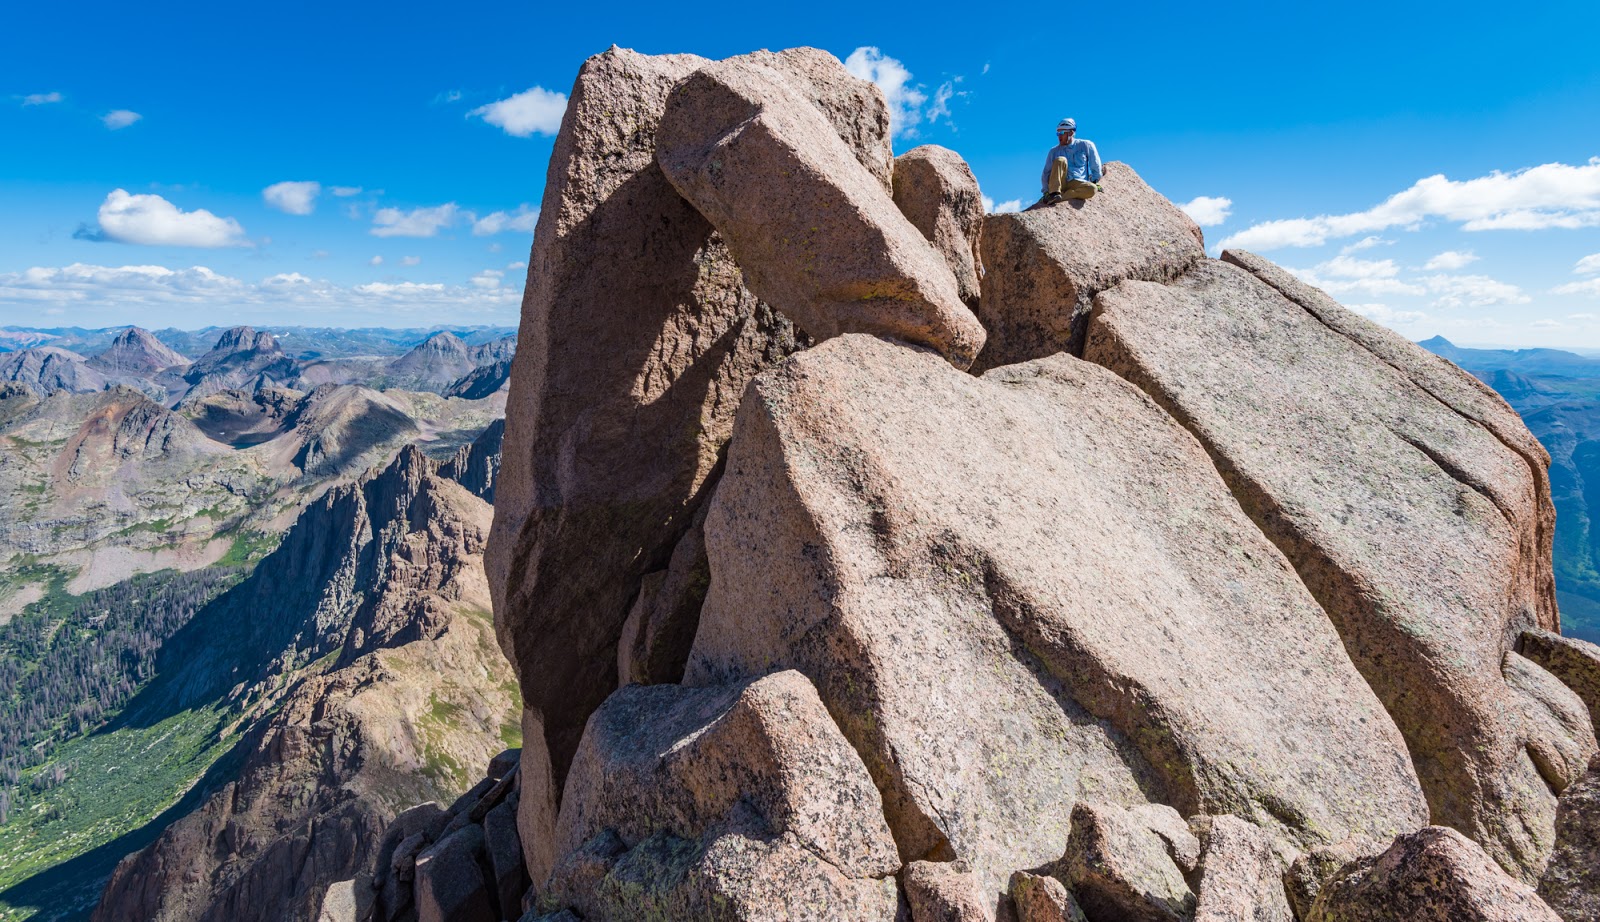
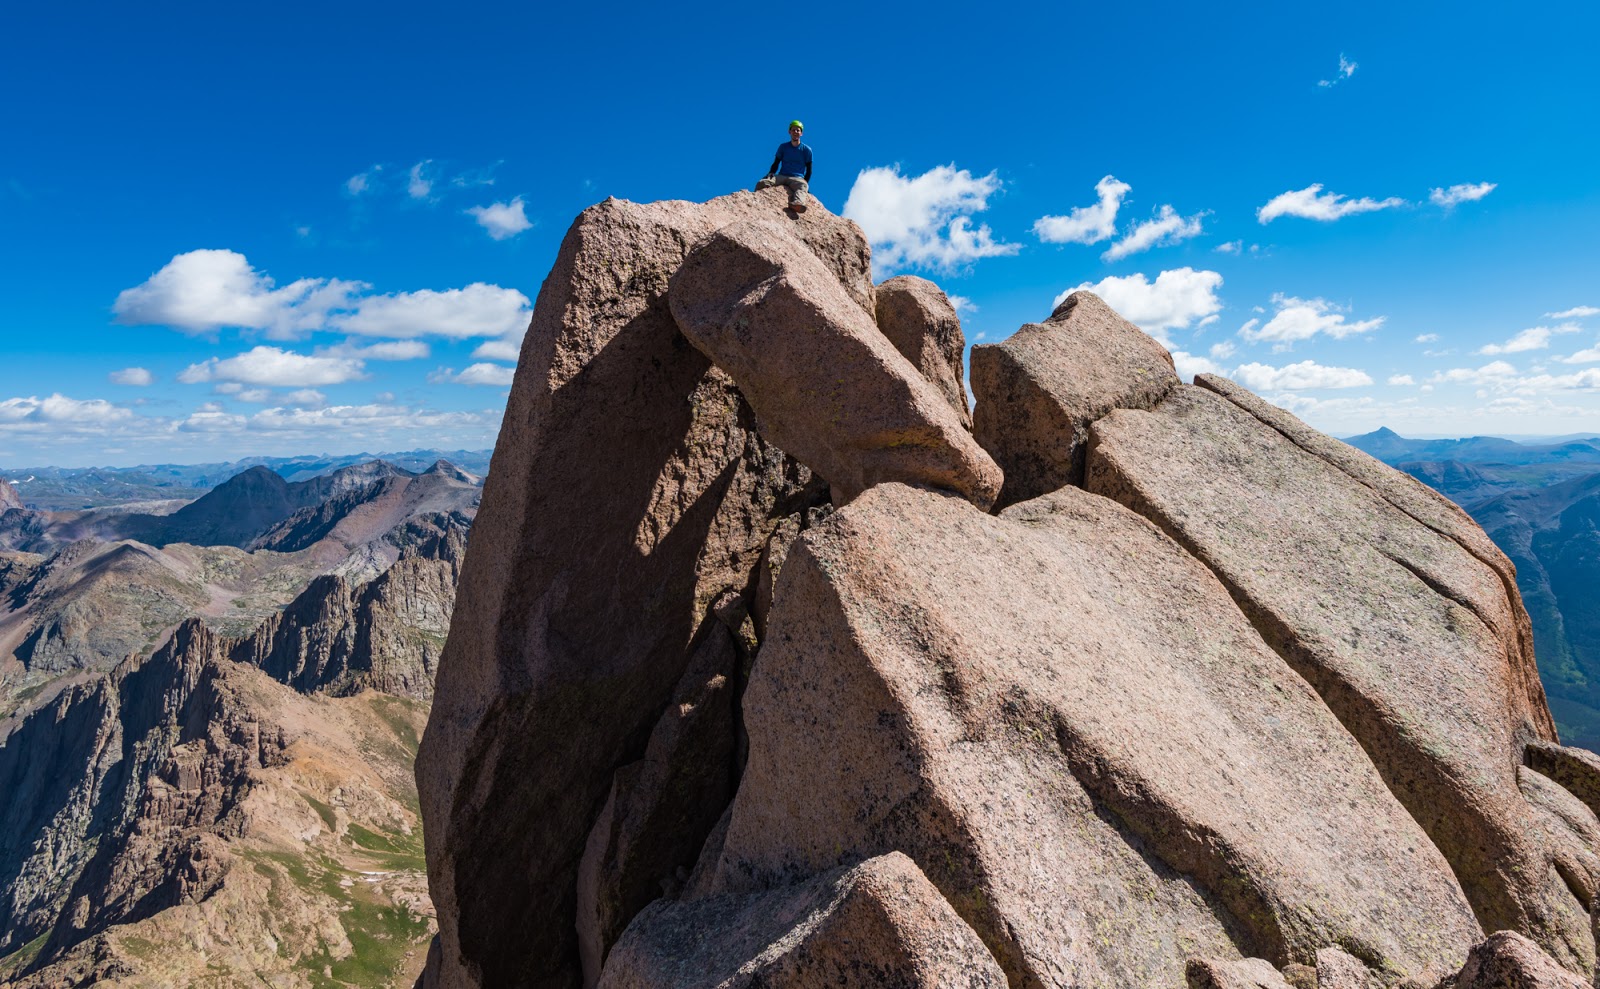
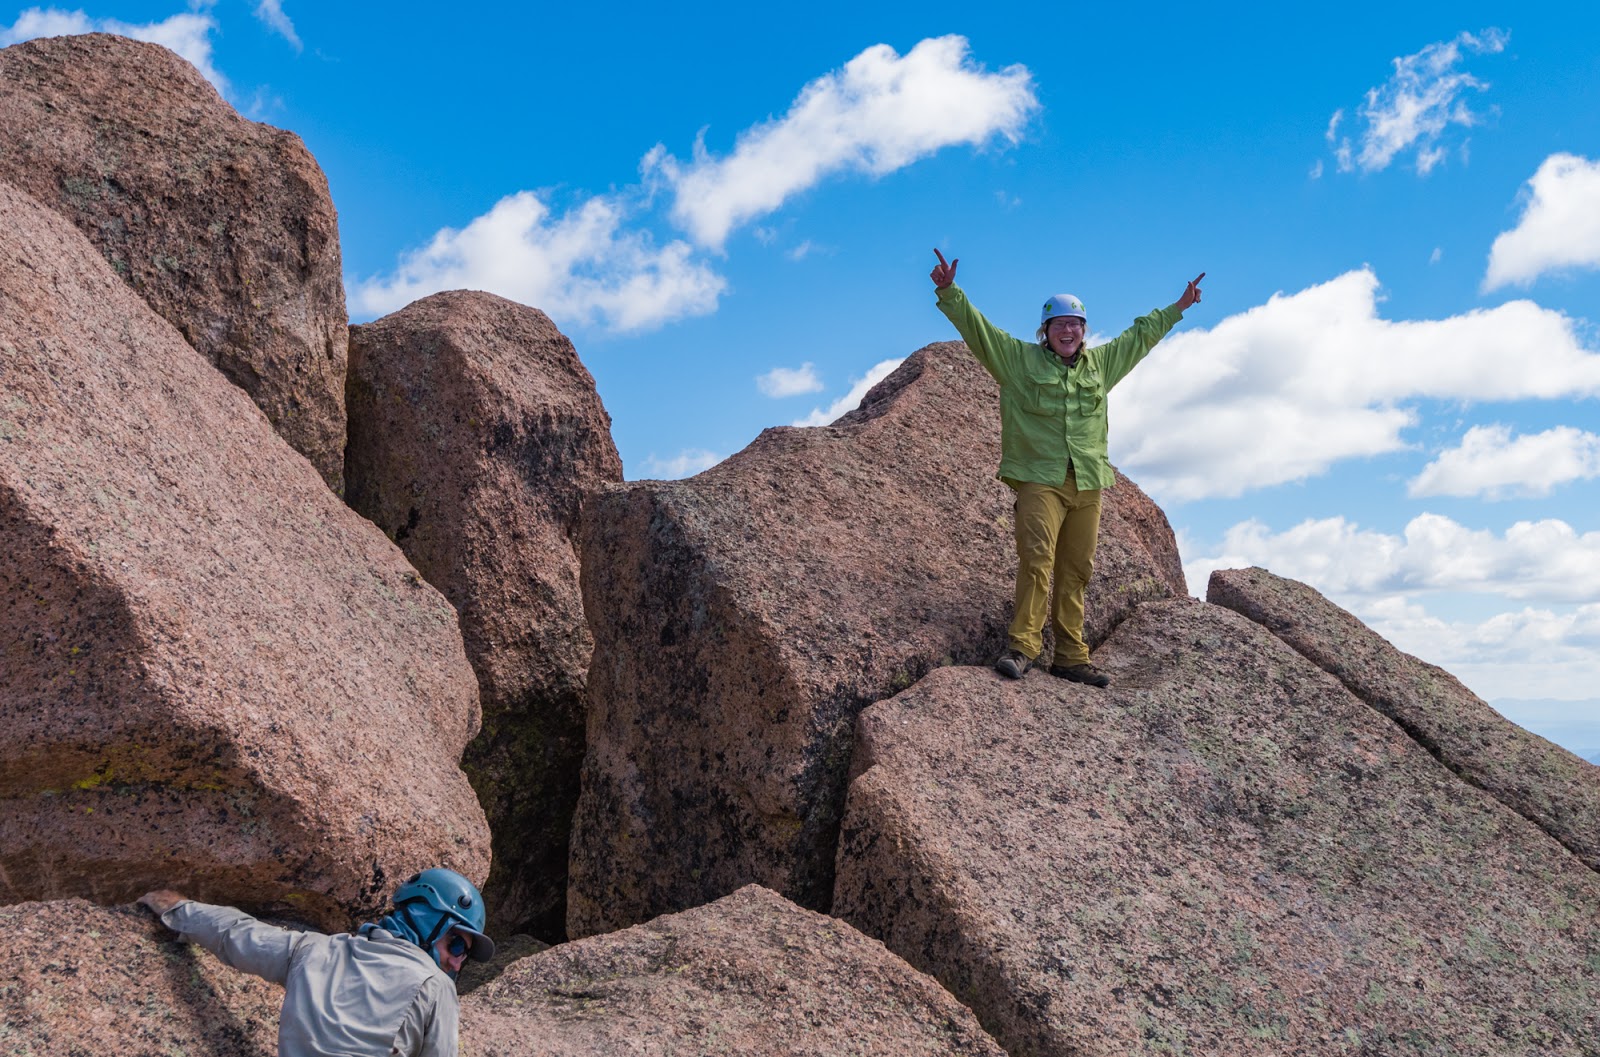
Dave on top of Sunlight Peak - hundreds of feet of open vertical space just a bit in front of him, immediately to his right, and behind him - this is, to this point, the most exposed summit I've ever been on. It blows the exposure on the summit of Utah's Wasatch Range's Lone Peak away...
A closer shot of Dave on the summit of Sunlight Peak! Arrow and Vestal Peaks area visible in the lower left quadrant of the picture, along with many other peaks stretching off into the distance. It's mountain country out here!
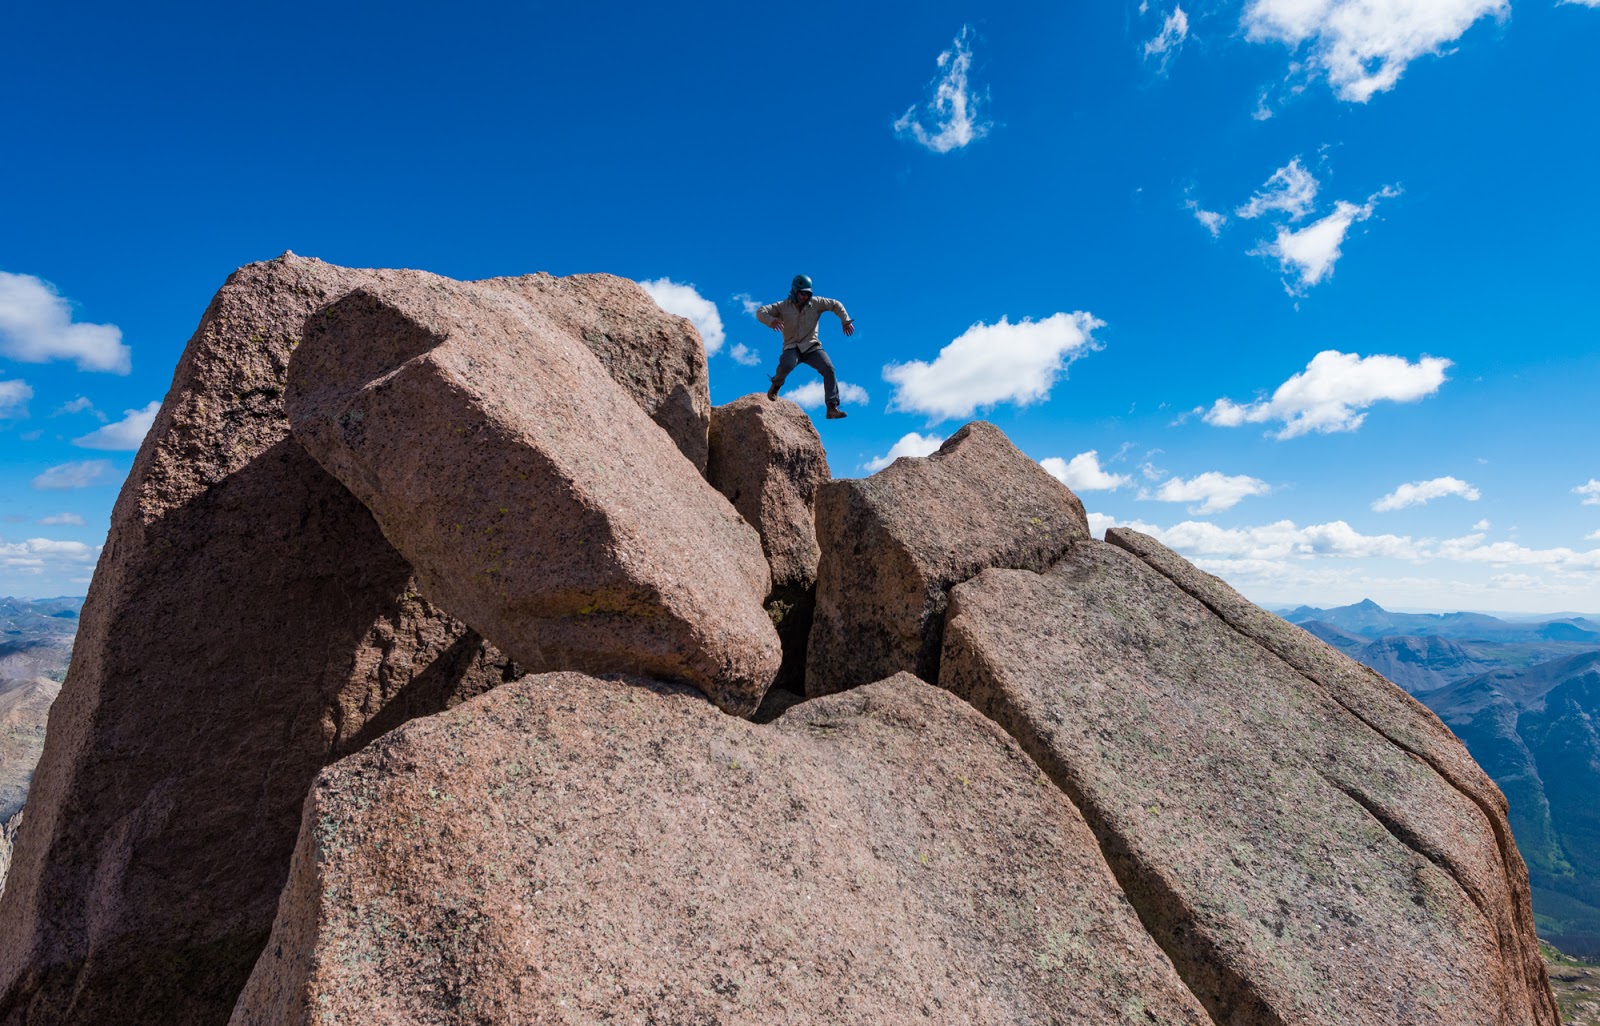
Dave prepares to make the consequential leap across the gap as he descends Sunlight Peak's summit...
I wasn't quite ready for his leap - so I didn't catch it, but he still did it and had a safe landing on the other side...Now he just had to get down from there...From where he is in this shot, Dave scrambled down the steep face of that block he's on top of, then followed that crack left until he was on the really big block (lower-center). After he made sure he had his footing he carefully scrambled/scooted right down the steep face of that block; at that point you're on much friendlier (but still bouldery) terrain and can move somewhat less cautiously since you're then outside of the immediate presence of any severe exposure.

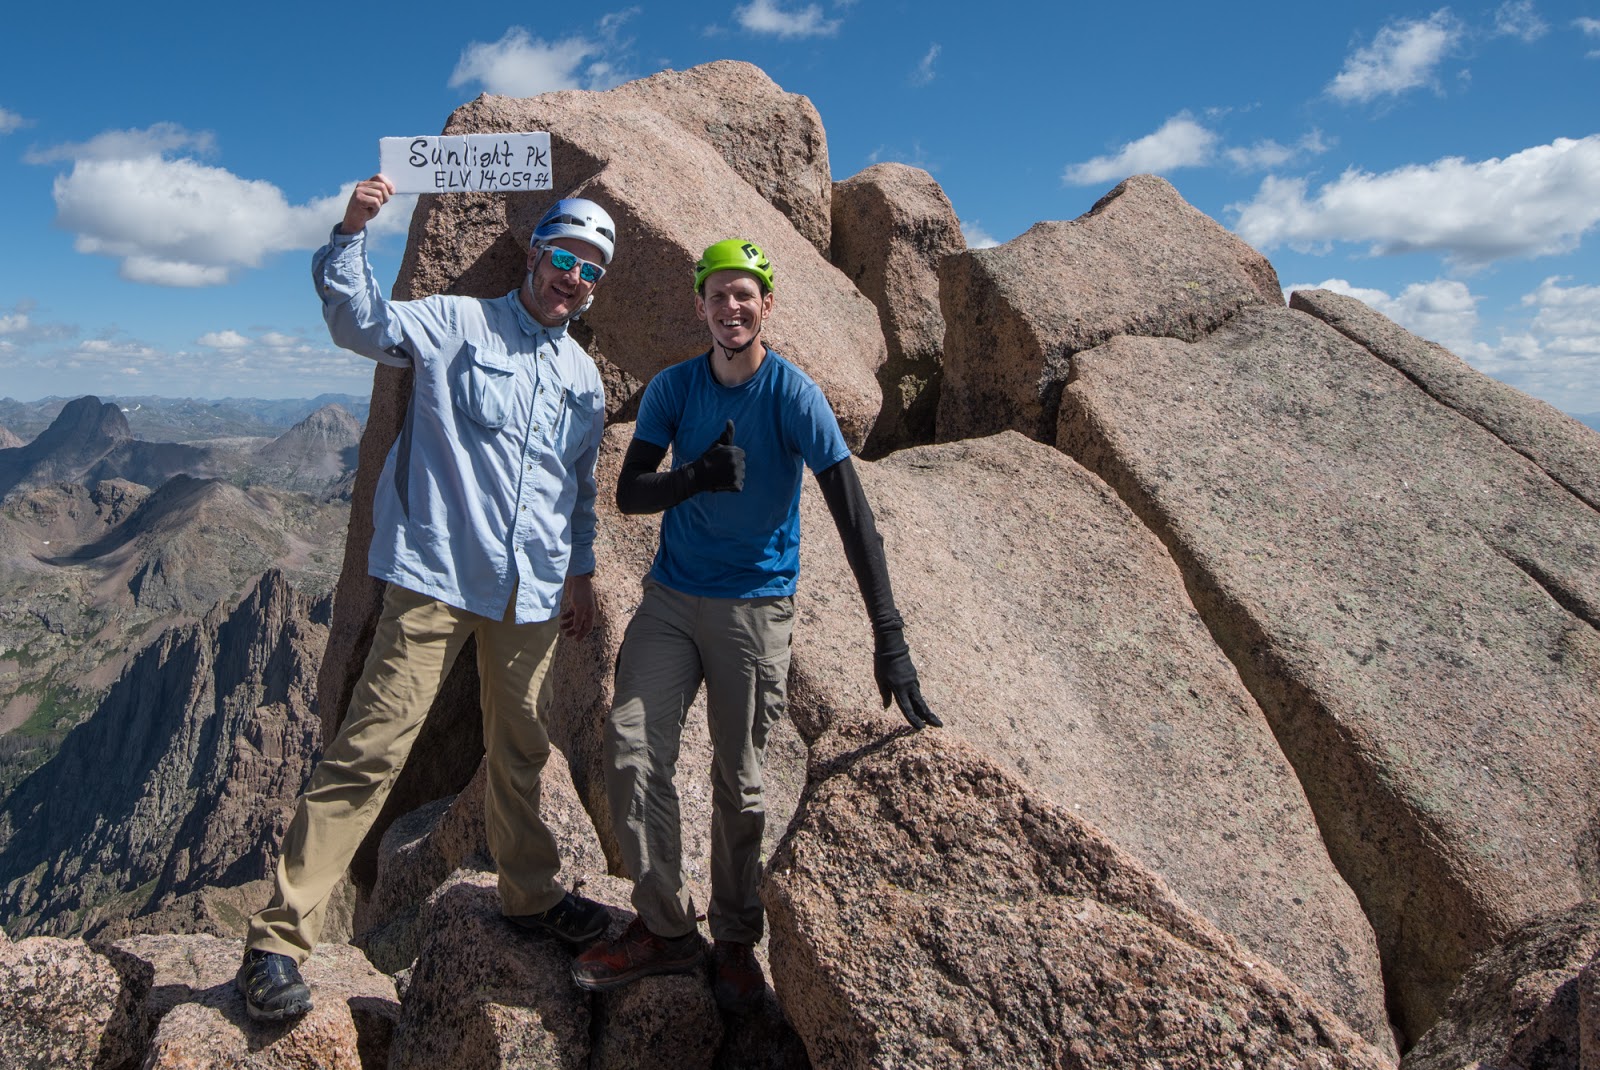
Caught Dave taking one of his (in)famous and unquestionably obligatory summit selfies with the Sunlight Peak summit benchmark.

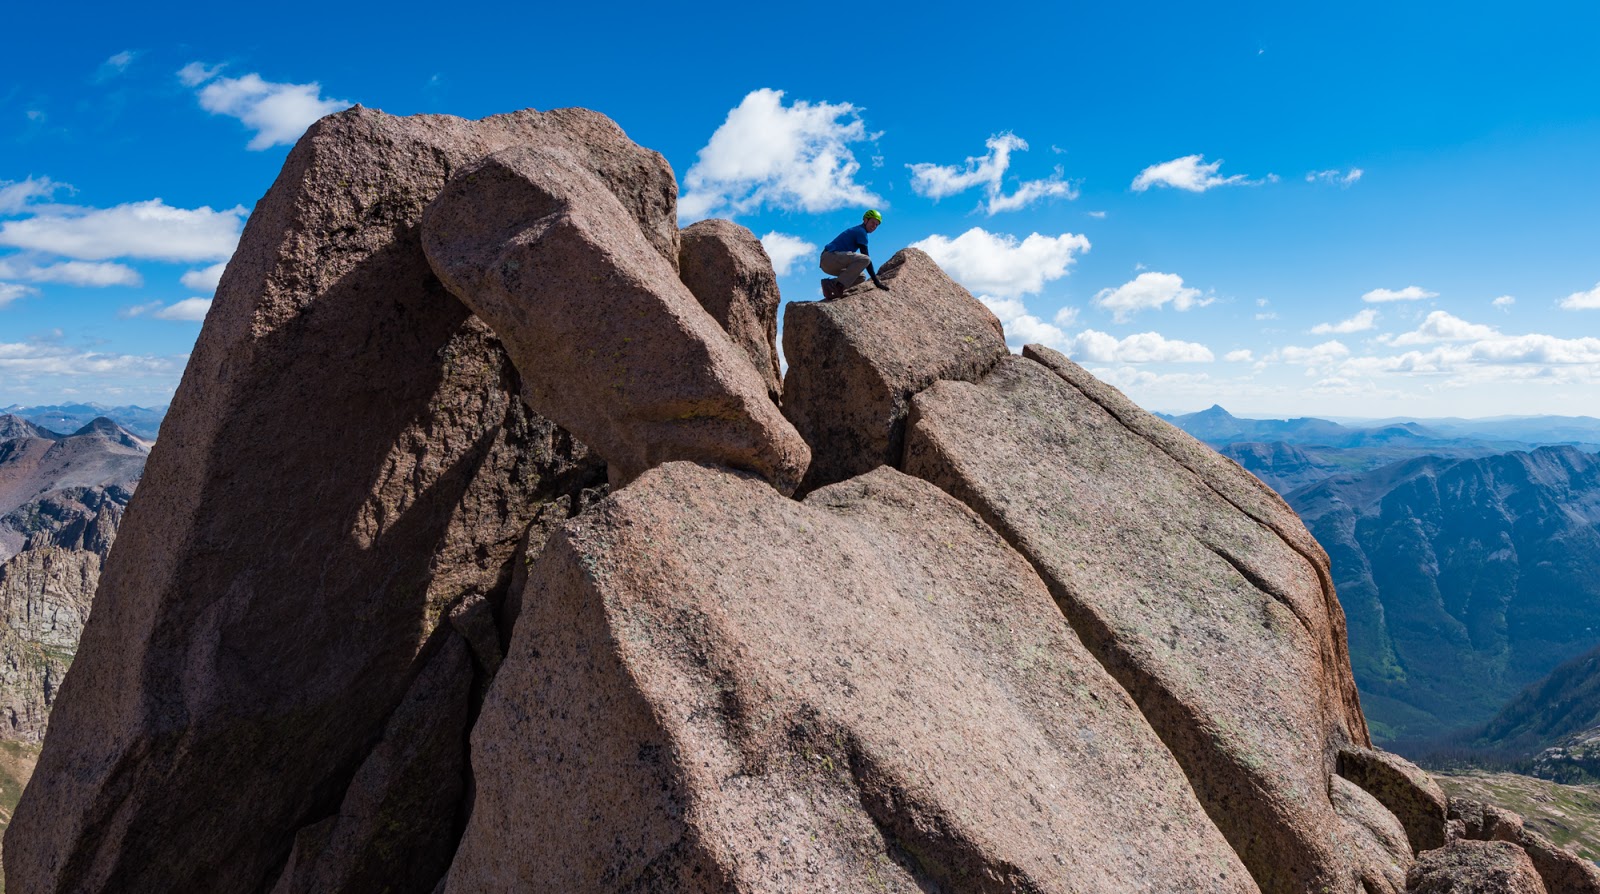
Dave captured the moment of me staring at the huge summit blocks...this was the point where I was trying to decide if I was really going to commit myself to what would be required to get up to the true summit... (Photo by Dave)
I decided to go for it... (Photo by Dave)

Initially you scramble up the large slab block partially seen in the lower left here, then grab the top edge of it and scramble across to the right before climbing up where I am here and traversing a bit along that crack I'm on until you get to a good spot to get up on that block my hands are on here... (Photo by Dave)

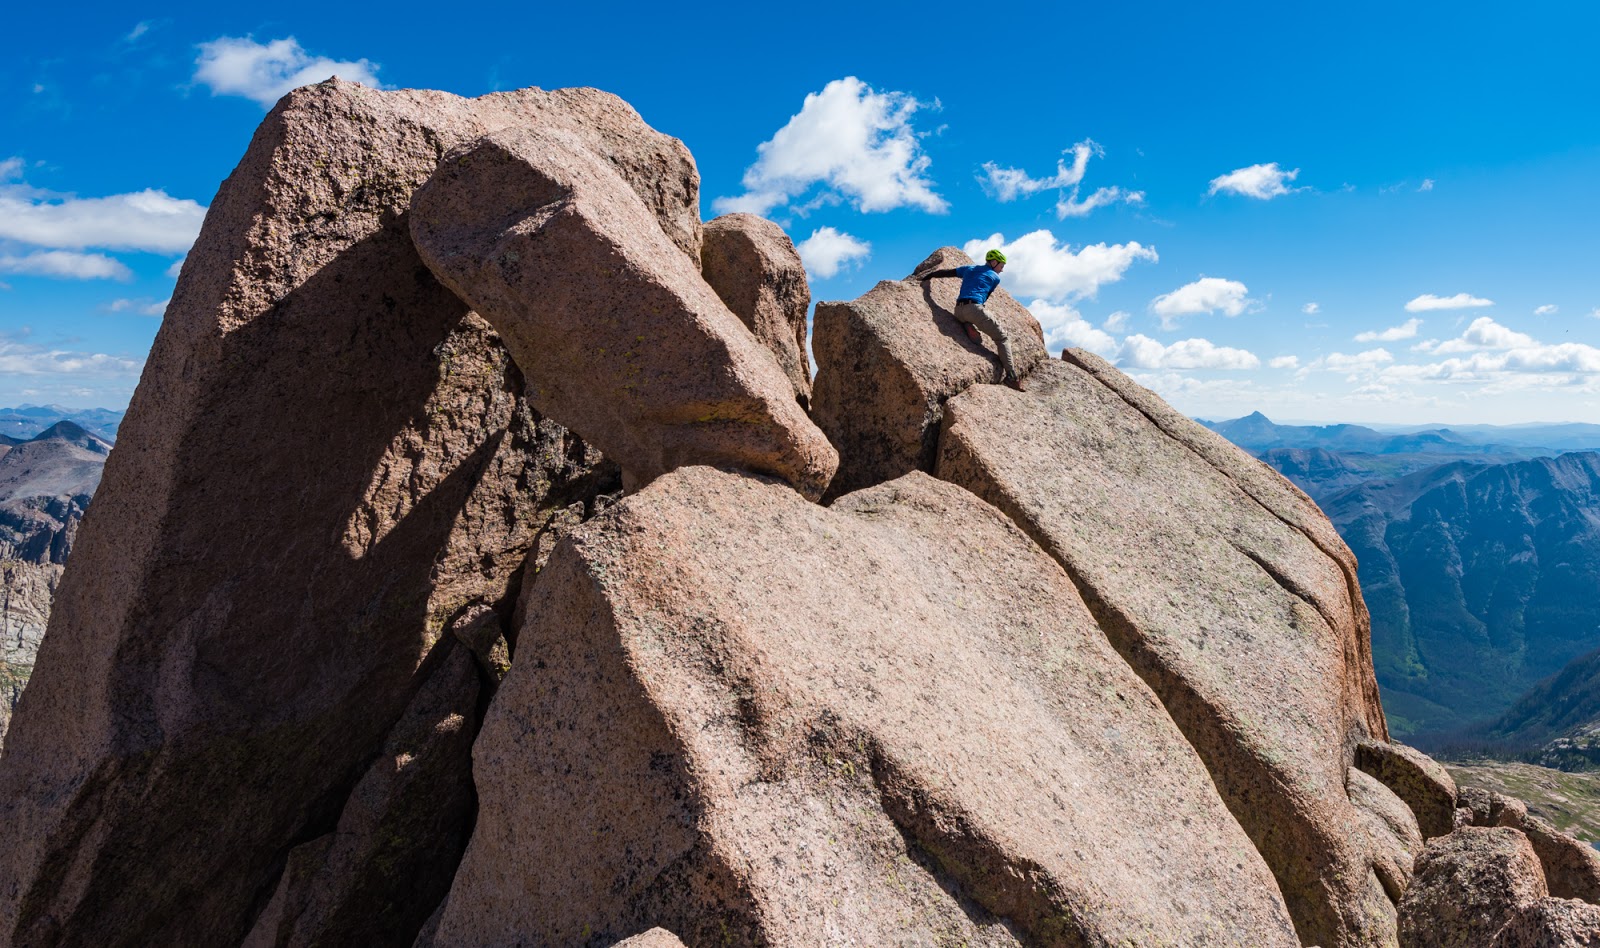
At this point I'm leaning across the eight to ten foot deep gap in the summit boulders; my hands are on the next block I have to get to. To make the move required a big stretched-out step with one foot onto the slightly slanted face my hands are on while I moved my hands onto the higher part of the block, quickly bringing my other foot across the gap and then scrambling up on top of this block. (Photo by Dave)

This is the place you first get the full-force of there severe exposure of the summit block, which is the larger block my hands are on. You can see there's a slight shelf on the edge of the summit block that makes it slightly easier to get up on, but it's still about a 3.5 foot step that's massively exposed to my right... (Photo by Dave)
Basically this is me crawling up onto the summit block from the second to last block; bear in mind, there is nothing but a whole lot of open air immediately to my right here, so very adjustment of body position is carefull calculated and cautiously executed... (Photo by Dave)

This was the first moment of "I really just did that" on Sunlight Peak...the second, and scarier of the two, came later...This was before I got bold enough (and physically stable enough) to take one of my hands off the summit block... (Photo by Dave)
***These next few shots of me on the summit were taken with my camera by Dave.***

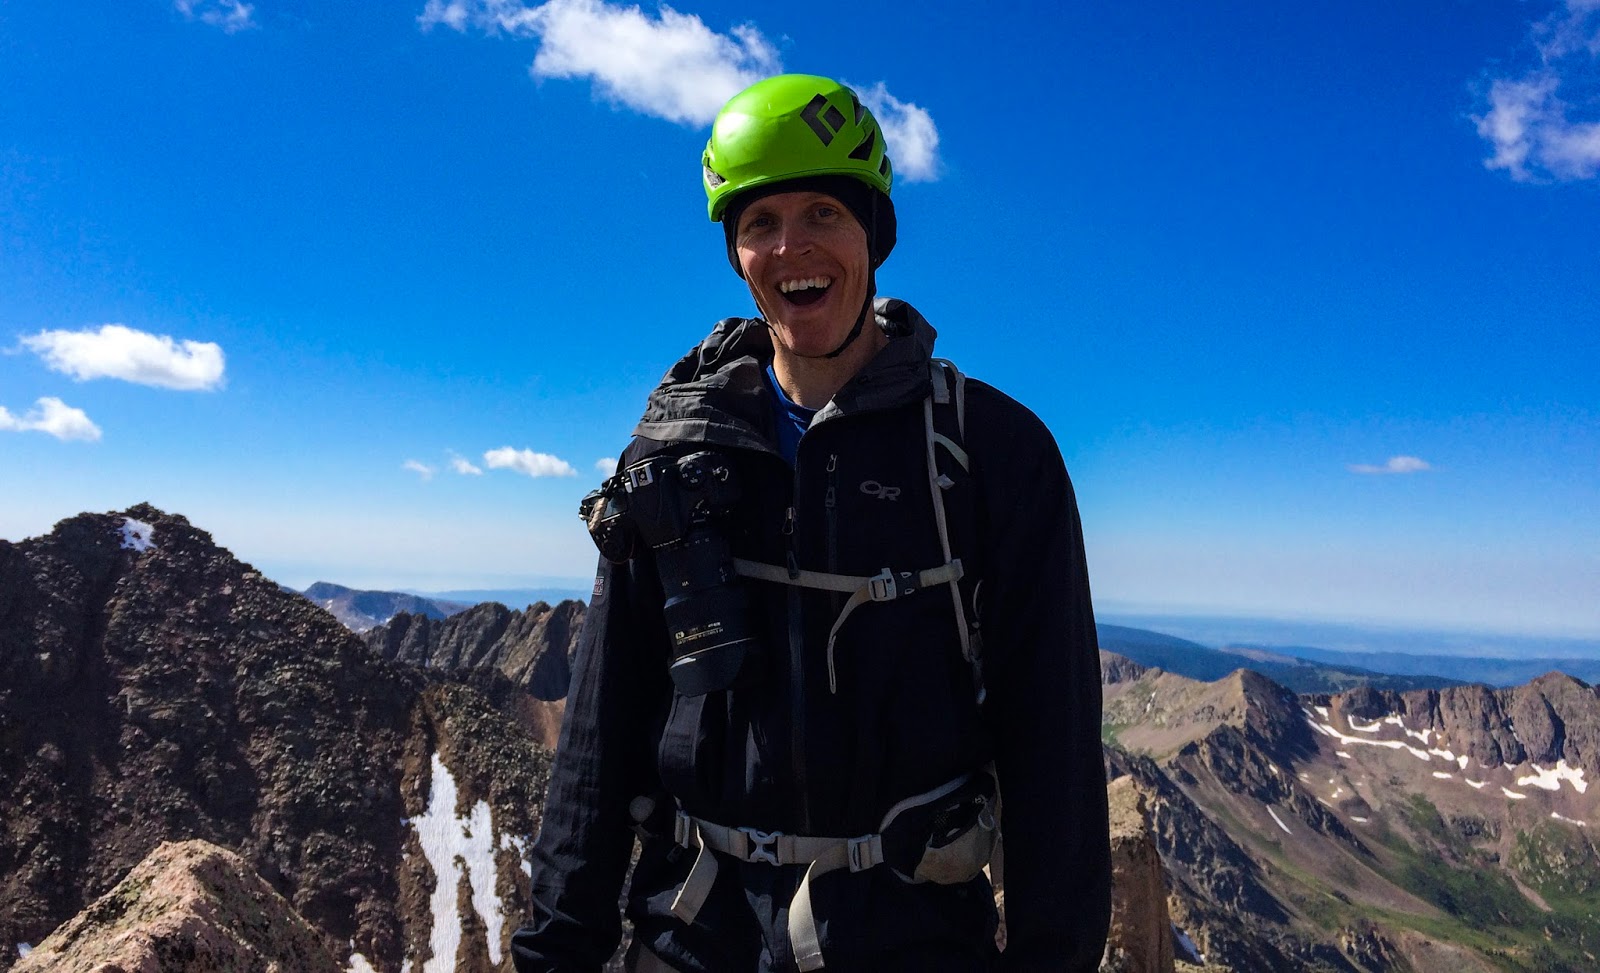
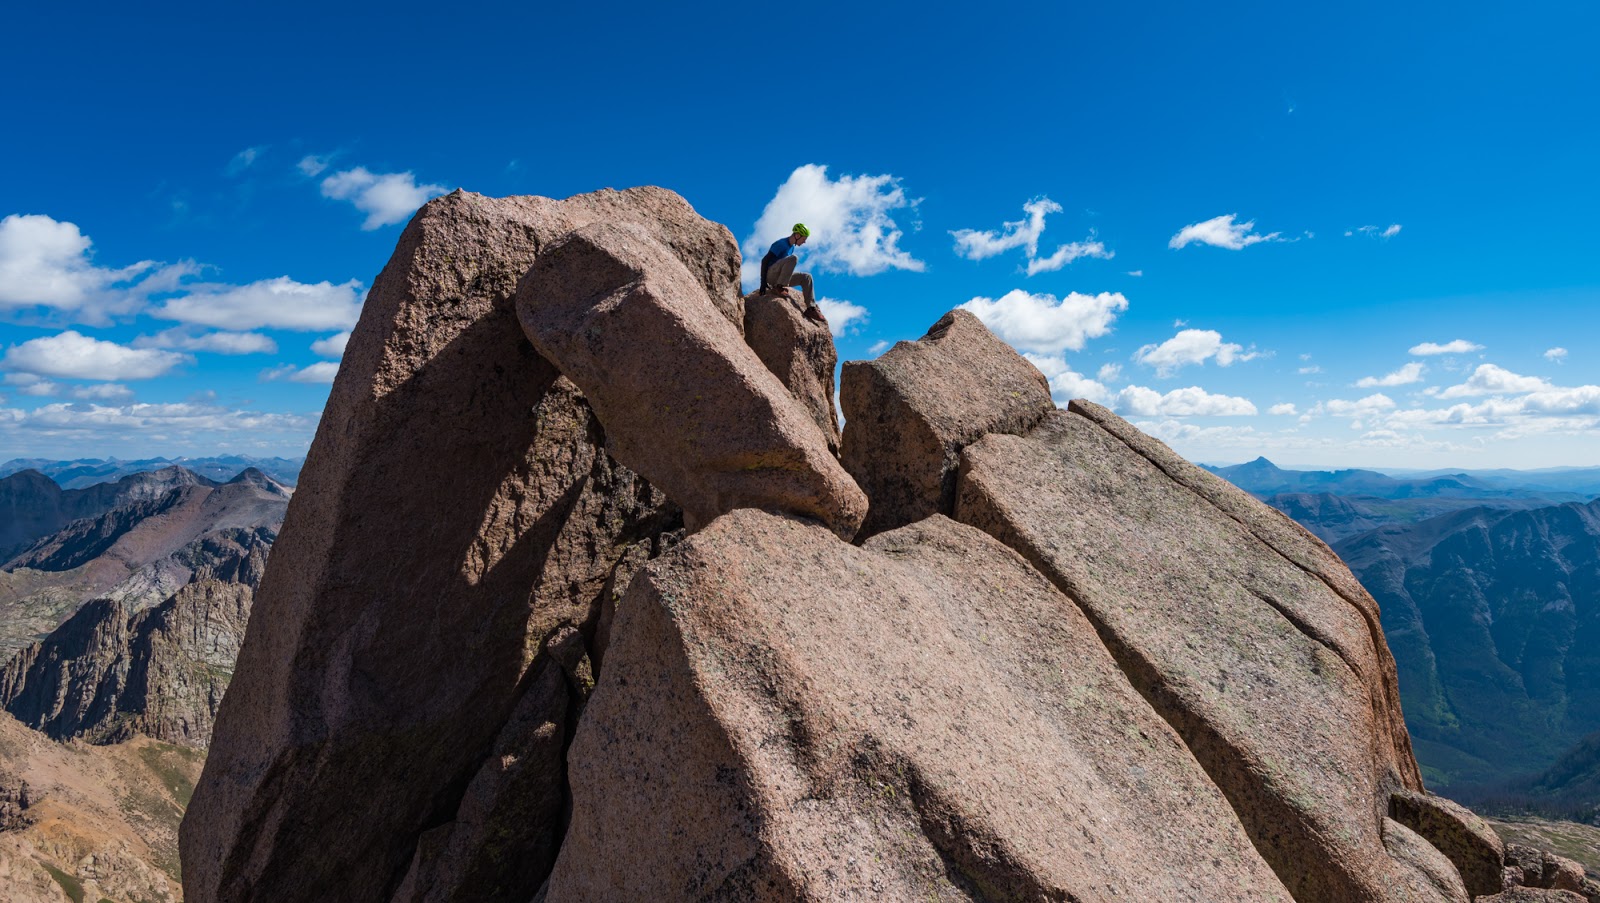
Me, on top of Sunlight Peak (14,059 feet)! The exposure (potential for a dangerous - in this case deadly - fall) was so crazy up here!
Dave takes a slightly wider shot, trying to convey how severely exposed this summit is...you just can't tell from anywhere except the summit block and the last block before it how exposed that entire side to my right is...My right foot is literally dangling in empty space above hundreds of feet of nothing to stop my fall in this shot...Wild and unforgettable!
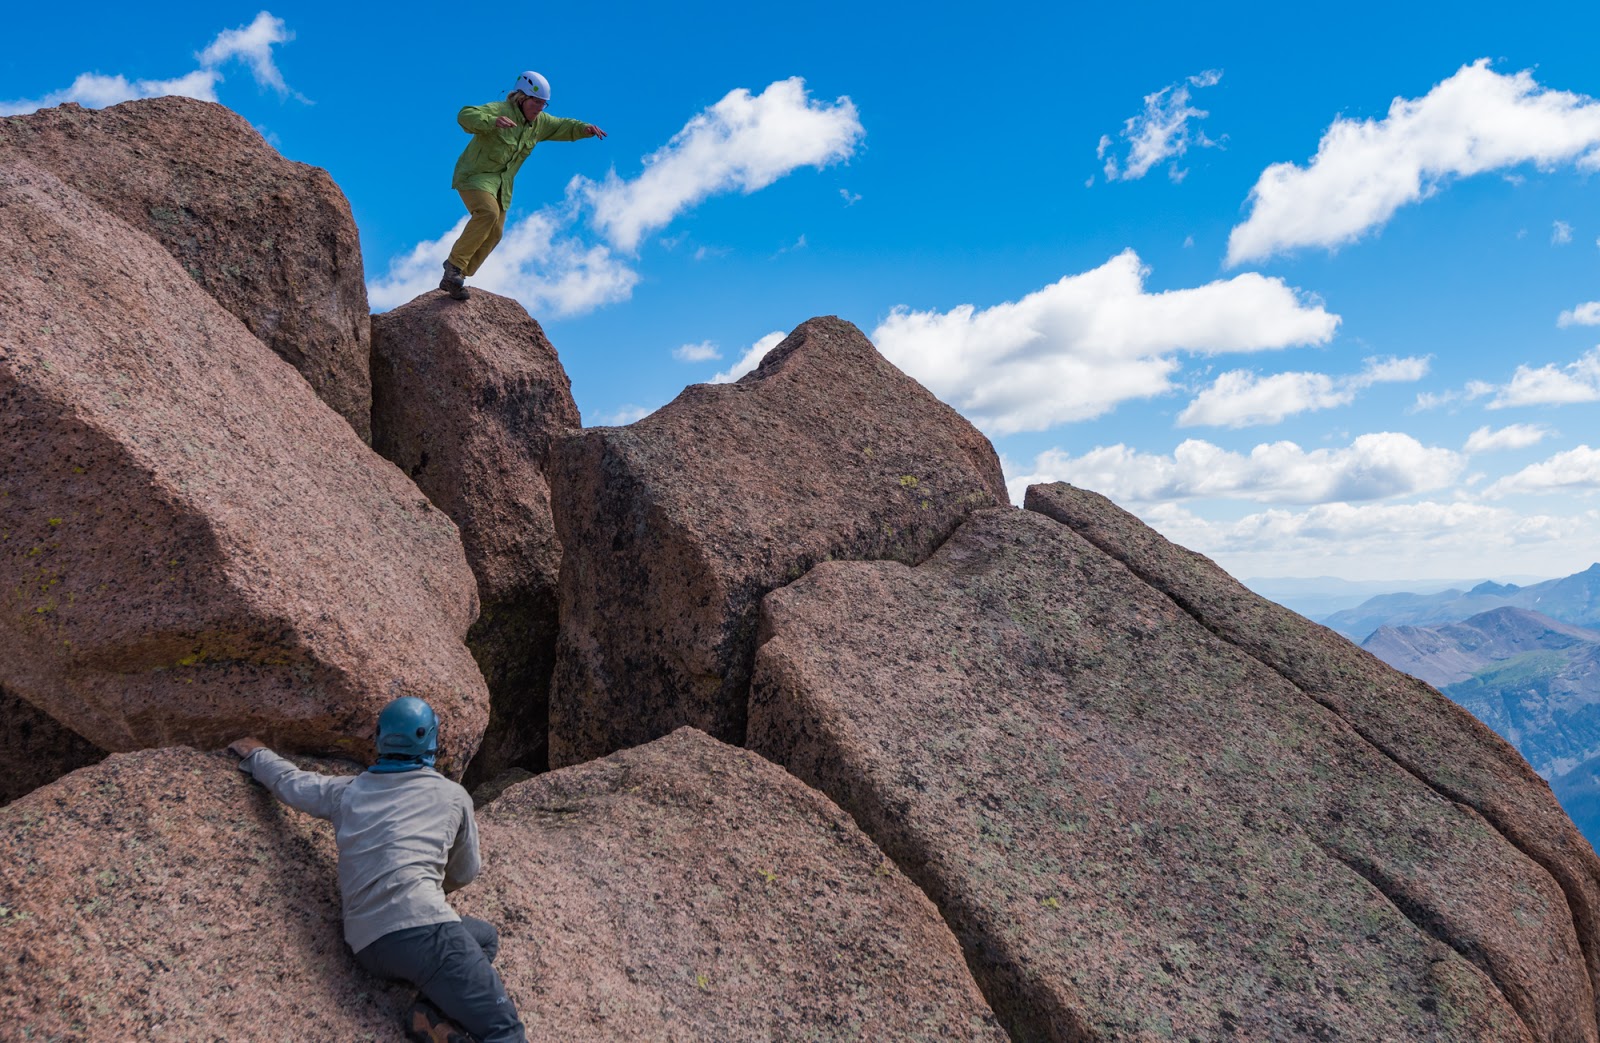
Okay, so, once you're up on the summit block the first little bit of excitement is turning around - remember you're balanced on a pretty narrow rock edge with your right leg hanging into empty space and your left leg somewhere on or around that steep down-slope on the other edge of the summit block with about a total 15 foot drop just below that edge...Also - in case you think that's not so scary, if you were to fall off the shorter side (left, from the direction you'd be facing when you first get up on the summit) that about 15 foot drop would likely deposit you onto sloping blocks that would then dump you off the side of a several hundred foot drop on the other side of the peak...so - you just don't want to fall anywhere up here! Once you carefully turn yourself about you carefully lower yourself the 4 (or so) feet onto the block just below the summit - this block also has massive exposure to the one side and the now about 12 foot drop (now on your left) through the gap in the rocks...now comes the fun part. You've got about a three foot vertical drop to the next block, but there's also a 4 - 5 foot wide gap between the rocks (with a drop off below); some tall people try to stretch out from one block to the other, but if you slip you're still gonna be in a bad way and that's an awkward proposition for most at best...The standard way to get off this high block and over the gap is to jump...Now, picture the scene:
You're on this smaller, somewhat rounded block, just ahead of the horizontal gap between you and the next block ahead of you and below you...you're looking down, almost immediately in front of your feet over about 10 - 11 feet of drop-off between the blocks, to your left - with nothing between you but the air itself - a vertical drop of hundreds of feet...You have to leap across the horizontal gap here...When you're stepping up from the lower rock (across the gap) to the higher rock on the way up the gap is only about 3-4 feet, but starting from higher up on the rock - where you make the leap - increases both the vertical and the horizontal distances to be crossed...To make things a bit more exciting, the block you have to land on, on the other side of the leap is pretty narrow, with the massive drop-off to the left, the 10 (or so) foot gap into the rocks immediately below, and if you jump too far you'll tumble off the steeply down-sloping block toward another very large (and likely fatal) drop off...a leap of faith, indeed!
You're on this smaller, somewhat rounded block, just ahead of the horizontal gap between you and the next block ahead of you and below you...you're looking down, almost immediately in front of your feet over about 10 - 11 feet of drop-off between the blocks, to your left - with nothing between you but the air itself - a vertical drop of hundreds of feet...You have to leap across the horizontal gap here...When you're stepping up from the lower rock (across the gap) to the higher rock on the way up the gap is only about 3-4 feet, but starting from higher up on the rock - where you make the leap - increases both the vertical and the horizontal distances to be crossed...To make things a bit more exciting, the block you have to land on, on the other side of the leap is pretty narrow, with the massive drop-off to the left, the 10 (or so) foot gap into the rocks immediately below, and if you jump too far you'll tumble off the steeply down-sloping block toward another very large (and likely fatal) drop off...a leap of faith, indeed!
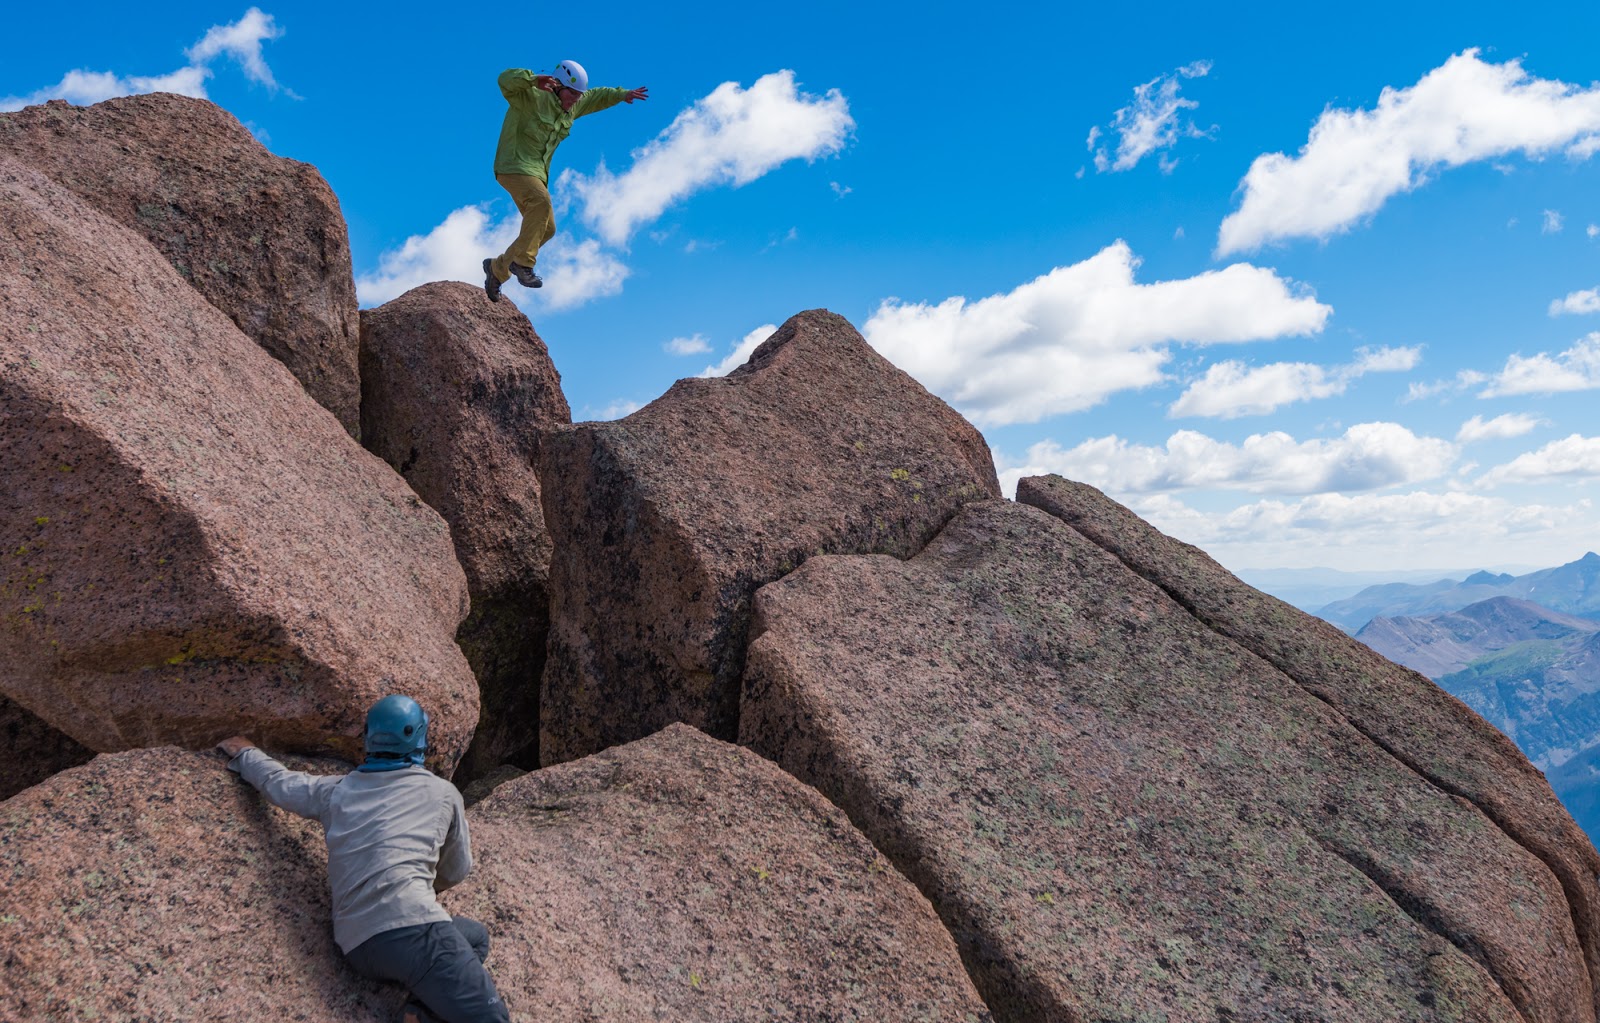
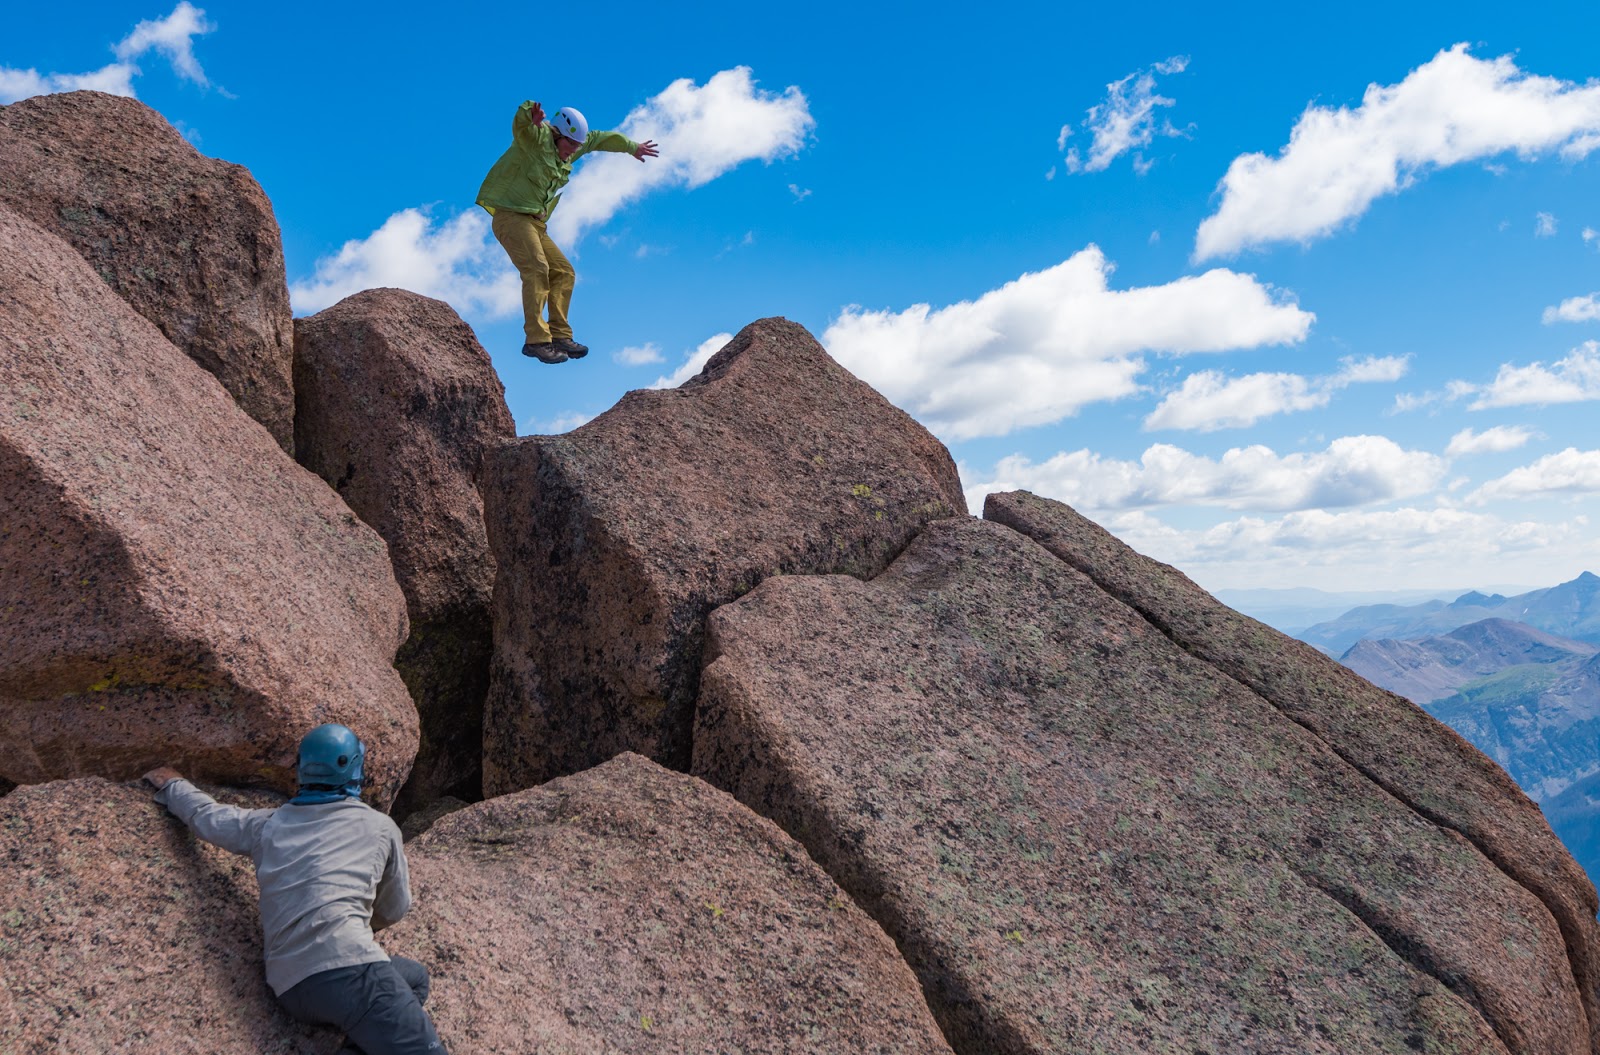
Steeling myself before that leap...We didn't have the camera in "high speed mode" at this point, but Dave did manage to catch the latter end of my jump just before I landed on the lower block. I was yelling over to him before I jumped, making sure he was ready to try and catch the moment, since I had no intention of doing it more than once on this trip...
The very real potential consequences of this particular move constitute the collective reason why I stood for a time and pondered and did some praying before starting up the first major block of the final summit approach...I knew if I crossed that gap just before the summit I was committing myself to getting back safely, which likely meant making that consequential leap across the gap...I distinctly remember carefully lining myself up on the sloping block just before the gap, steeling myself, and jumping. Dave captured the latter part of my jump; if I'd had more presence of mind (there was a lot of nervous anticipation leading up to this summit) I would've swapped the camera into "high speed mode" which likely would've caught more of the action. I didn't get a picture of Dave making the jump, though he did (seeing him make it, I'm sure, encouraged me in having confidence about the nature of the jump itself and my - likely - ability to make it). Later we met two brothers on the summit and I was able to capture pictures of them making the jump. Between the pictures of Dave, me (including some from Dave's phone), and the ones I took of the brothers with my camera in "high-speed mode" this post includes the most comprehensive visual beta I've ever seen online for navigating the ascent and descent of the summit area on Sunlight Peak. - you know, in case you're curious about that.
The physical energy and mental excitedness from making that jump lasted for at least an hour after it happened...it's one of those "did I really just do that?!" moments...
The physical energy and mental excitedness from making that jump lasted for at least an hour after it happened...it's one of those "did I really just do that?!" moments...

The end of my jump...Sweet glorious adrenaline, Batman!
This was me crouching on the lower block just after the jump, heart-poundingly contemplating the reality of what I'd just done. Intense!
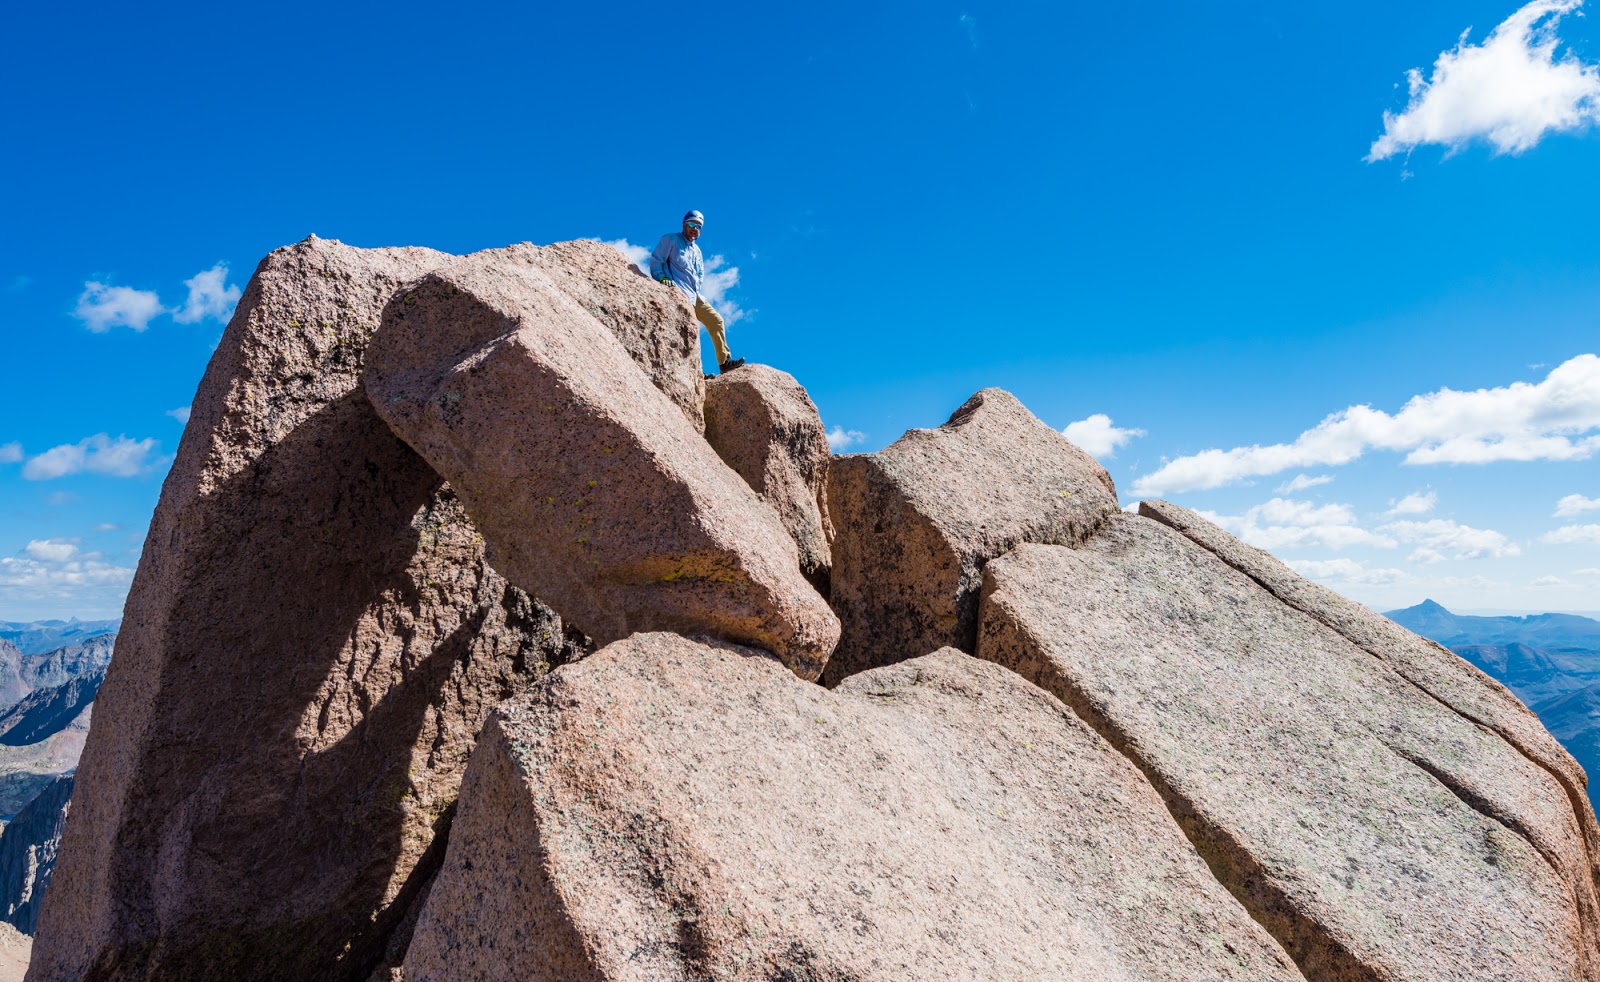
You can see, in these shots the basic idea for navigating the blocks down from the summit of Sunlight Peak; you'd follow the same course on the way up, generally speaking.
Following the crack across...
The eight (or so) foot drop into the boulder pile is immediately to my right in this picture, and - a bit further out, nothing for a long ways...
Carefully stepping down...
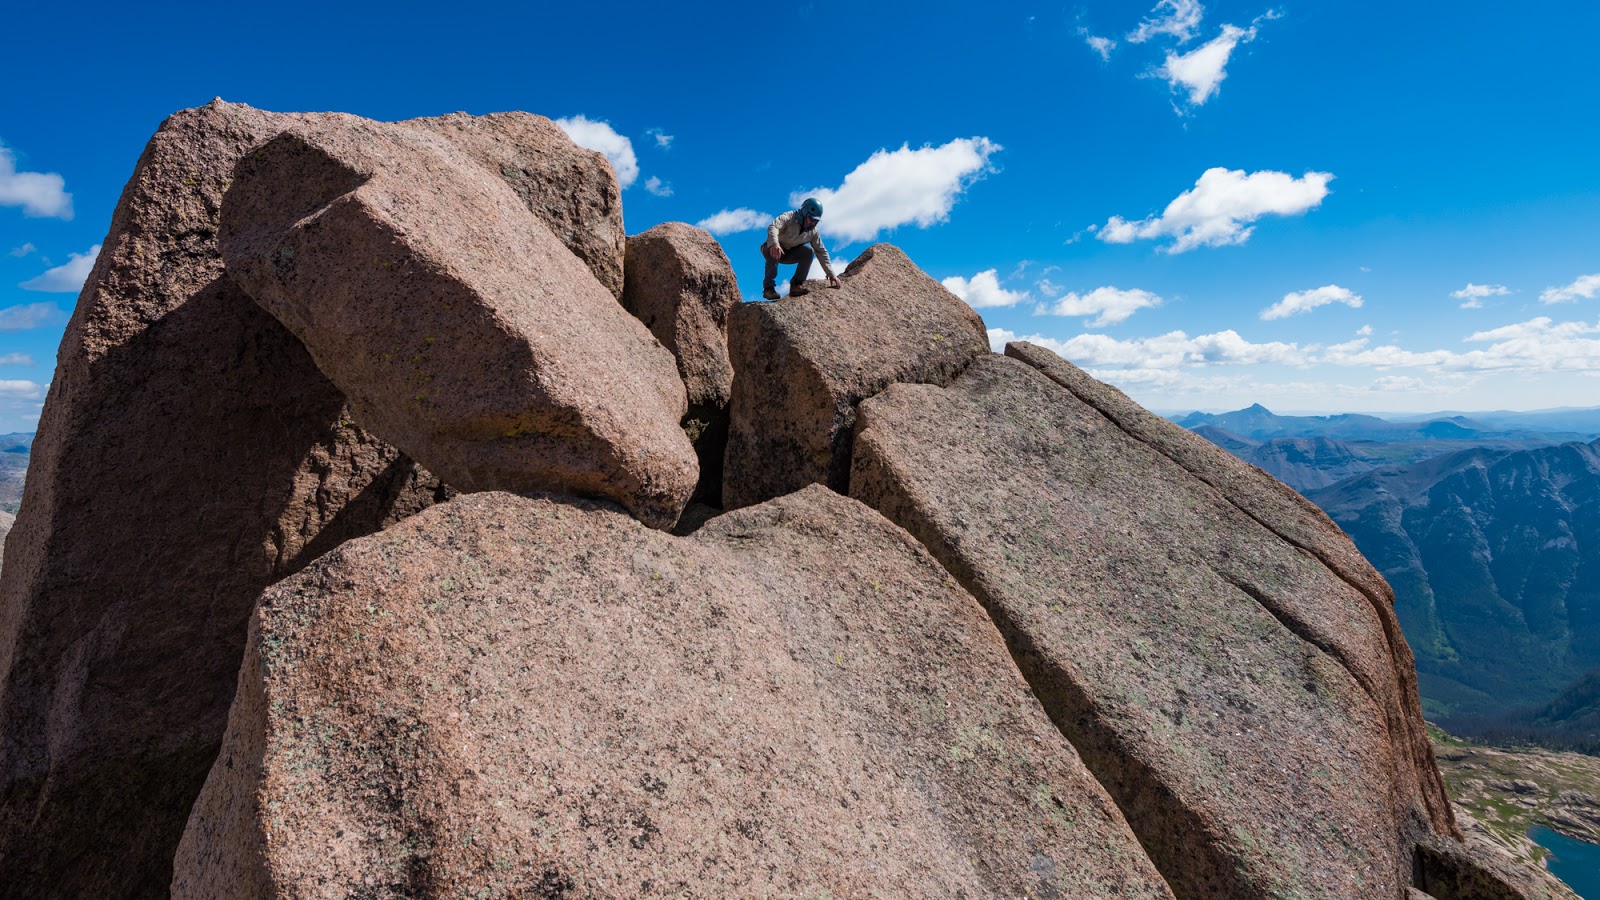
I contemplated going down the large block the same way Dave did...I had come right up the face of this block on my ascent to the summit...
...After some pondering that route option and looking for possible alternatives, I decided to stem down the large crack between the two boulders just behind me here since the movements required there didn't look too severe and seemed lower-consequence to me if I were to slip or something...
Stemming down the crack between the two large boulders at the base of the main summit pile of Sunlight Peak.
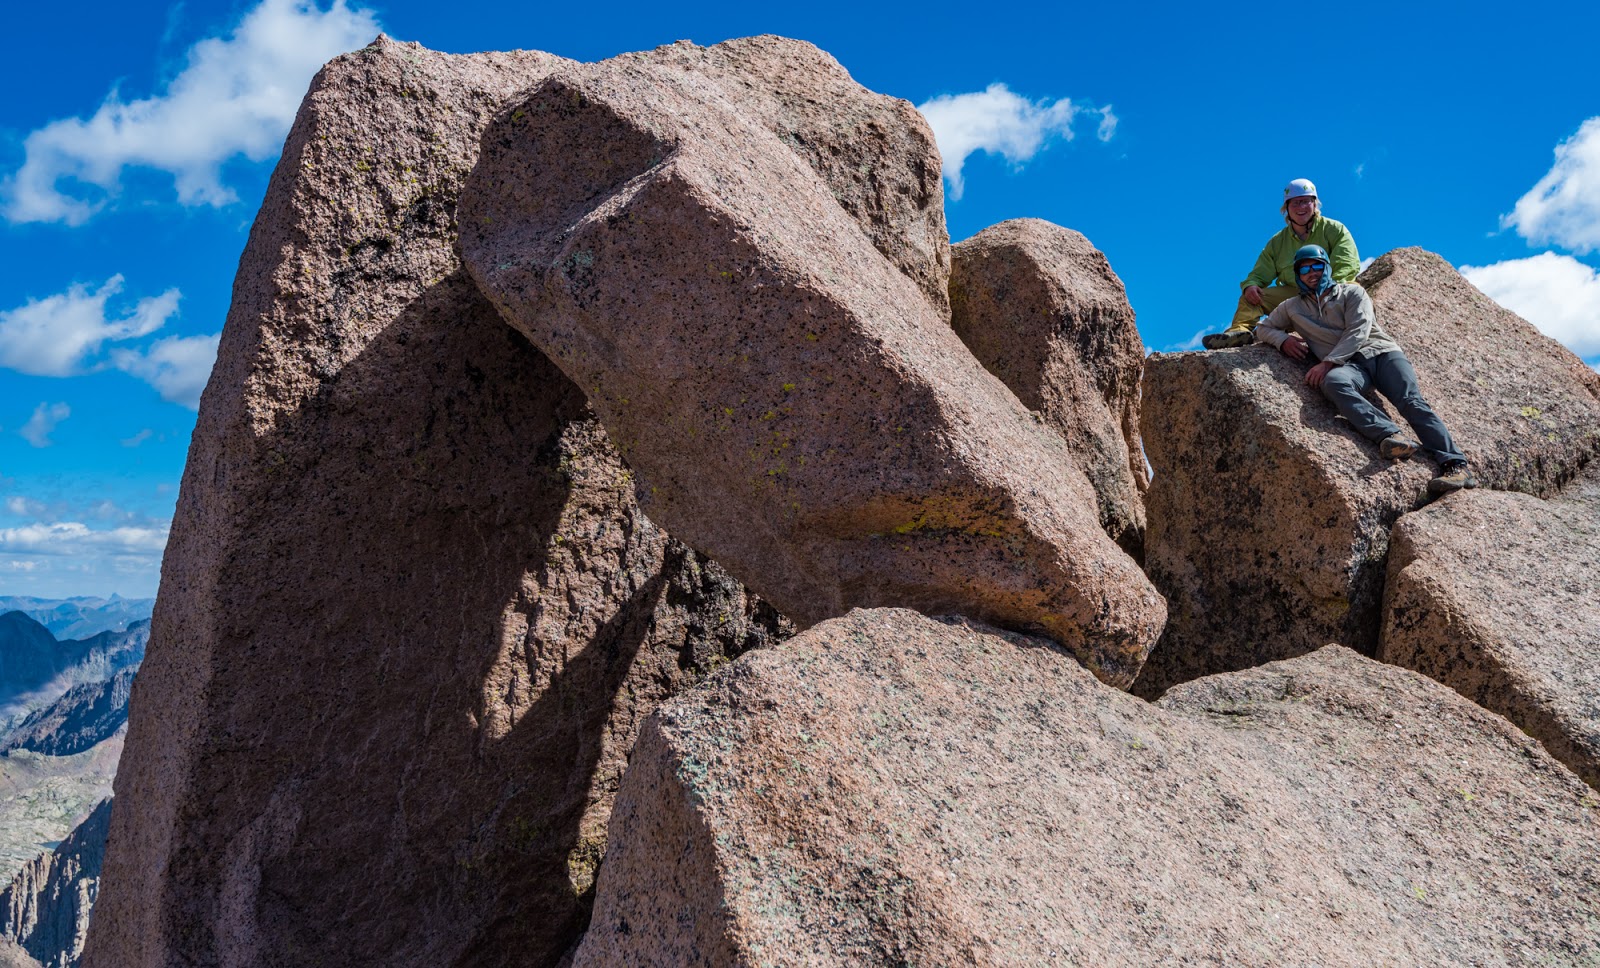
Me, enjoying a snack and a little recuperation after that summit experience up on Sunlight Peak... (Photo by Dave)
Some action shots of the two brothers who came up to summit Sunlight Peak shortly after Dave and I completed our own summits there. I offered to take some action shots of them making the jump and to send them the pictures after I got them edited some weeks after the trip; they agreed and thus I was able to do them a kindness while also gather some excellent examples of how significant a jump this is between the blocks...it's not your standard step across a little, though highly exposed, gap...
He lands it!
The two brothers, named David and Matthew (David's in the khaki-colored jacket).
Matthew carefully climbs off the summit block after sitting on it briefly. This shows, probably best of any shot I have, how large the step down from (and, before this, up to) the second to last block to the final summit block is...If it wasn't crazily-exposed it would be a relatively simple boulder scrambling move...but the psychological effect of the extreme exposure immediately to your right (there's nothing there!) as you make the large scrambly move up/down here is very real and definitely registers strongly on the "intense scale".
Matthew makes the jump - look how big this is...
Matthew makes the jump - look how big this is...
Making a leap this big and having such a small, narrow platform to land on with so much exposure immediately to your left now (since you're facing the opposite direction on your descent) is so wild...I'm getting goosebumps just writing about it even though I'm putting this post together a little over a month after the summiting actually occurred here.
He lands it too!
Success!
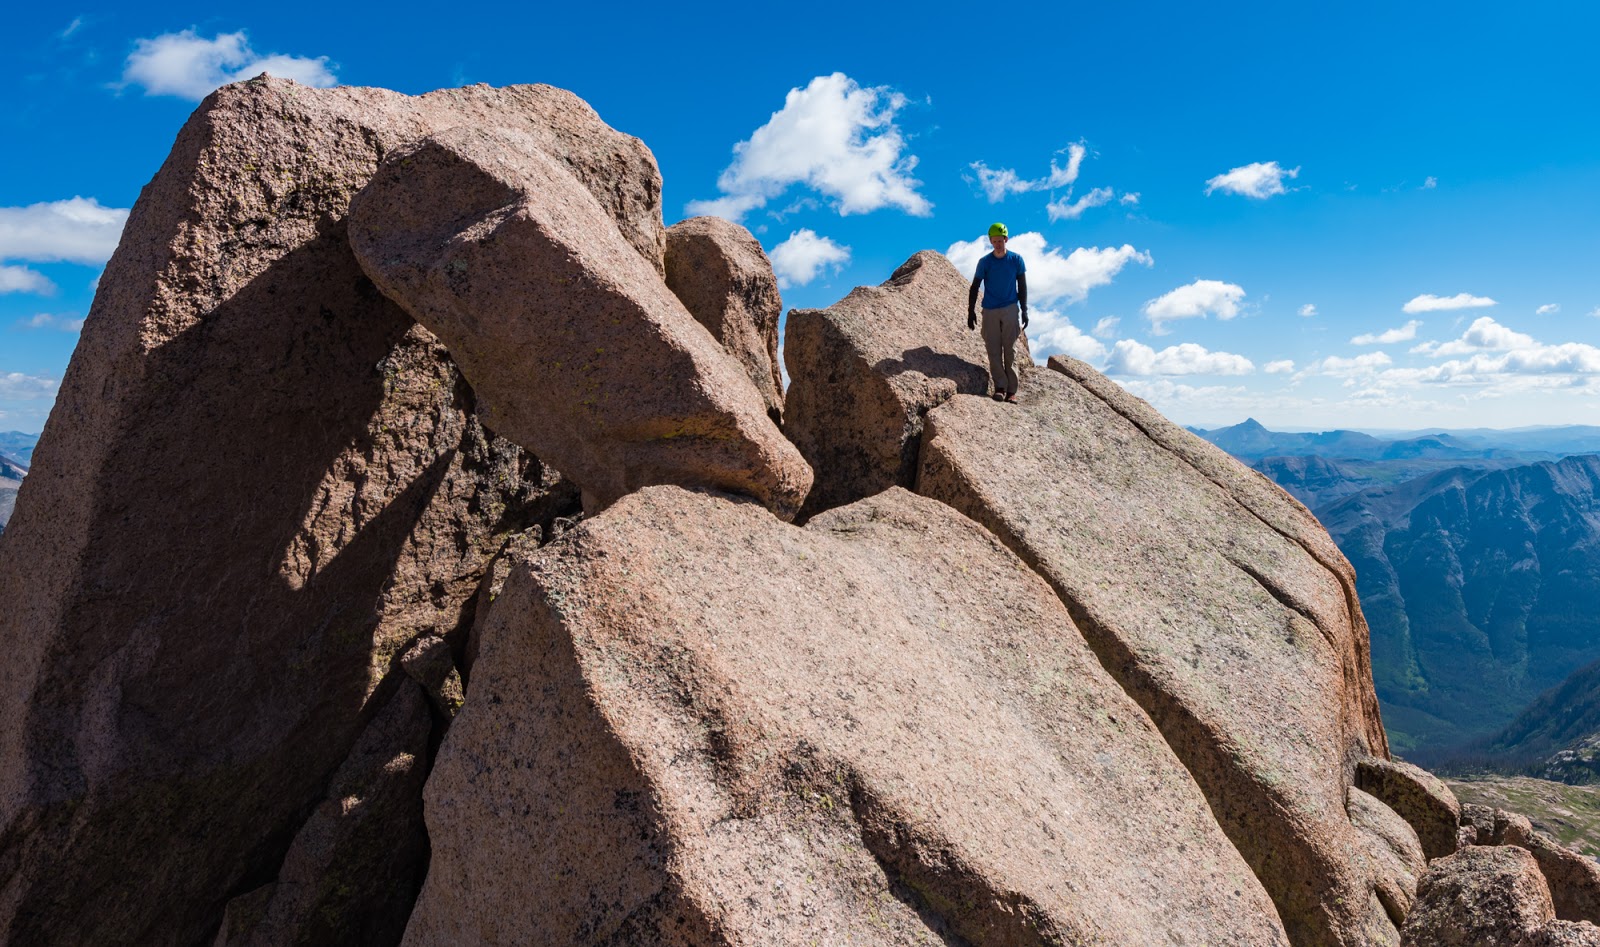
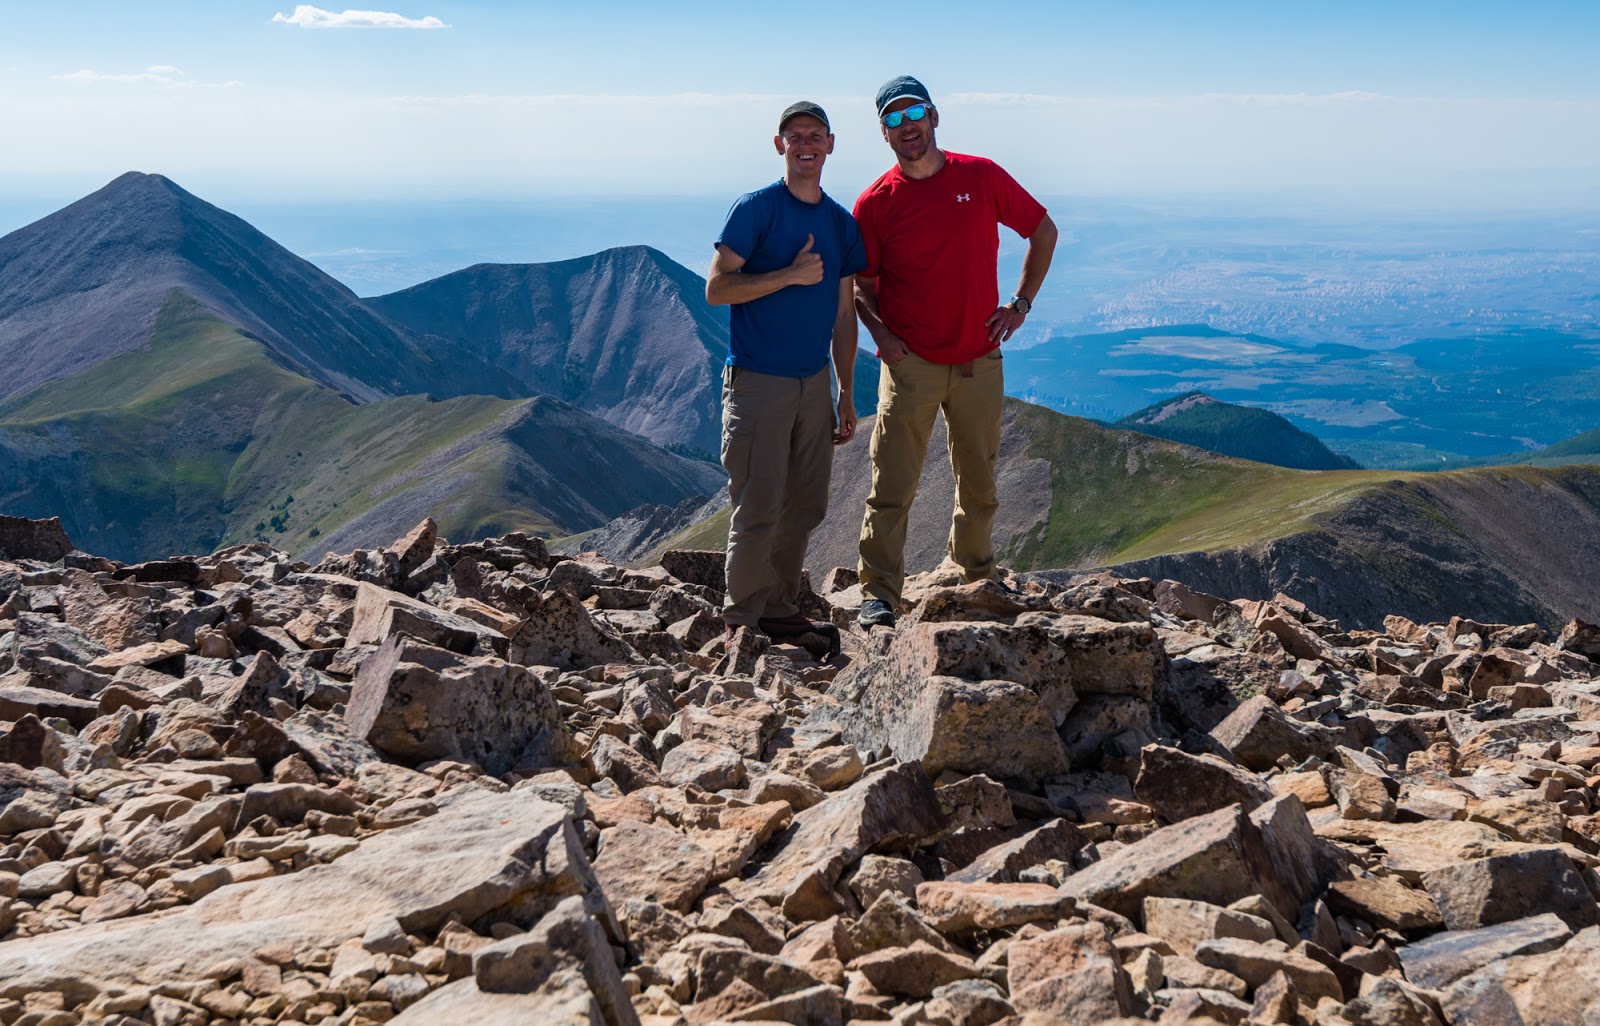
After Dave and I and the brothers we met on the summit were done summiting and descending the summit blocks one of the brothers took a picture of us on a larger mostly-level spot a bit below the final blocks of Sunlight Peak's summit. In talking with a number of other people on other parts of the trail we were the only four of the larger number that went up Sunlight that actually made the jump (of all those we talked with that day); some folks stop their ascent before getting into that committing and exposed terrain on the final summit push.
I then took advantage of the photographic opportunities of this summit, including new perspectives on the surrounding peaks. You get real familiar with the area peaks if you ascend all the mountains we ultimately did (Eolus/N. Eolus/Sunlight/Windom) but each one gives you a little different glimpse into the character of the various surrounding peaks, which I found to be a very enjoyable thing.
I then took advantage of the photographic opportunities of this summit, including new perspectives on the surrounding peaks. You get real familiar with the area peaks if you ascend all the mountains we ultimately did (Eolus/N. Eolus/Sunlight/Windom) but each one gives you a little different glimpse into the character of the various surrounding peaks, which I found to be a very enjoyable thing.
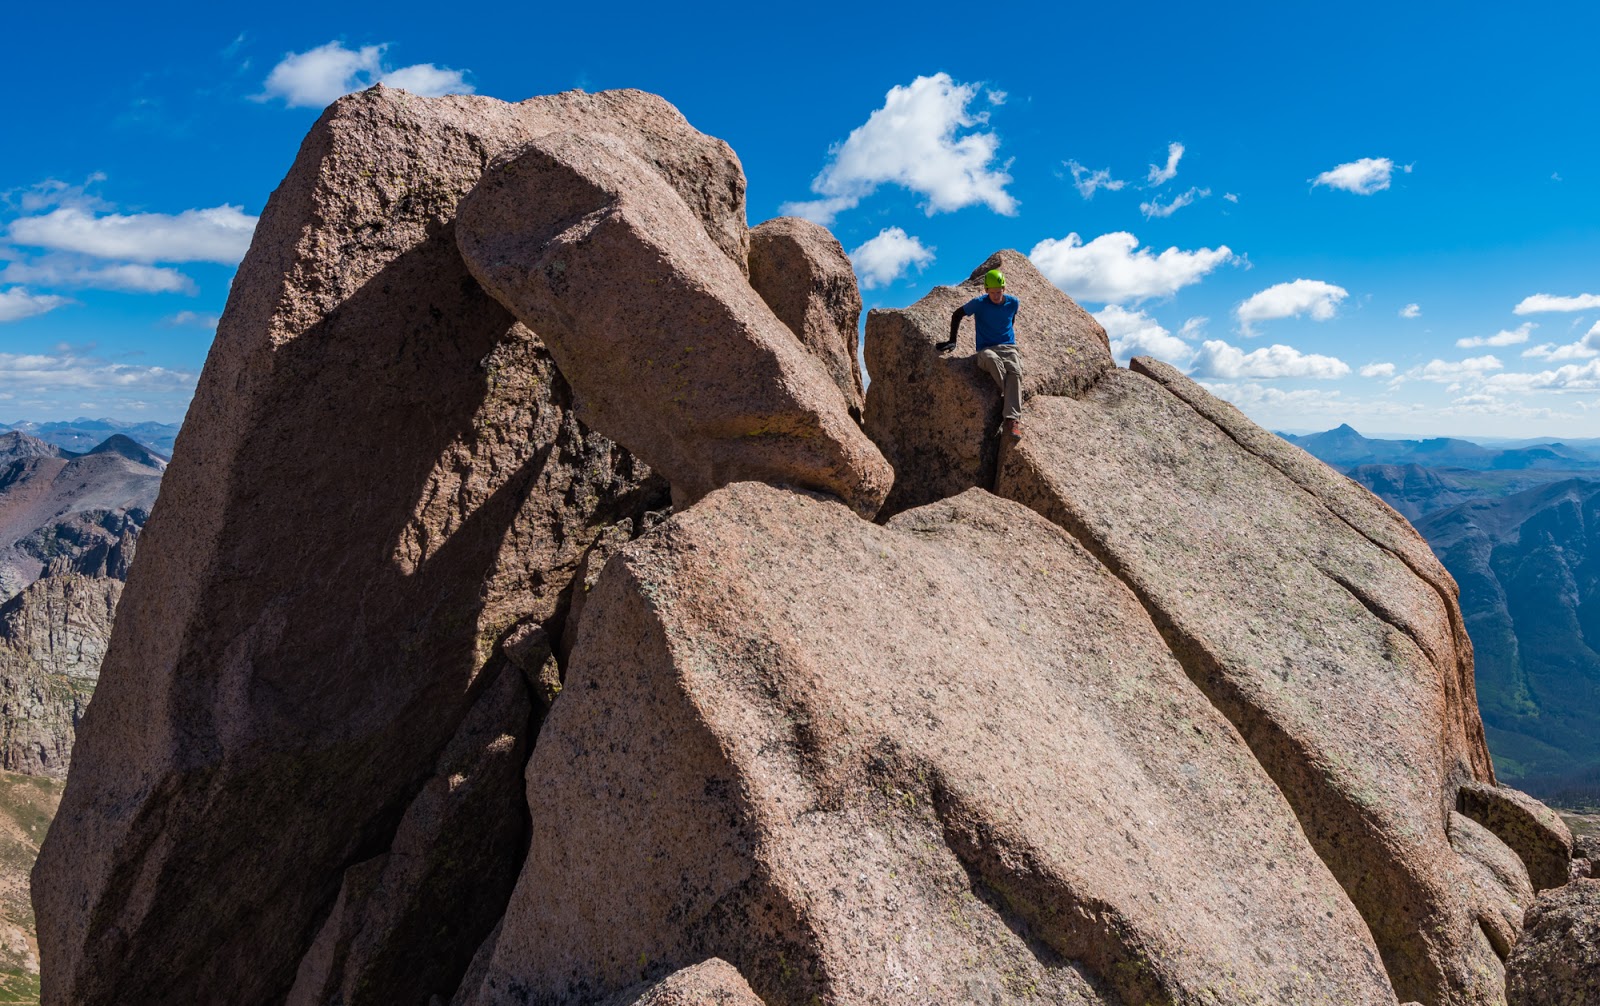
The other David was kind enough to take this picture of Dave and I in front of the summit blocks that make up Sunlight Peak's summit. See how much smaller the summit blocks appear in this shot than they really are? They appear smaller because they're some distance behind us.I'm glad to have the shots I do for scale on this terrain - it's pretty epic up there...
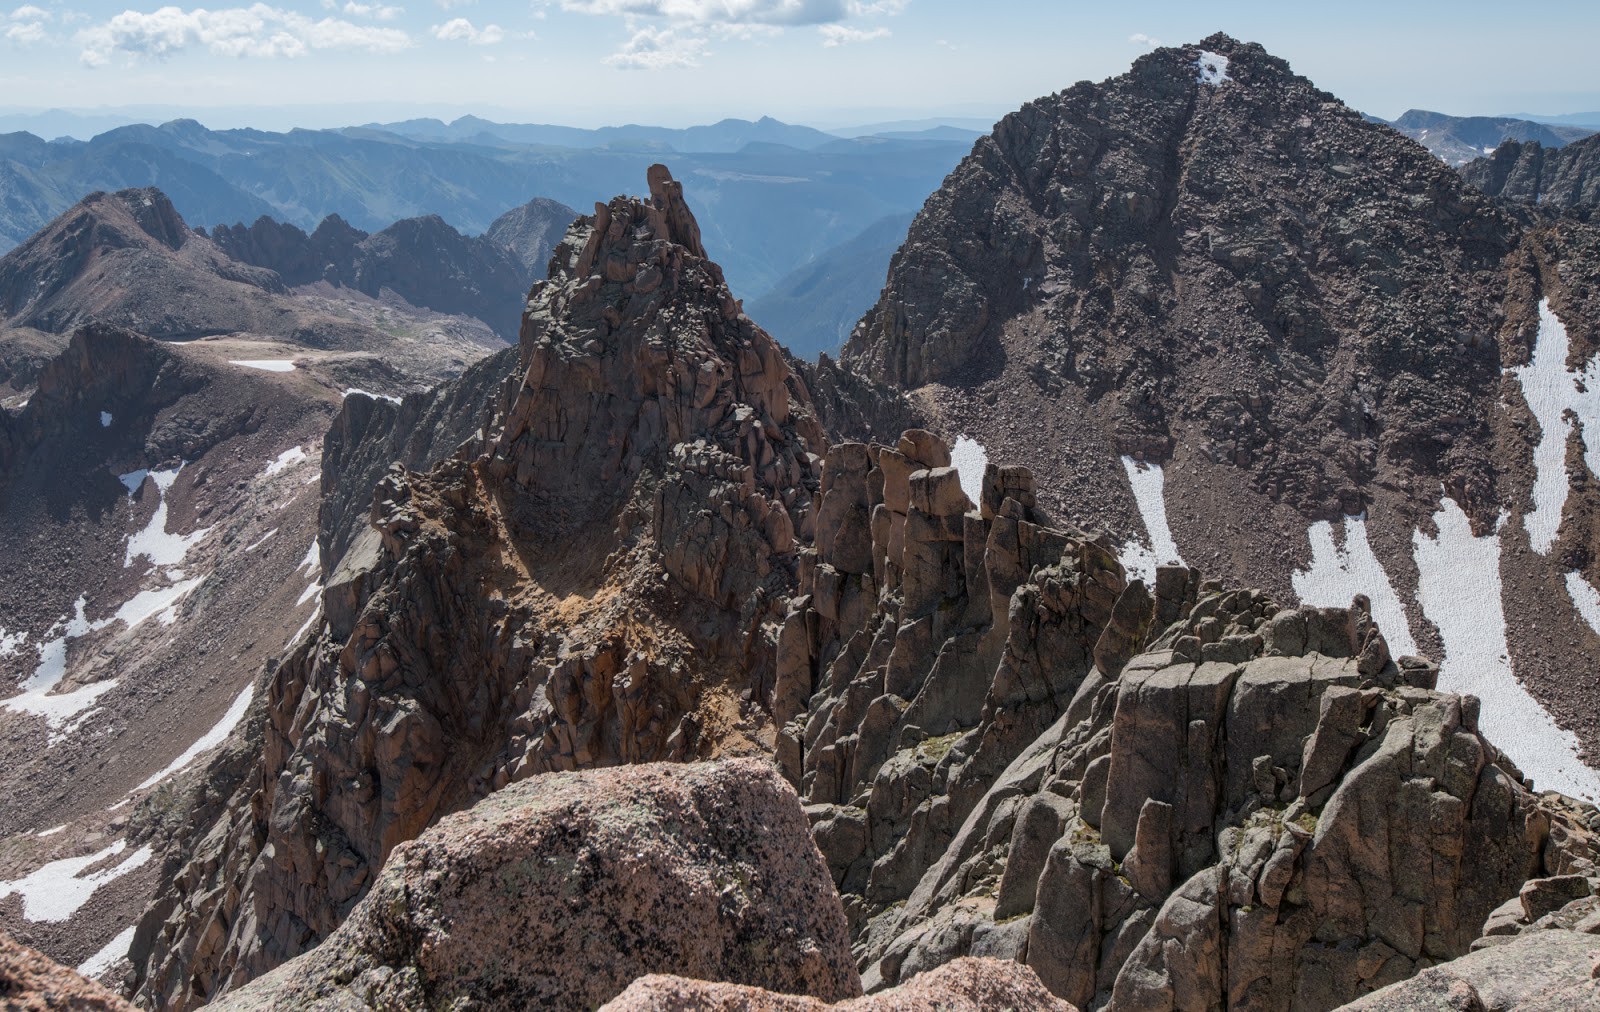
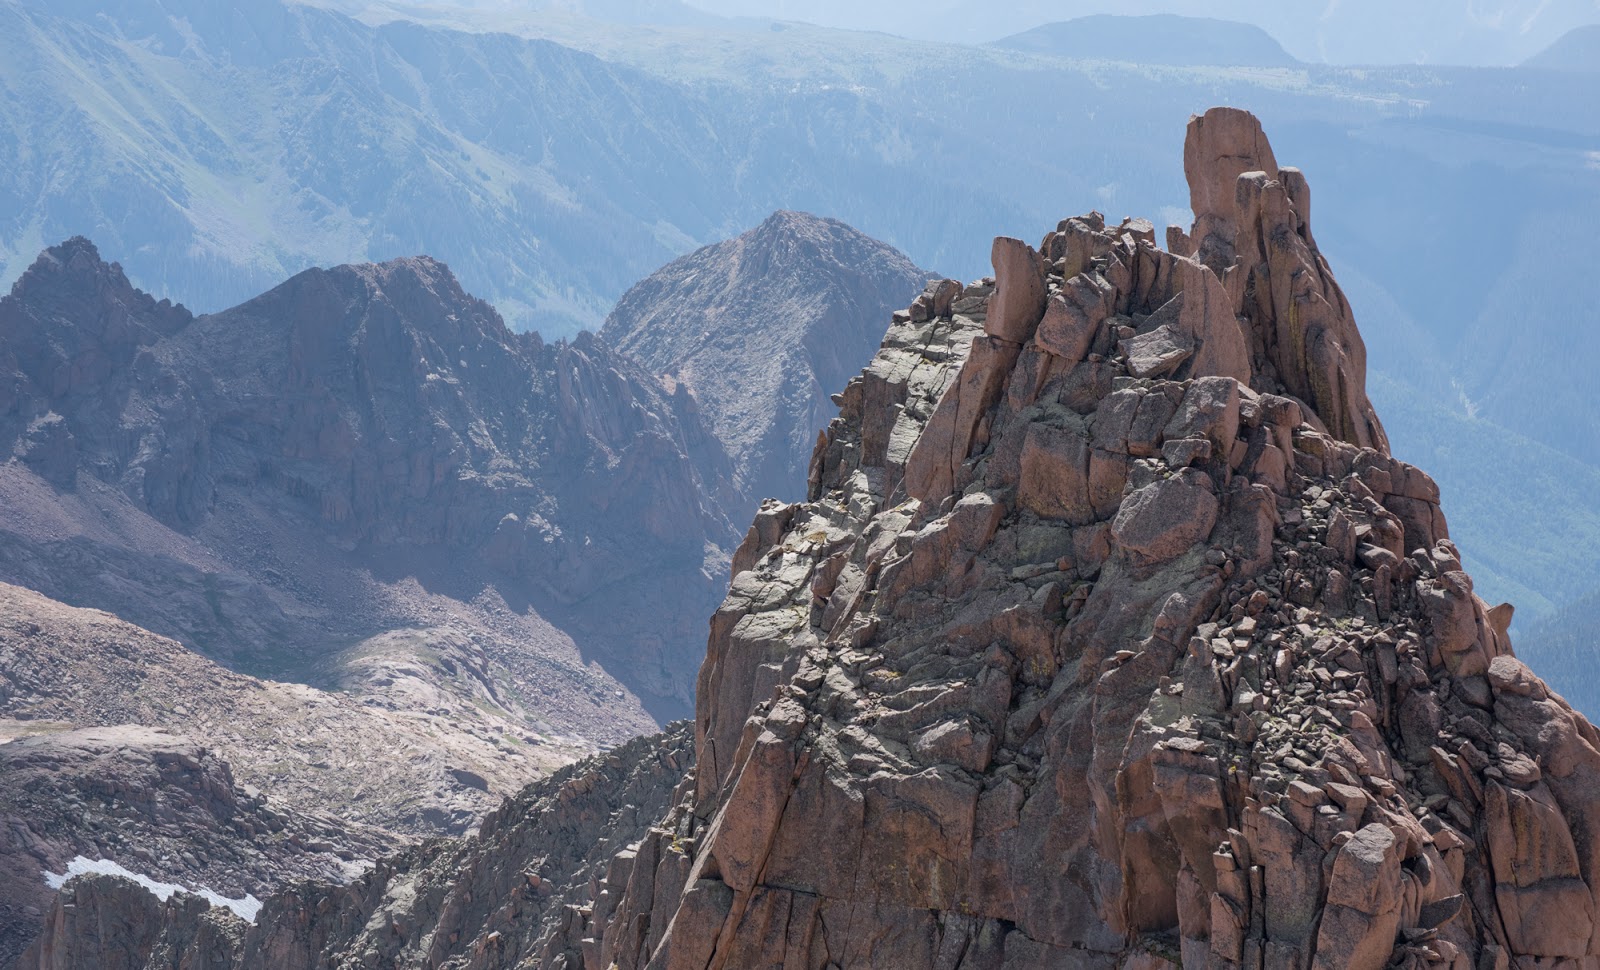
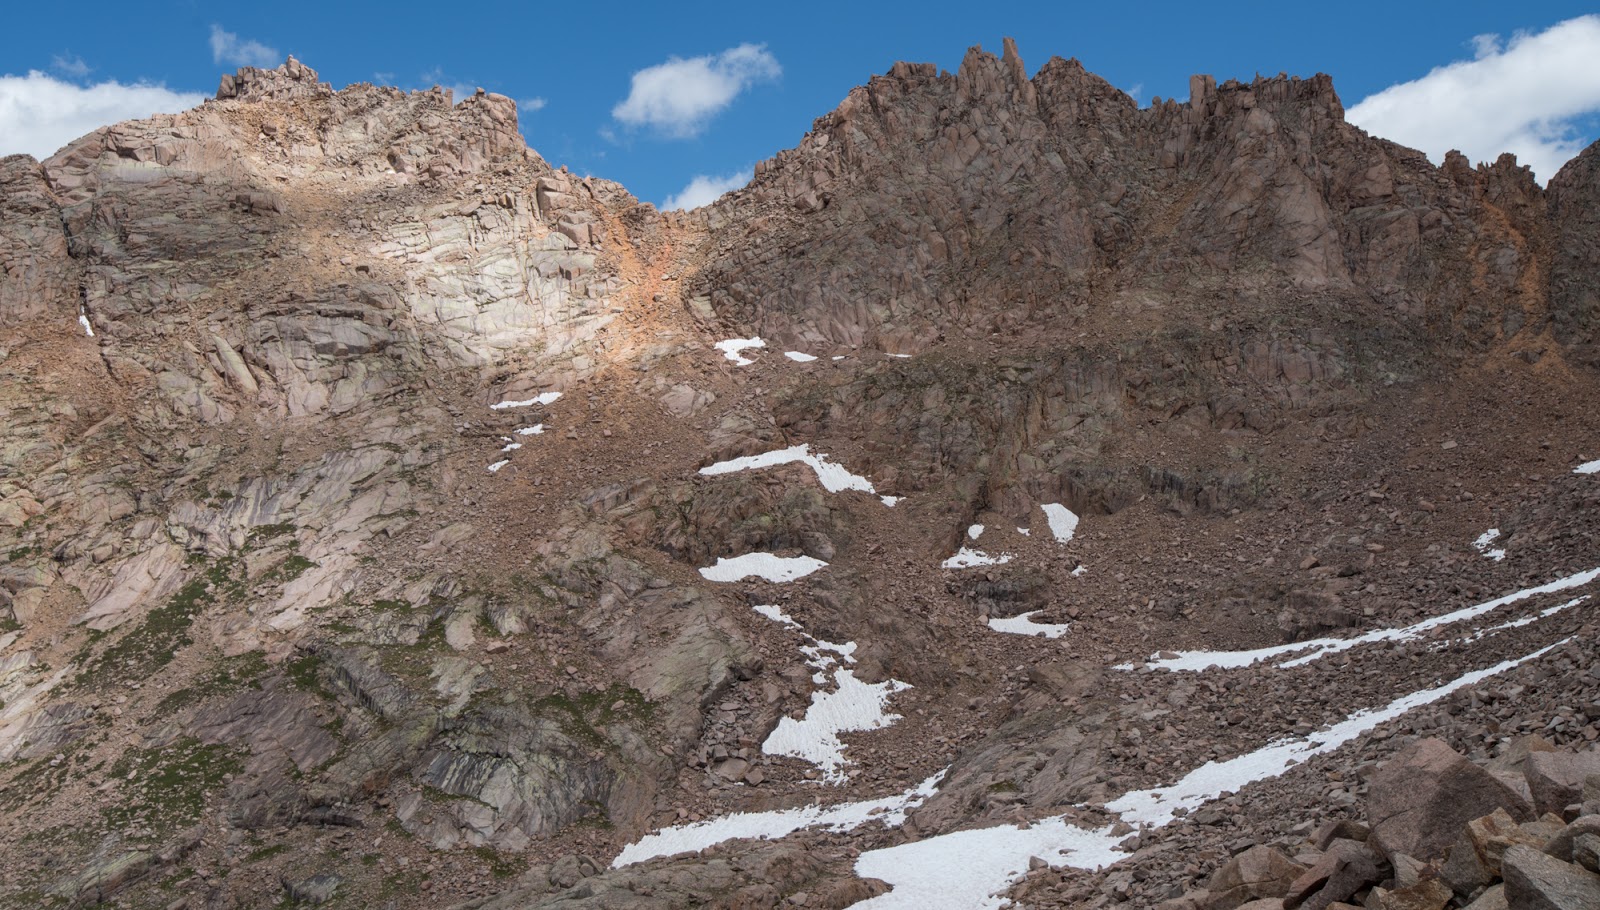
Sunlight Spire, still looking at least as dramatic as it has when we've seen it before this, and Windom Peak, looking a lot harder than Class 2 at this point...happily, we weren't going up that nasty face, but traversing right of the edge of this shot and route-finding up a boulder/talus slope to gain the more gentle, but still very rugged blocky ridge.
One last shot of Sunlight Peak's summit block; trying to show more of the exposure there, but you can't really get it unless you're up on those last two blocks, and really not until you're on the summit block itself. As I said before - unforgettable...

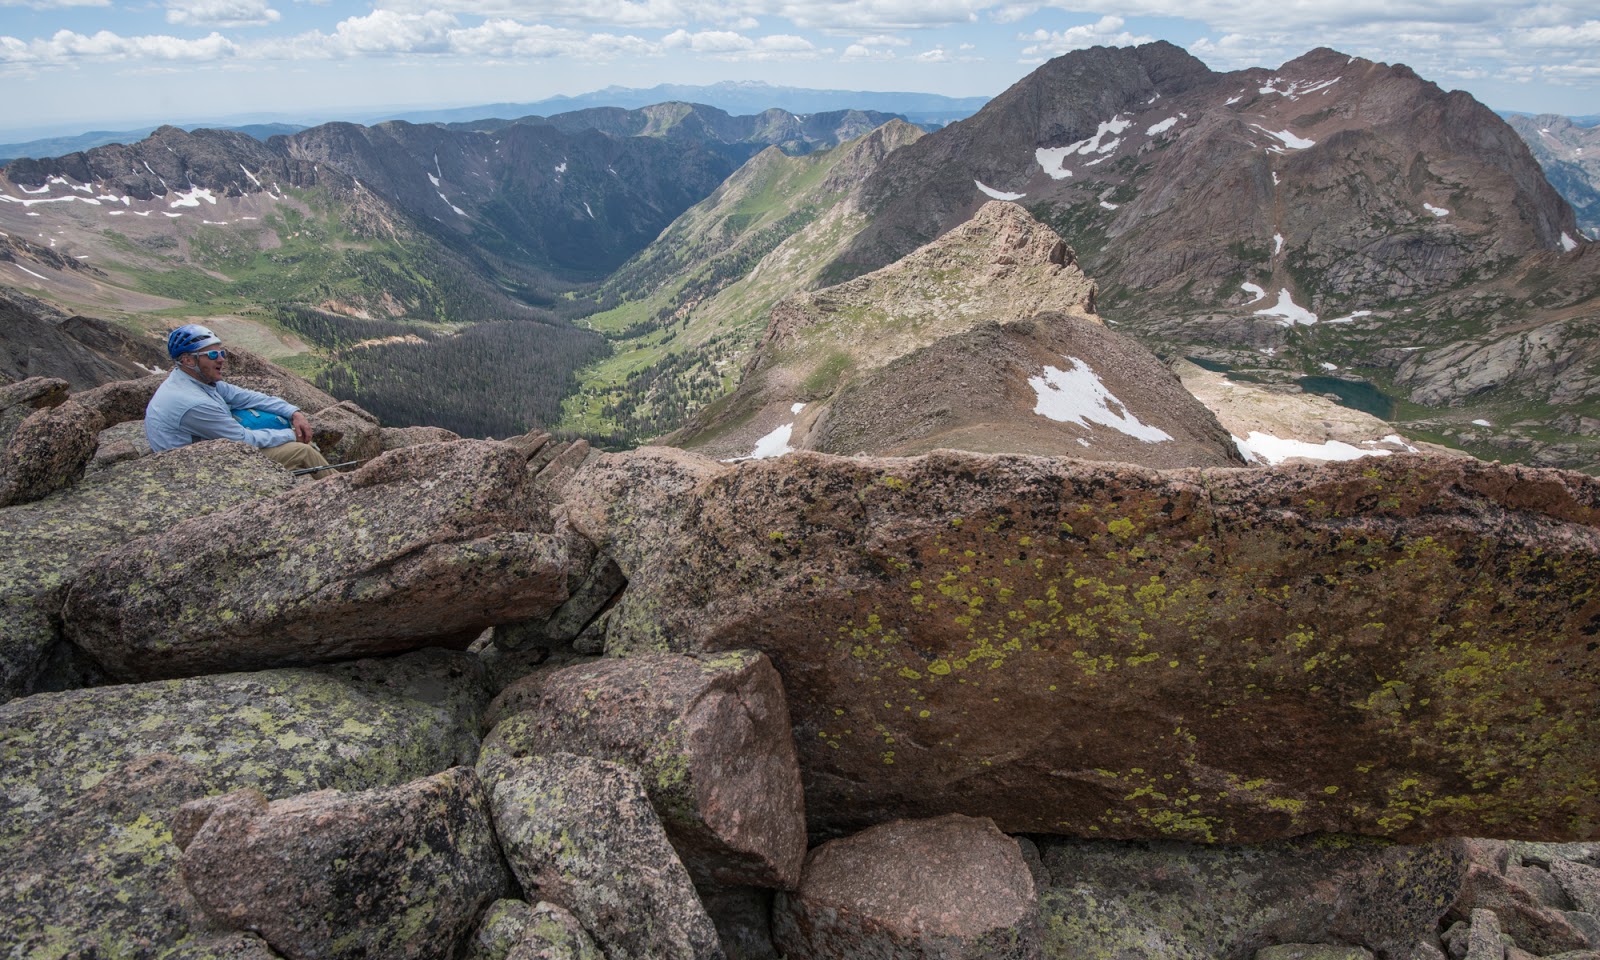
Epic terrain seen from the summit area of Sunlight Peak. Mount Eolus and North Eolus are the two peaks adjacent to each other in the upper-left.
Close view of the top of Jagged Mountain, giving an idea of how challenging actually gaining the summit of this peak is (it's a technical ascent, generally requiring equipment to attain the summit).

Cool shot of Arrow and Vestal Peaks (Arrow's on the left). This is the closest we approached these peaks - they're still well off in the distance from Sunlight Peak, but it's closer than the other summits to them so I was able to get the best detailed shots of them I got on the trip from this vantage point.

Wetterhorn Peak (14,015 feet) and Uncompahgre Peak (14,308 feet) are visible along the upper border of this image, along with lots and lots of other peaks. Uncompahgre is rounded with a flat top a bit right of upper-center, and Wetterhorn is the pointy peak near the upper left.

Mount Sneffels (14,150 feet) and other mighty San Juan Range peaks are visible here; Sneffels is in the upper left.

Detail shot on Mount Eolus (left) and North Eolus (Right) from the Sunlight peak summit area.
Detail shot on Sunlight Spire; to get to the top of that requires navigating terrain that is rated about 5.10 on the YDS climbing difficulty scale (that's pretty hard, for those that don't know...). Obstacles here are larger than they appear.
Detail shot on Windom Peak, as seen from the Sunlight Peak summit area.

Sunlight Peak summit benchmark.

Looking down over Sunlight Lake and another basin on the other side of Sunlight Peak.

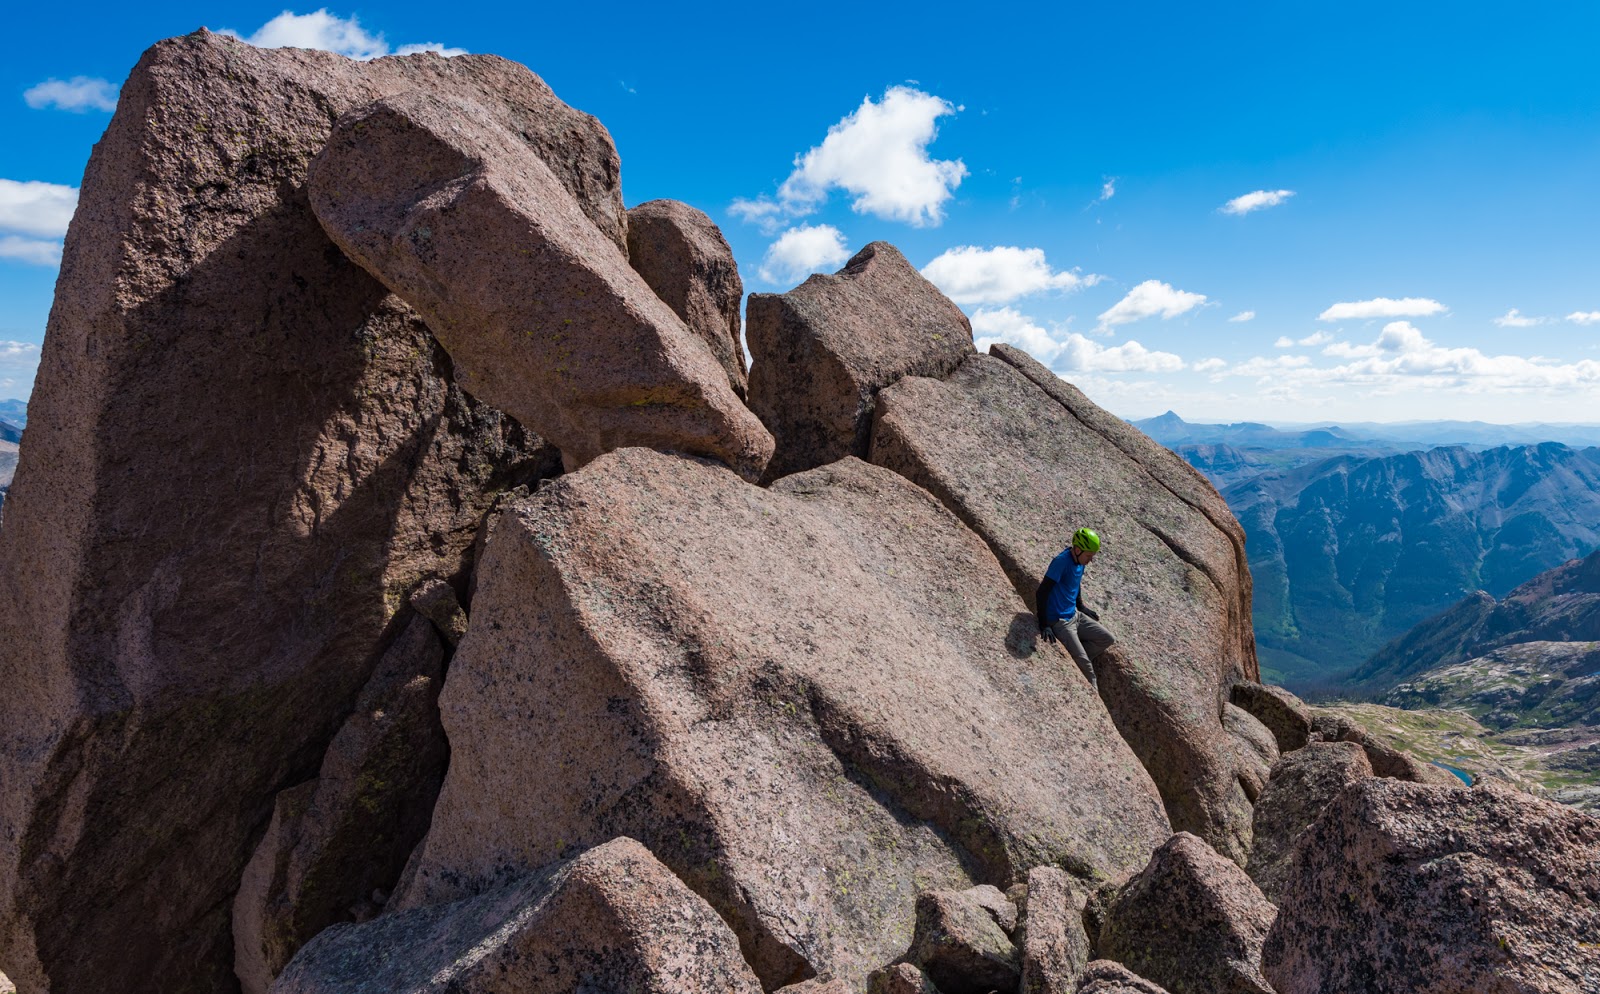
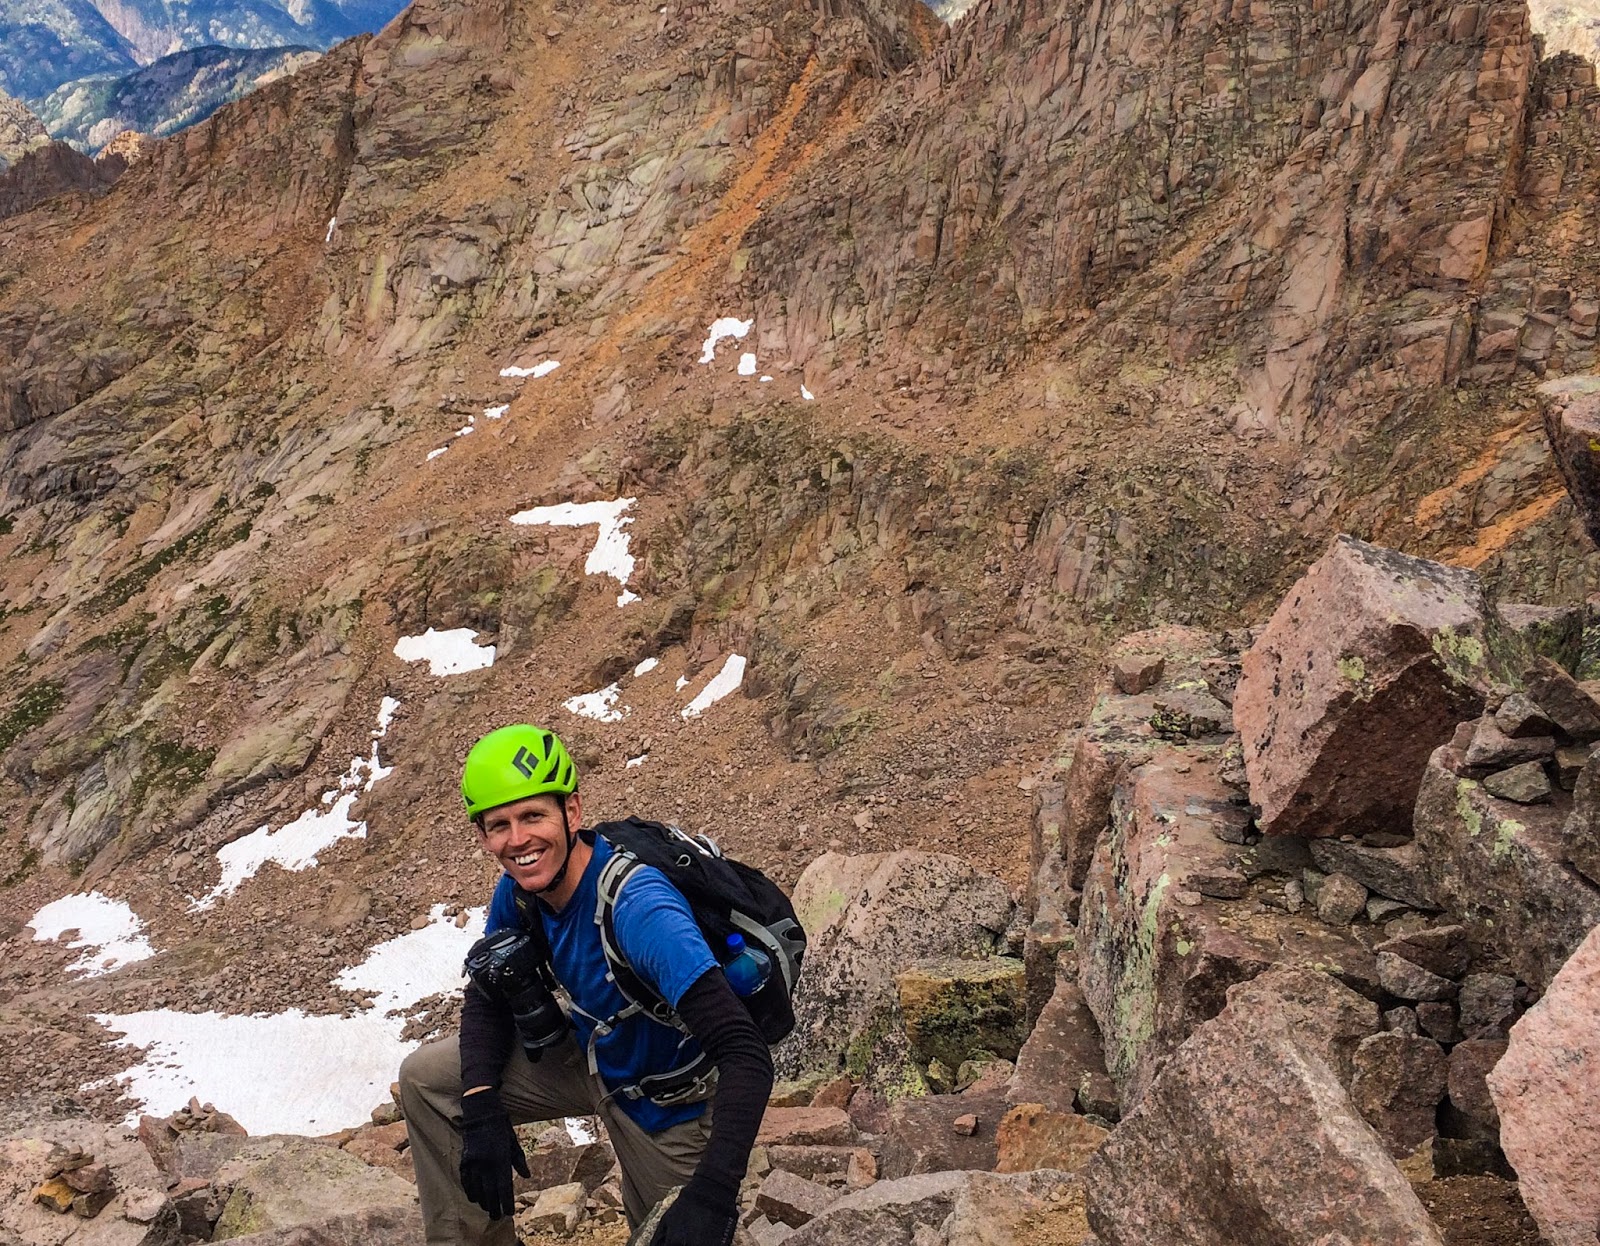
Me, scrambling down large boulders as Dave and I descend the upper reaches of Sunlight Peak. (Photo by Dave.)
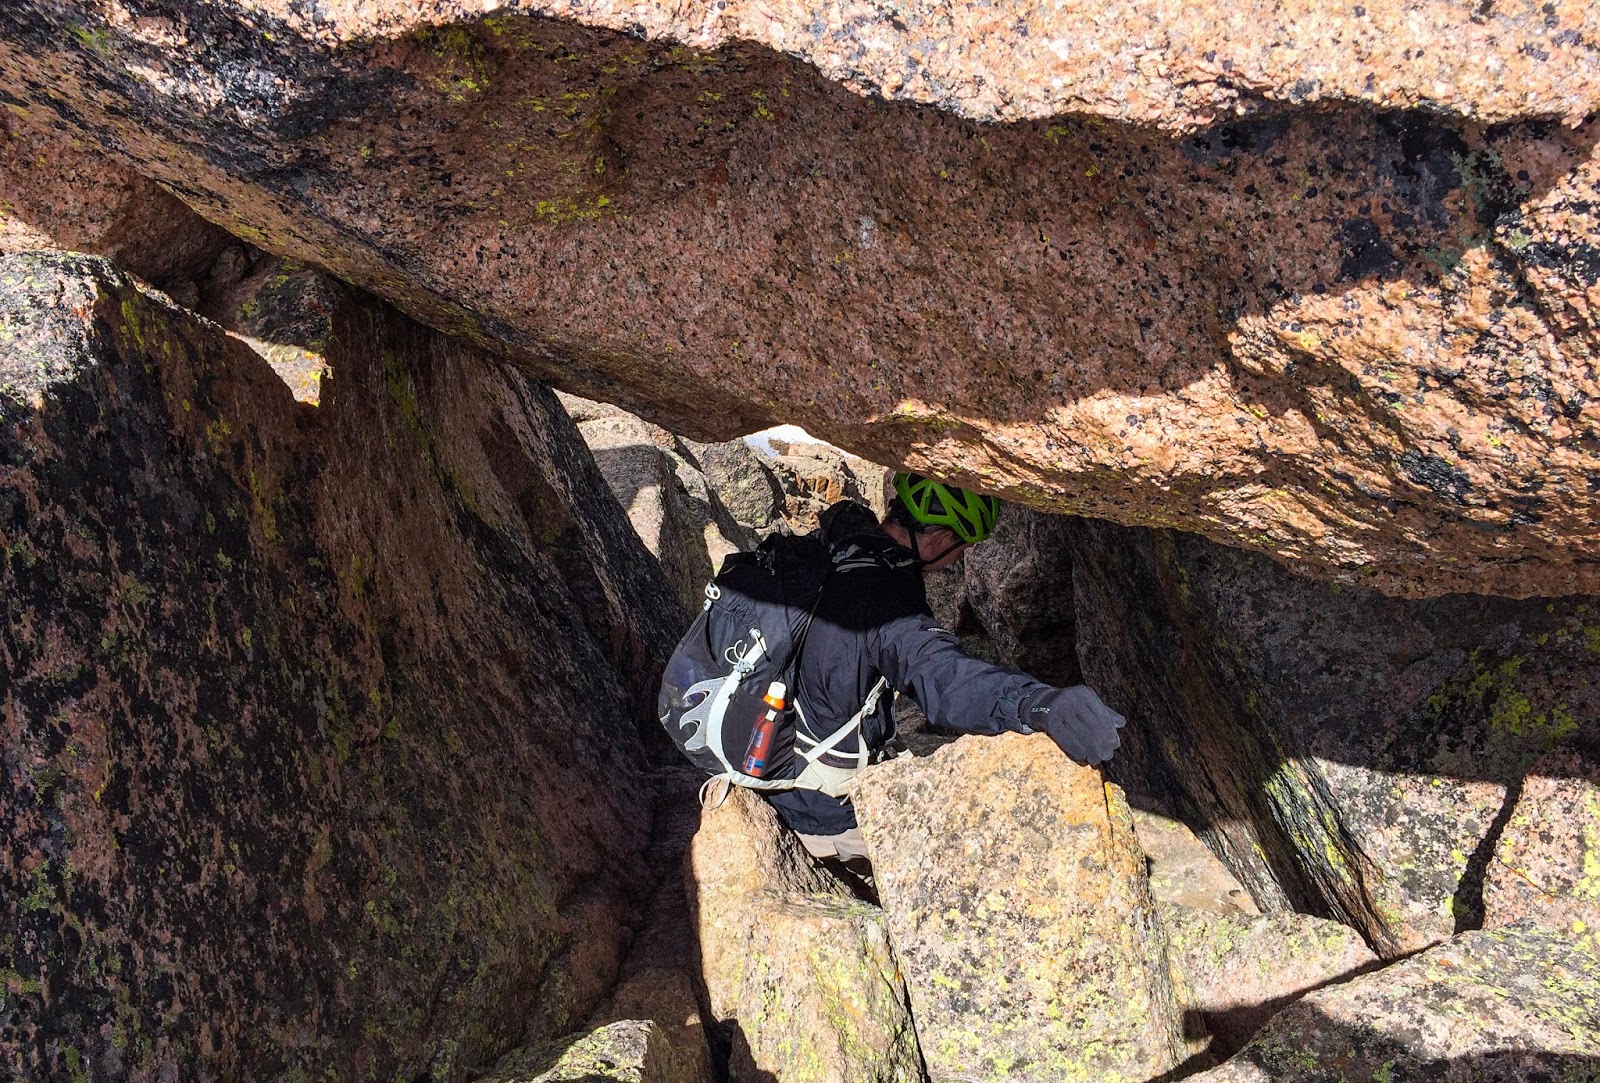
Heading back down through the hole... (Photo by Dave)

Heading back down through the hole... (Photo by Dave)

Heading back down through the hole... (Photo by Dave)
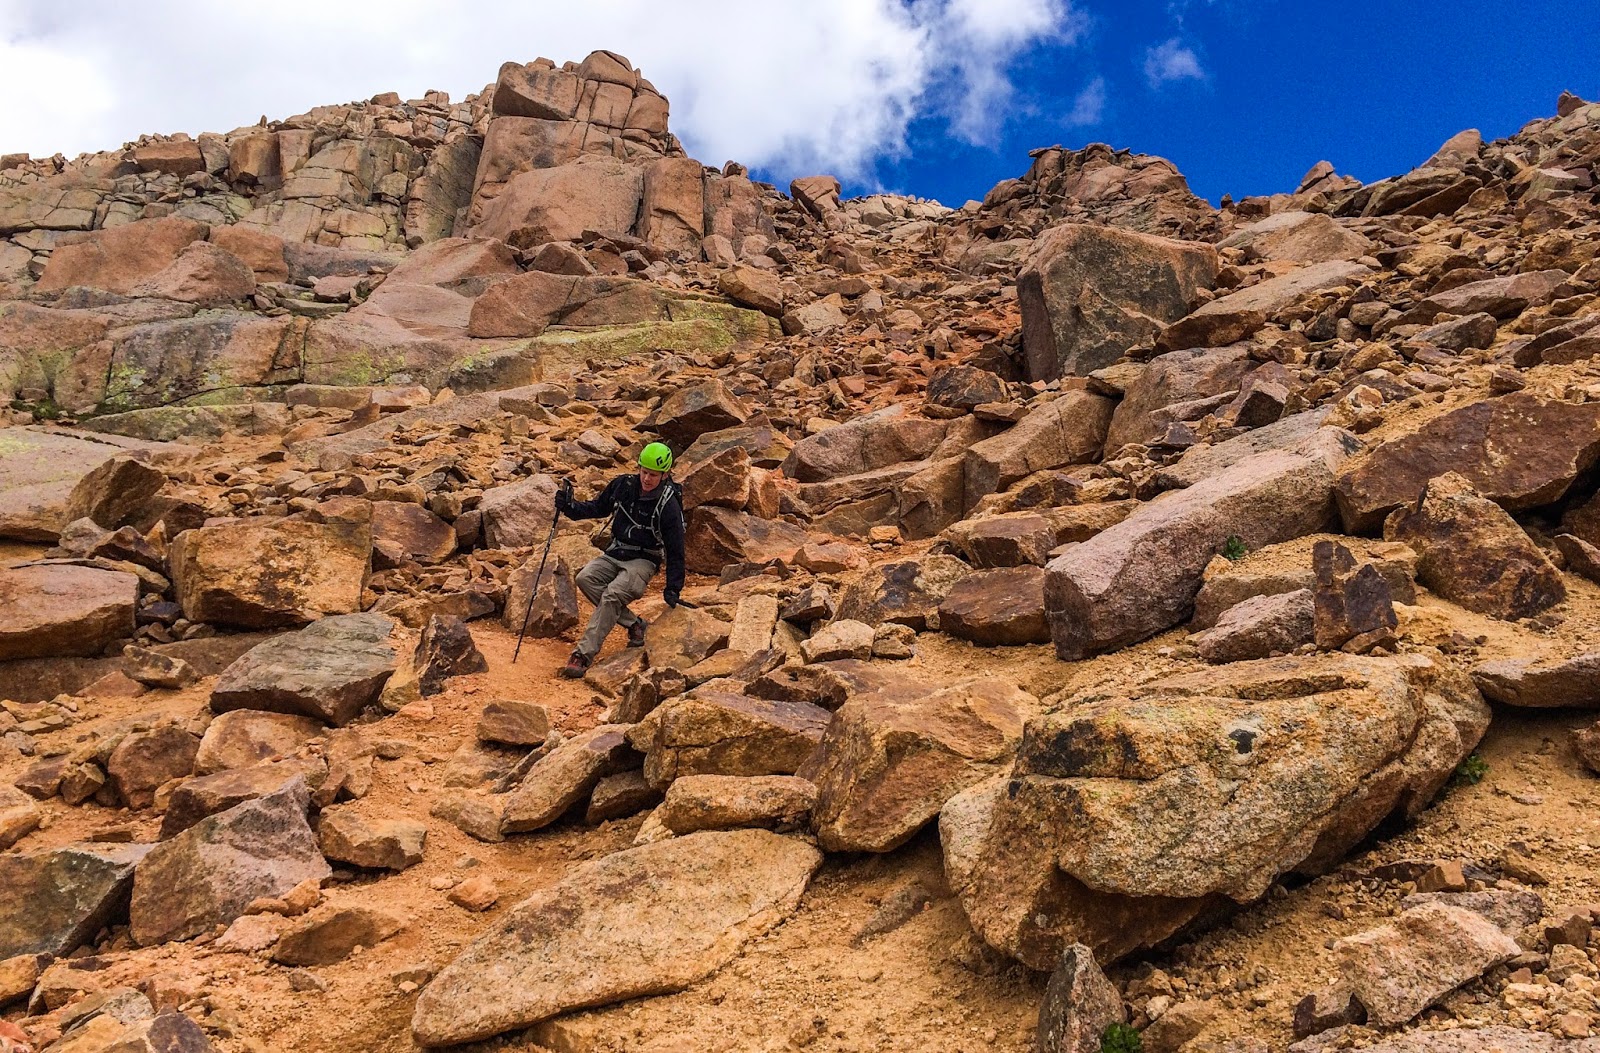
Me, descending the terrible chute. Terrain here is much steeper than it looks in this image... (Photo by Dave)
Looking back at the terrible chute (red-orange sandy place just left of center) and Sunlight Peak's ruggedness standing above on the left, with Sunlight Spire on the right side. This gives a little better idea of how steep that area is...
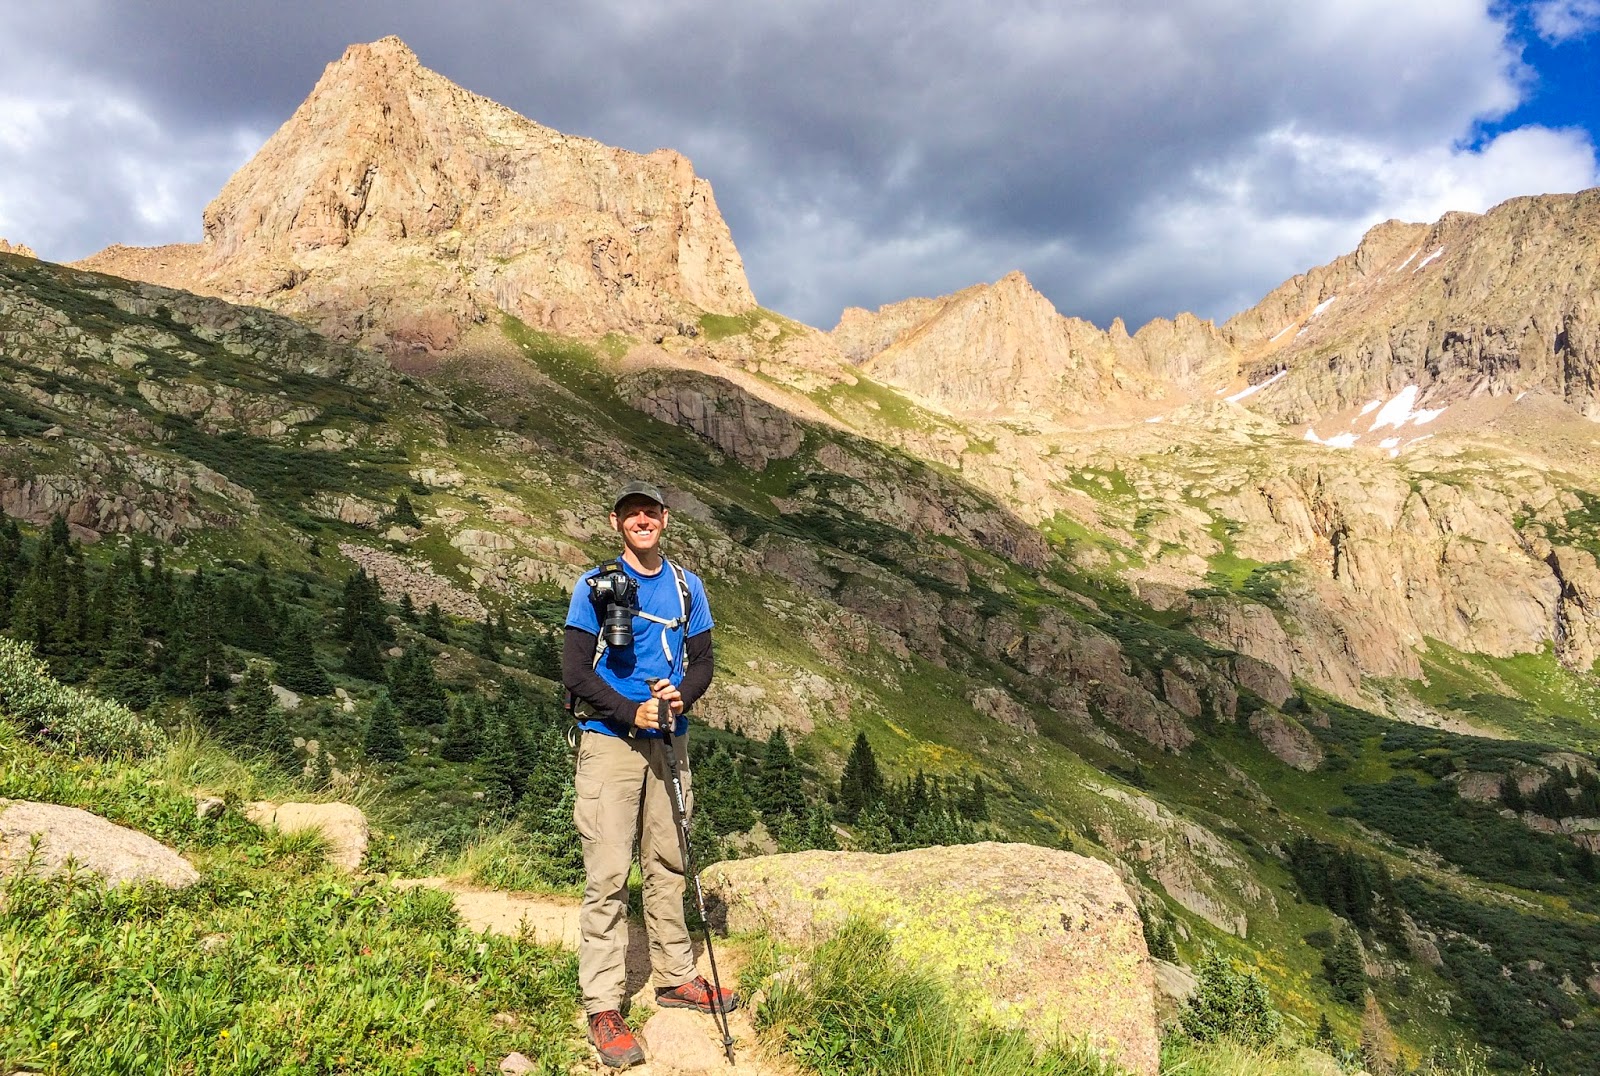
Dave, enjoying the views over Eolus and North Eolus as we were ascending Windom Peak.
Windom Peak's summit block is made up of many large, rocky...blocks...The blocks here are not so large as the ones atop Sunlight - which are massive - but the summit is of an interesting character with how the blocks are stacked upon and around each other. There's a bit of a walled-in depression between the blocks near the true summit that drops down about six feet (more accessible than the random drop near Sunlight Peak's summit); there was a register down there when we summited the peak. When Dave and I first arrived we had the experience, which ended up being in common with all the other peaks on this trip, that we were alone on the summit for some time before being joined by others. The only summit we didn't end up sharing at some point was North Eolus the day before; there was another party headed up as we were headed down, but we didn't end up on the summit together.

One more shot of Sunlight Peak and sunlight Spire from somewhere on Windom Peak. Again, notice how steep the terrain is, both in the terrible chute of red-orange rock and as you're scrambling across the front of Sunlight Peak itself. Pretty intense peak, but, overall, a lot of fun if you're ready for it.

Windom Peak summit benchmark.
Me, down in the hole just below Windom Peak's summit block.
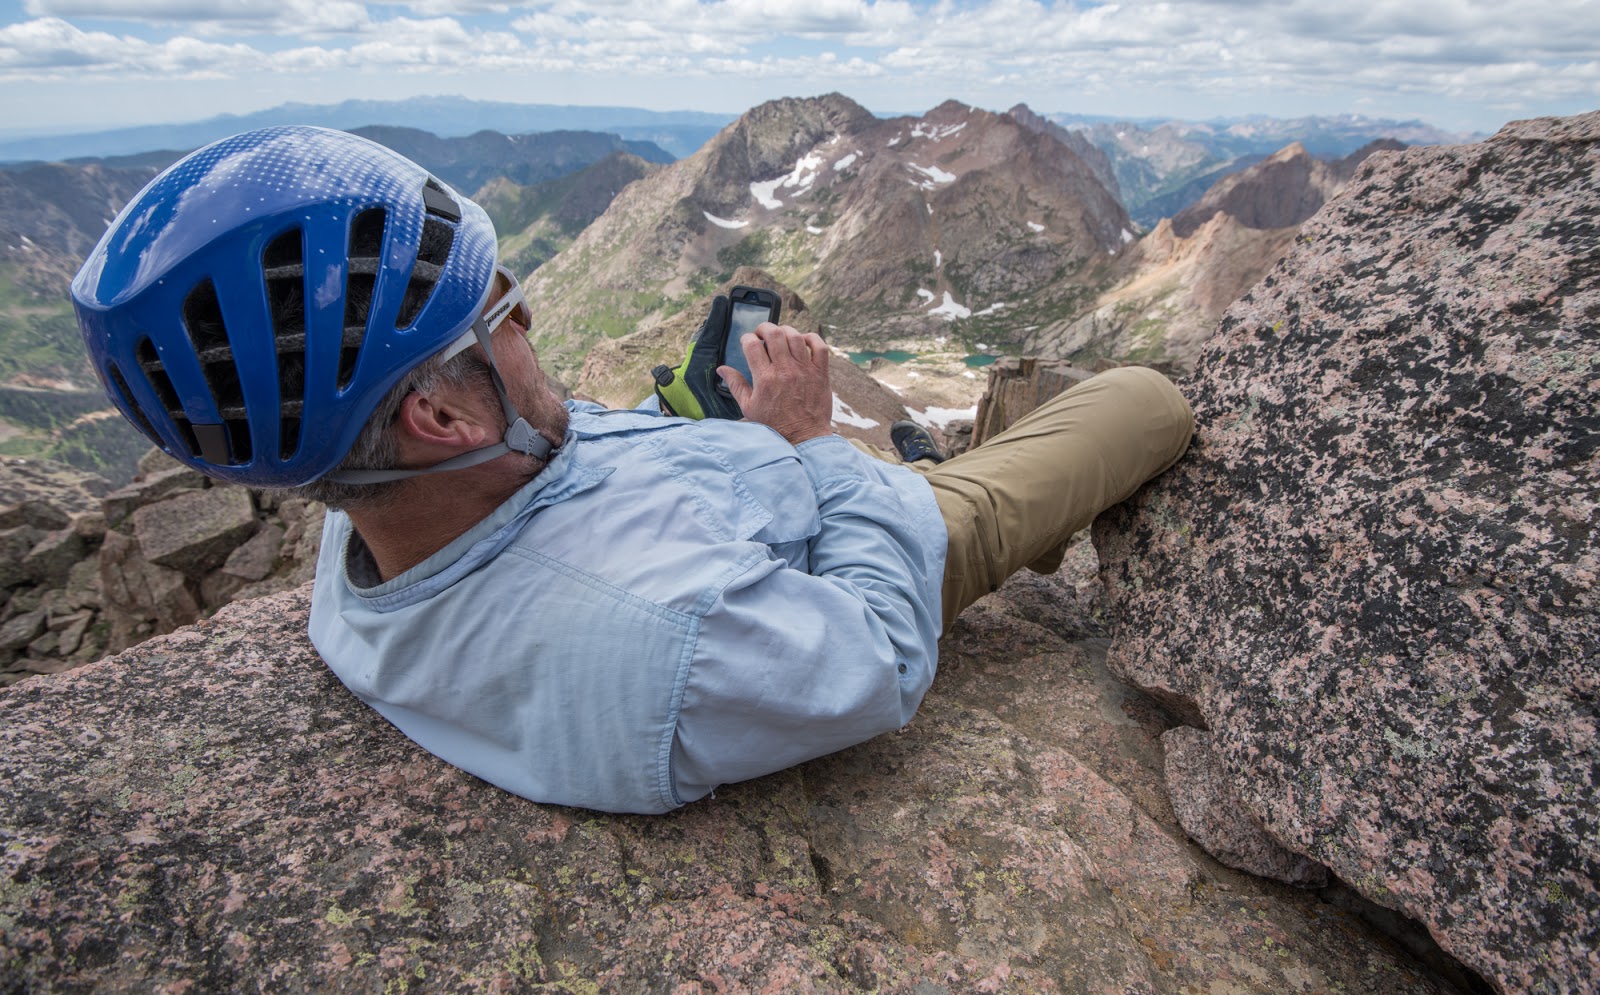
Dave, sending a text to his wife to give her a little update as to his progress; he would do this whenever he got signal from the summits.

Me, at the summit of Windom Peak (14,088 feet)!
Me, descending the slopes of Windom Peak. (Photo by Dave)

Descending Windom Peak; this view is looking down into Chicago Basin. (Photo by Dave)

Descending Windom Peak, Sunlight Peak is in the upper-right here. (Photo by Dave)

Descending Windom Peak. (Photo by Dave)
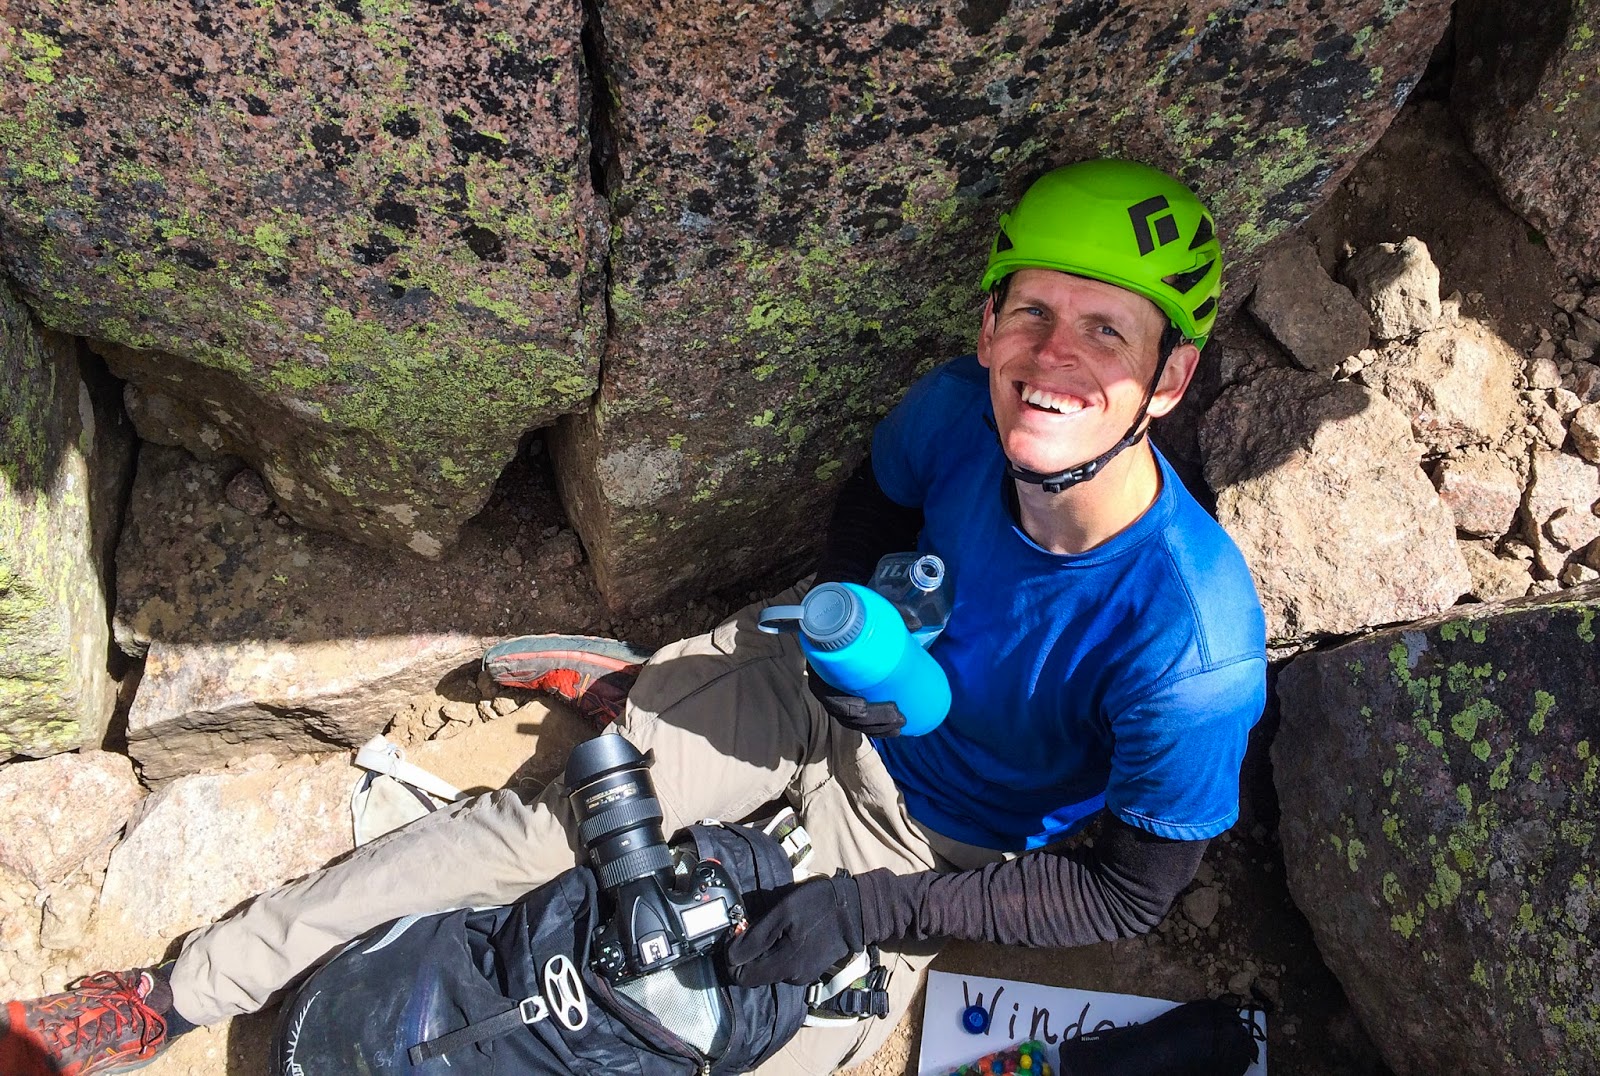
Me, adding one small stone to the very top of this massive cairn.
(Photo by Dave)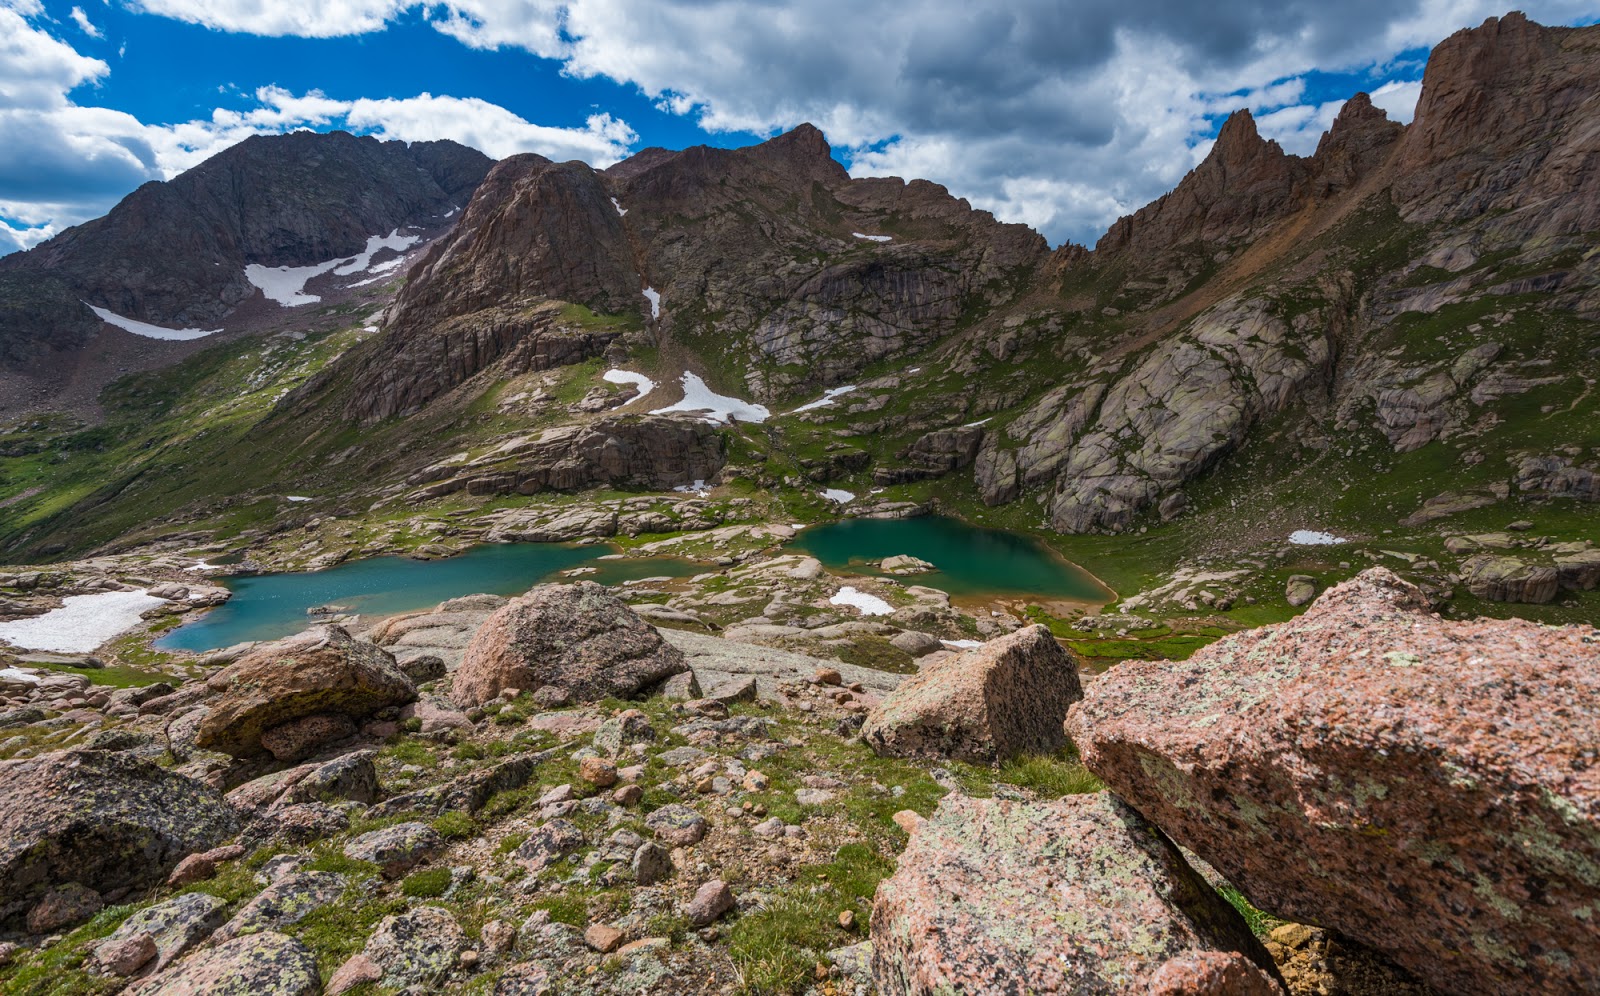
Seriously...

Me, at a lovely overlook above the Twin Lakes area. (Photo by Dave)
Dave and I enjoyed this little rock path across the tundra grass; Dave reasoned that it was put in place by the (made-up) Alpine Tundra Preservation Federation, or something like that...Whoever put them there, the tundra does seem remarkable well-preserved, especially considering how heavily-trafficked this area can be.
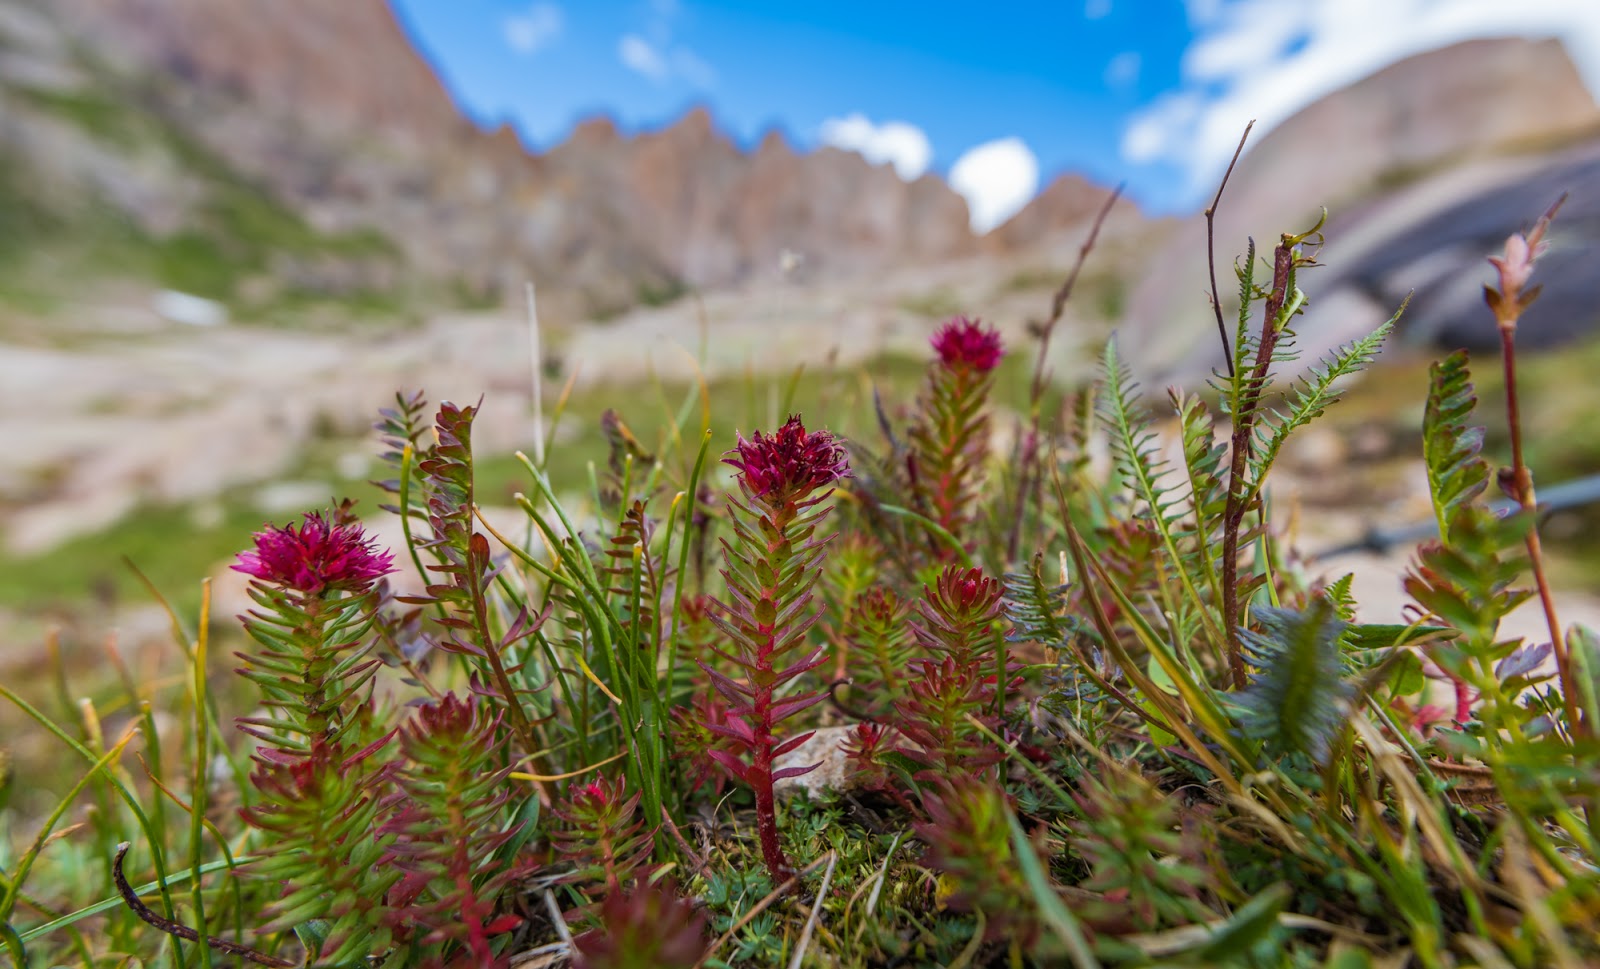
Neat flowers near the Twin Lakes area.
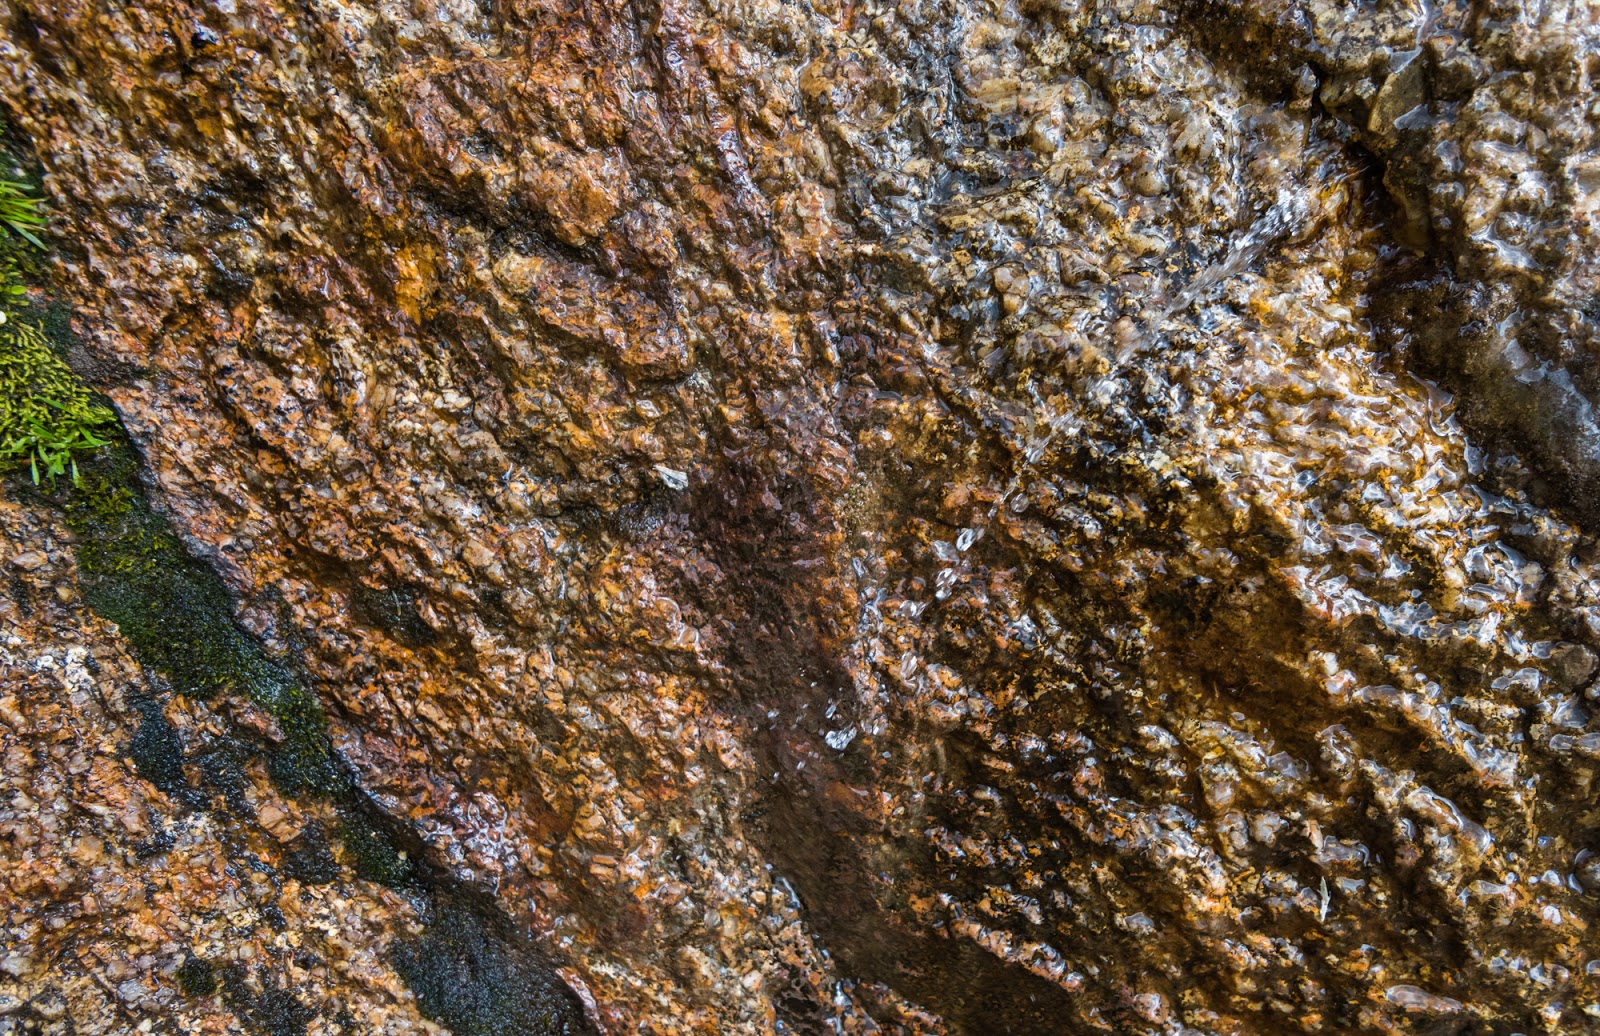
A little above the Twin Lakes I came across this stream of water pouring out of a rock wall - it was maybe two or three feet off the ground, but flowing vigorously enough that you could fill water bottles out of it. It caught my eye because I heard water and couldn't see anything flowing off the top of the rocks around me, so I looked around and found this little stream coming right out of the side of the rock a bit off the ground and just took a moment to enjoy the sight.
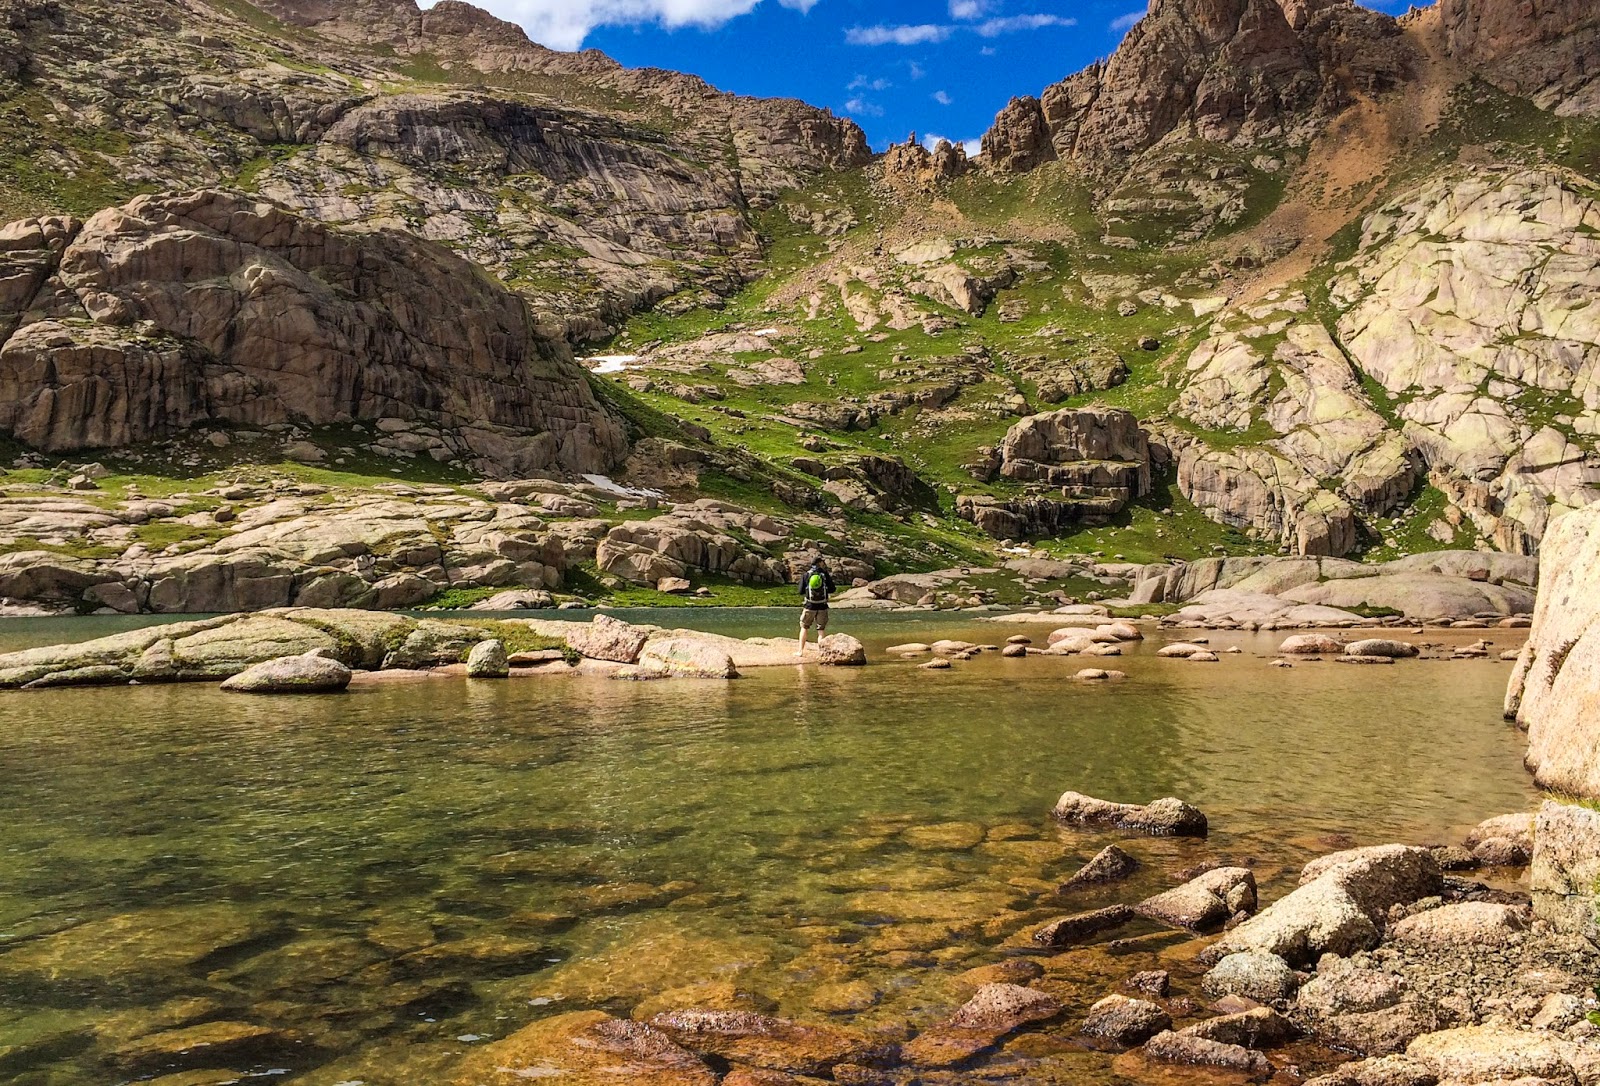
Me, on the little rock island I waded out to in one of the Twin Lakes. (Photo by Dave)

I took this shot while laying down on a large rock somewhere out in one of the Twin Lakes; I had to wade out there and lay awkwardly on the rough-textured stone to get the right angle...I've never waded for a shot before, but it wasn't an altogether unenjoyable experience...though some of the rocks weren't fun to cross barefoot...The chill mud beneath the cold water in the lake was particularly soothing.

Wading back to shore after hunting for photos in one of the Twin Lakes. (Photo by Dave)
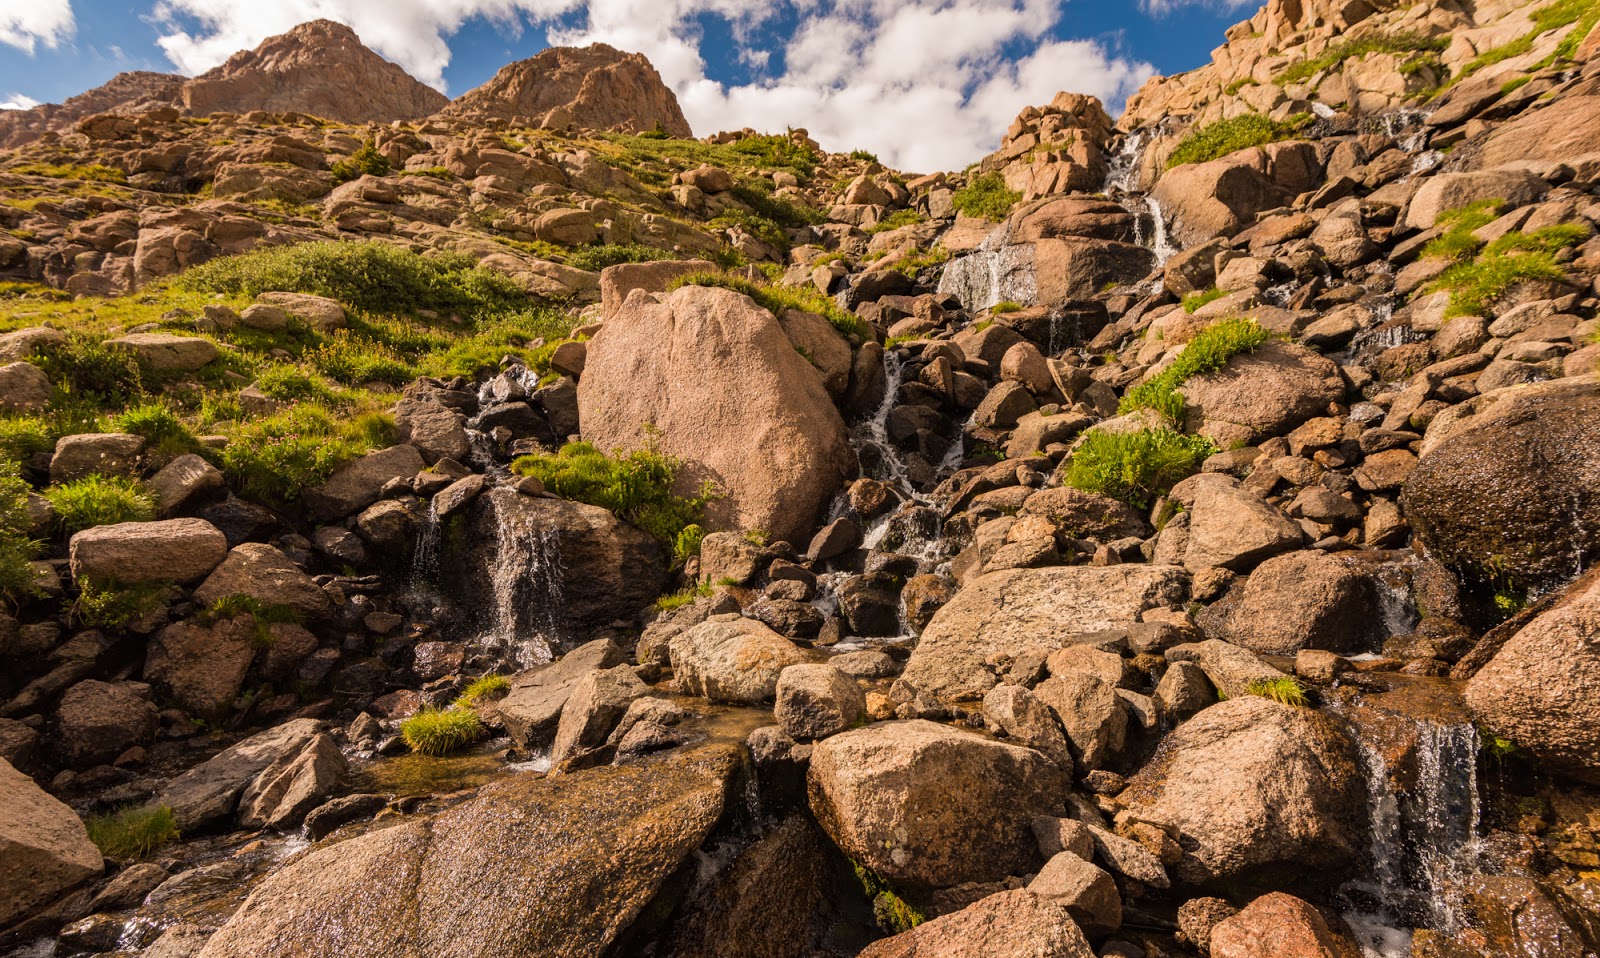
Lovely cascade below Twin Lakes.

Me, admiring the scenery on the descent to our campsite. (Photo by Dave)

Dave descends steep trail as we work our way down from Twin Lakes to our camp in Chicago Basin.
Me, taking a moment on the descent to camp with glorious scenery all around. (Photo by Dave)

Dave descends steep trail as we work our way down from Twin Lakes to our camp in Chicago Basin.
Dave caught this picture of me looking up at him on one of the steeper sections of trail on the way down to camp.

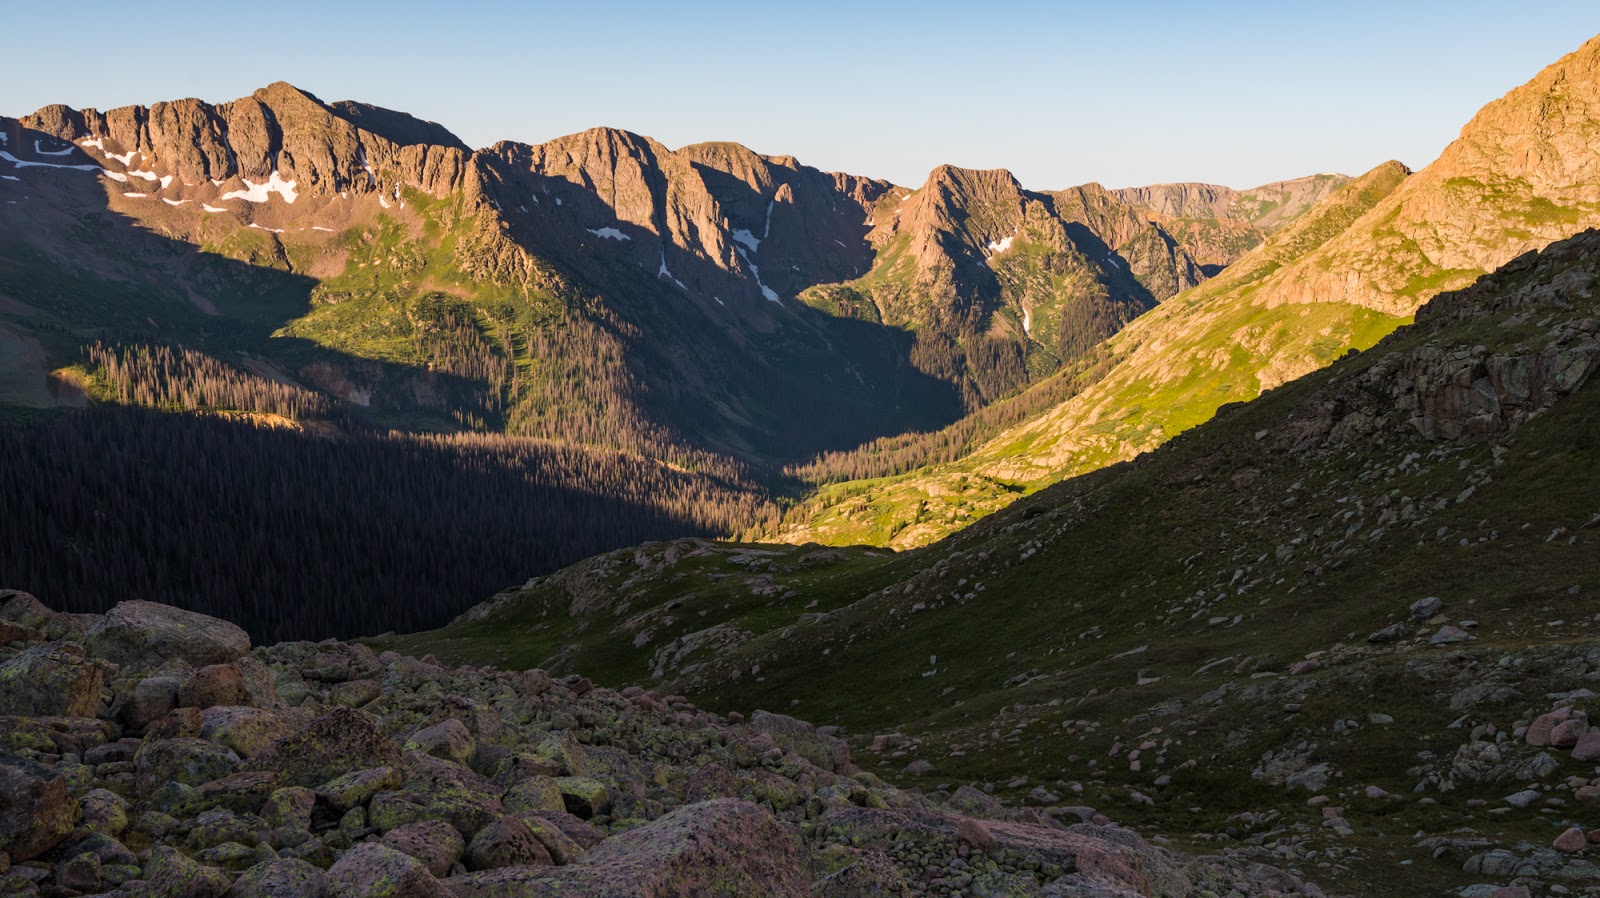
Beautiful and rugged country enjoyed on our way as the afternoon progresses...

Dave descends steep trail as we work our way down from Twin Lakes to our camp in Chicago Basin.
Dave, working through a not-so-steep area on the way down to camp.

Lovely leaves back-lit by the sun.

Dave, coming through some thicker forested areas as we get nearer to our camp in Chicago Basin.

Me, just about to the more thickly-wooded section of the trail back to camp. (Photo by Dave)
"What wond'rous scenes mine eyes behold." (Hymns, No. 16, 985 Edition) (Photo by Dave)

Few things outside are as lovely as a nice walk through a pleasant wood.
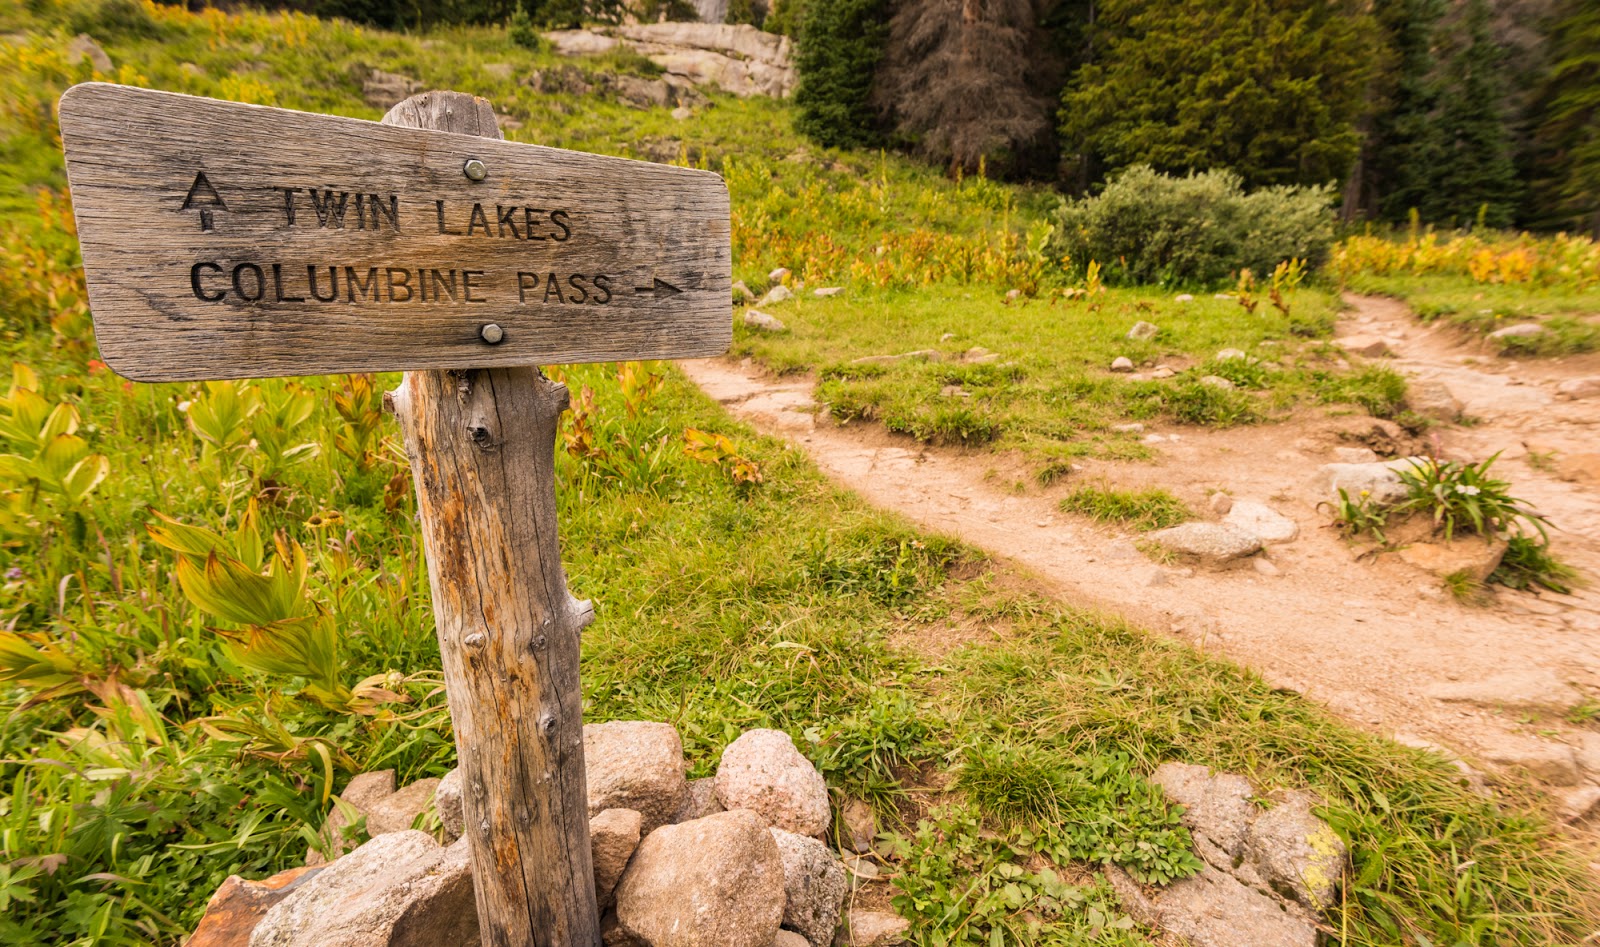
Trail sign at the junction of Twin Lakes and Columbine Pass. To do Mount Eolus/North Eolus/Sunlight Peak/Windom Peak you take the left fork here.
When we got back to camp we found some goat damage! Both our backpacks (speaking of our large packs that carried all our stuff, not our smaller day packs we used for climbing the peaks) had had their straps gnawed on a bit...nothing exceptional there, but we could tell the goats had chewed on them for a while because of the fraying patterns on them that weren't there before we left that day. Also, Dave's bear spray that he'd left behind under the edge of his tent while we'd been out summiting Sunlight and Windom Peaks was missing - assumedly clandestinely purloined by some "fearsome woodland creature" as Dave would say!
So, I lost a trekking pole to the critters and Dave lost his bear spray...and we both had minor (mostly cosmetic) damage to our packs. The sad thing is I actually packed a bottle/container of granulated coyote urine out to this area with me - I'd read online that it would keep the critters at bay - and I sprinkled it on the ground to form a wide perimeter around our campsite the first evening and we had no issues the subsequent day - but I forgot to put it out the second day, and that's when our stuff got munched...Take the critter warnings out here seriously; they're not (very) exaggerated...
We had a nice dinner and ended up deciding to pack out at least to the Needle Creek junction (about six miles and a few thousand feet down from our Chicago Basin camp); we decided that as fun as it had been to hike all the way in from the Purgatory Flats TH under full packs we wanted to shorten that distance on the main exit hike if possible. We'd already climbed two major 14,000+ foot peaks on this day, but we figured since we'd be mostly descending that we could suffer through the remaining miles - putting us at an estimated 3,000+ feet of gain, about 6,000+ feet of loss, and about 12 - 13 miles hiked that day by the time all was said and done.
We hiked out about the time sunset was happening but it was mostly overcast, and Chicago Basin itself really isn't the best place to catch sunset shots anyway, so I wasn't too distracted by amazing light like I often am when hiking through beautiful country early or late in the day. Our pace was quick on the descent to the Needle Creek junction; I don't recall offhand how long it took us, but we covered the terrain pretty quickly and were able to find a very fine suitable space located a bit off the main Purgatory Trail. We set up a simple camp in the dark, and happily surrendered consciousness to a well-earned and restful sleep.

Enjoying a nice dinner under mildly-threatening skies before we tore down our camp and headed down to the Needle Creek junction area to make camp for the night.
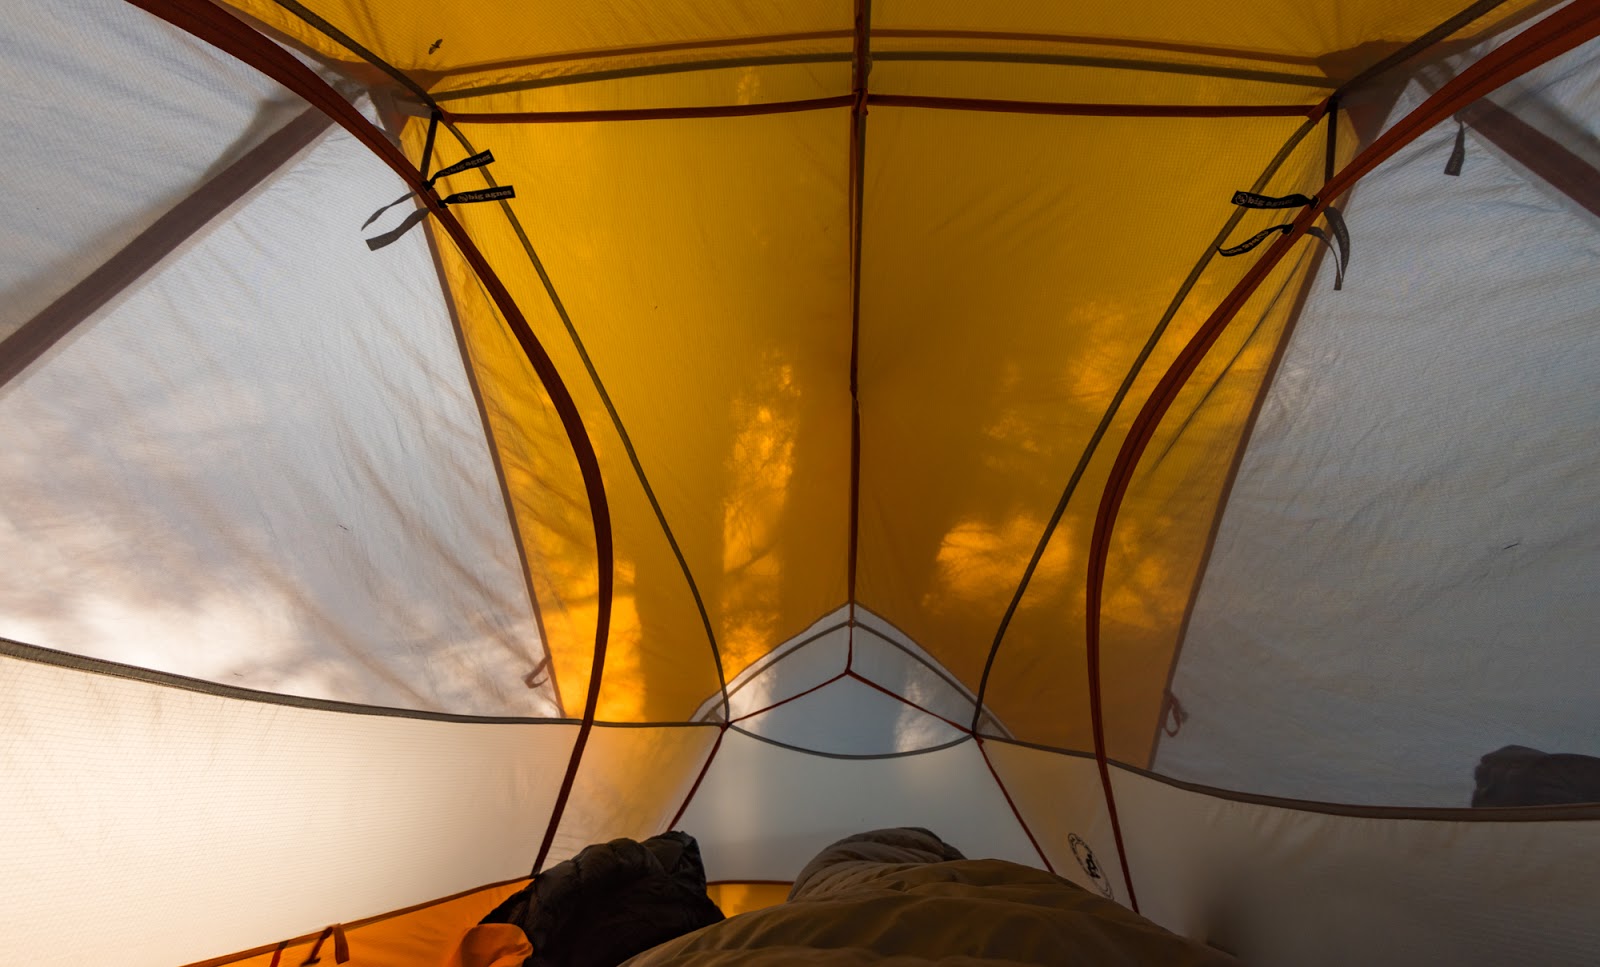
Inside my tent from our camp near the Needle Creek junction.
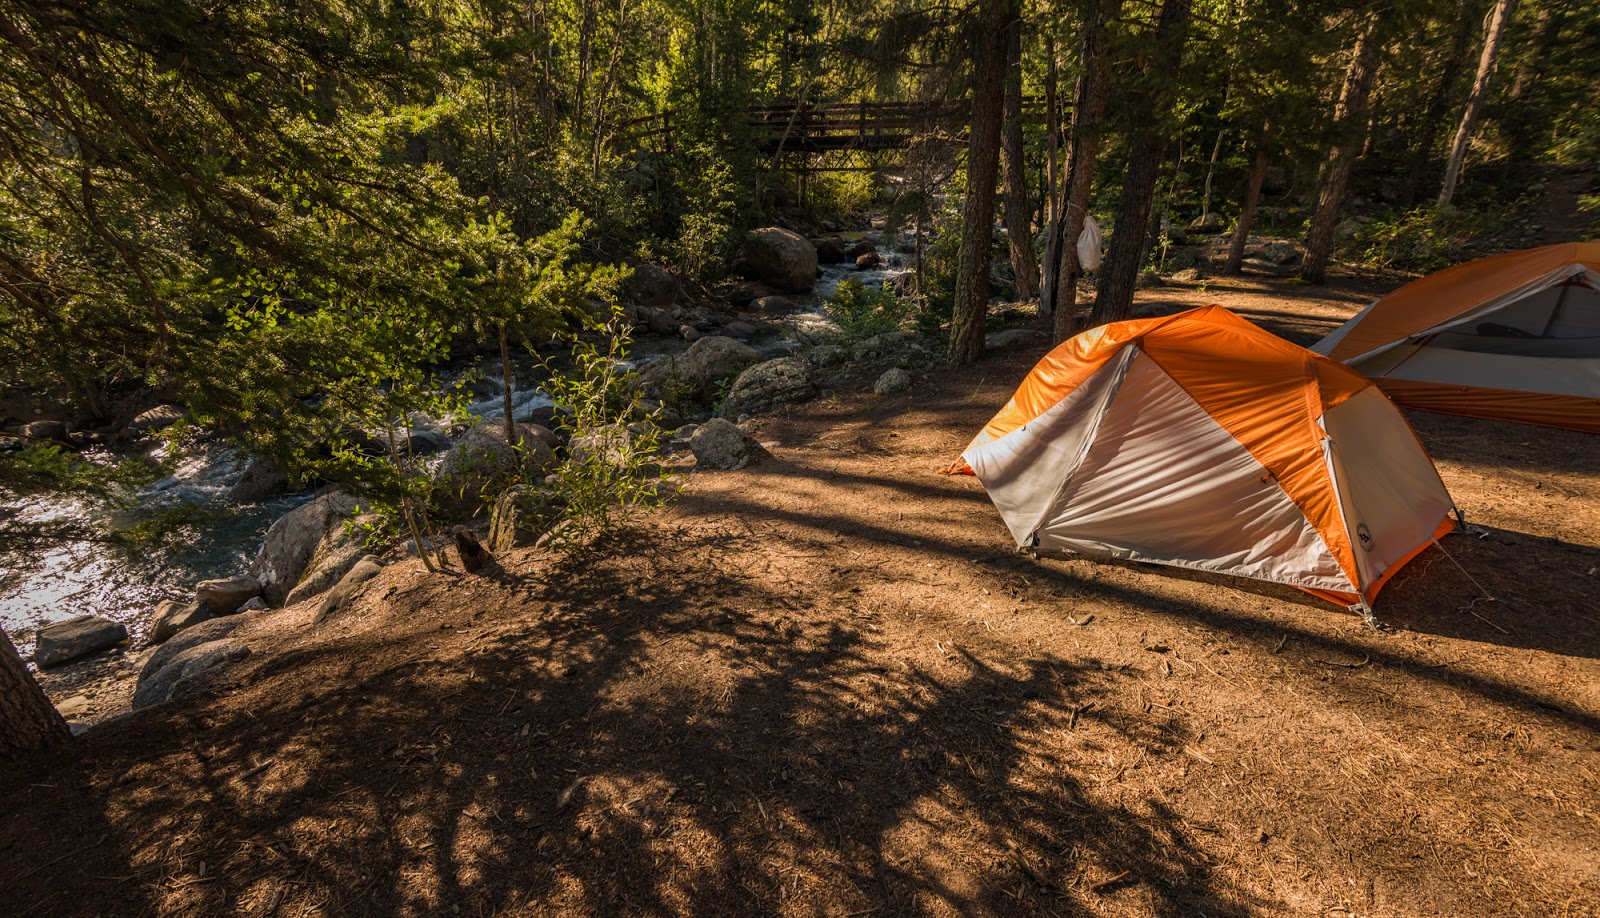
A wider view of the campsite we stayed at overnight; this is nearer to the creek than you really should be, but we weren't sure about the layout of things since we made camp in the dark and at the end of a high mileage/high elevation gain/loss day...oh well...at least it was scenic...We did make sure to go way out in the woods away from the creek for any bathroom needs.
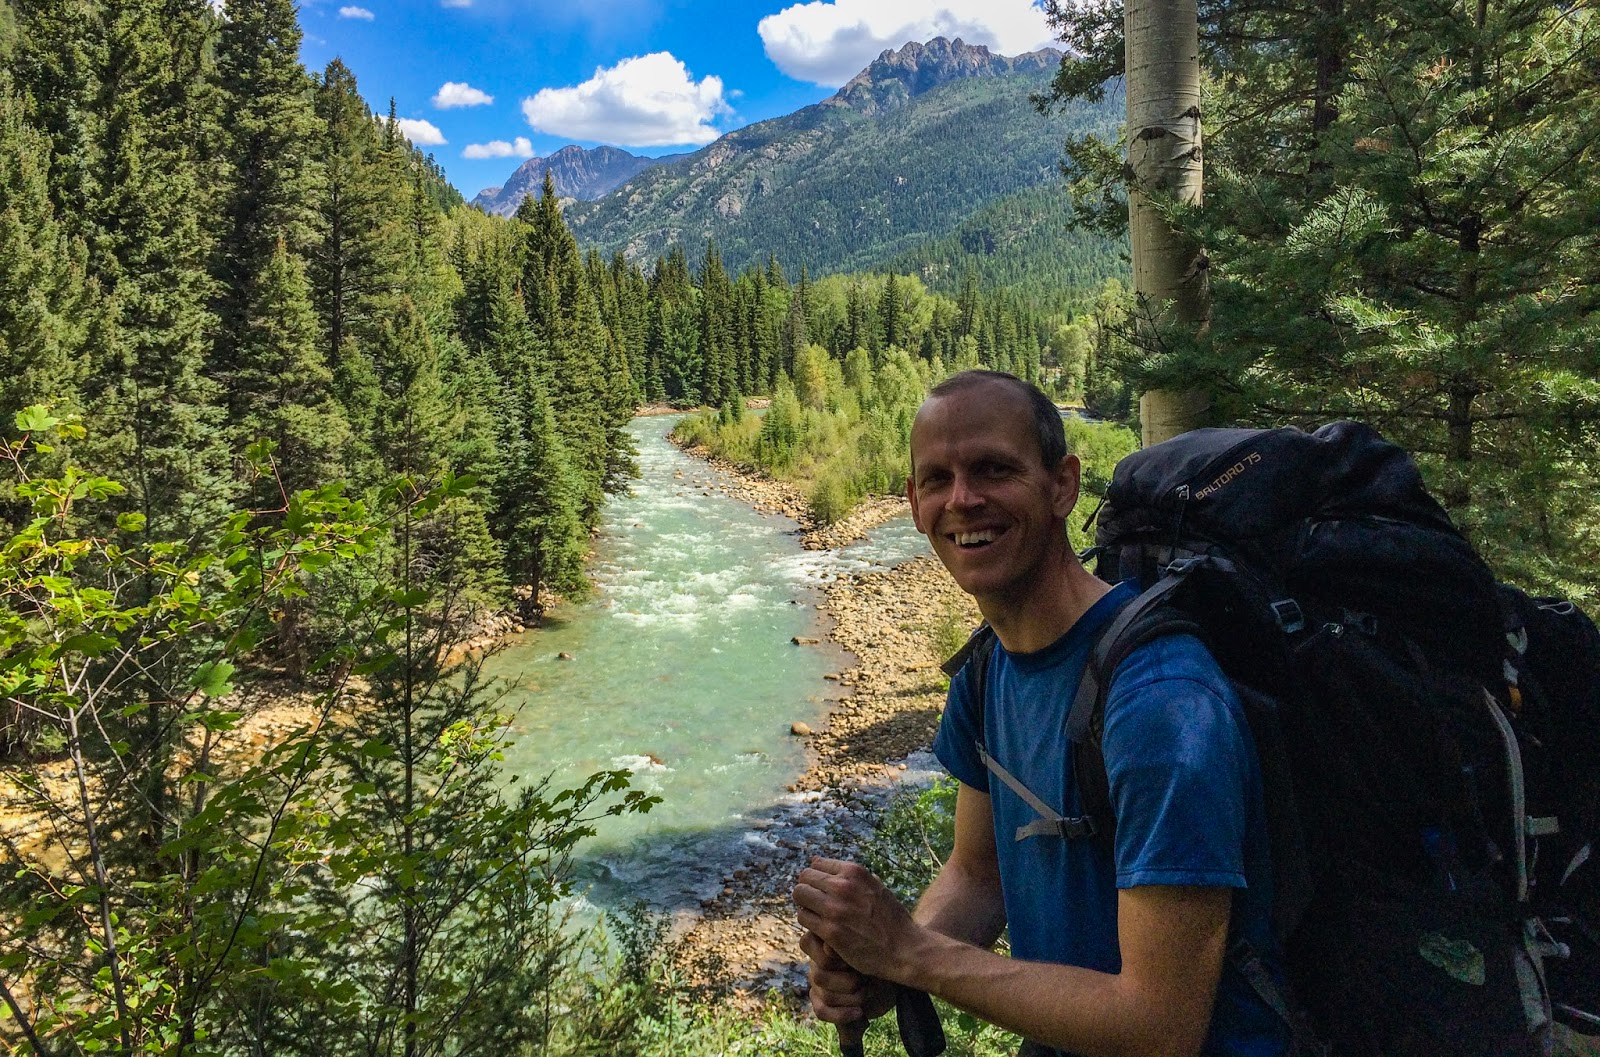
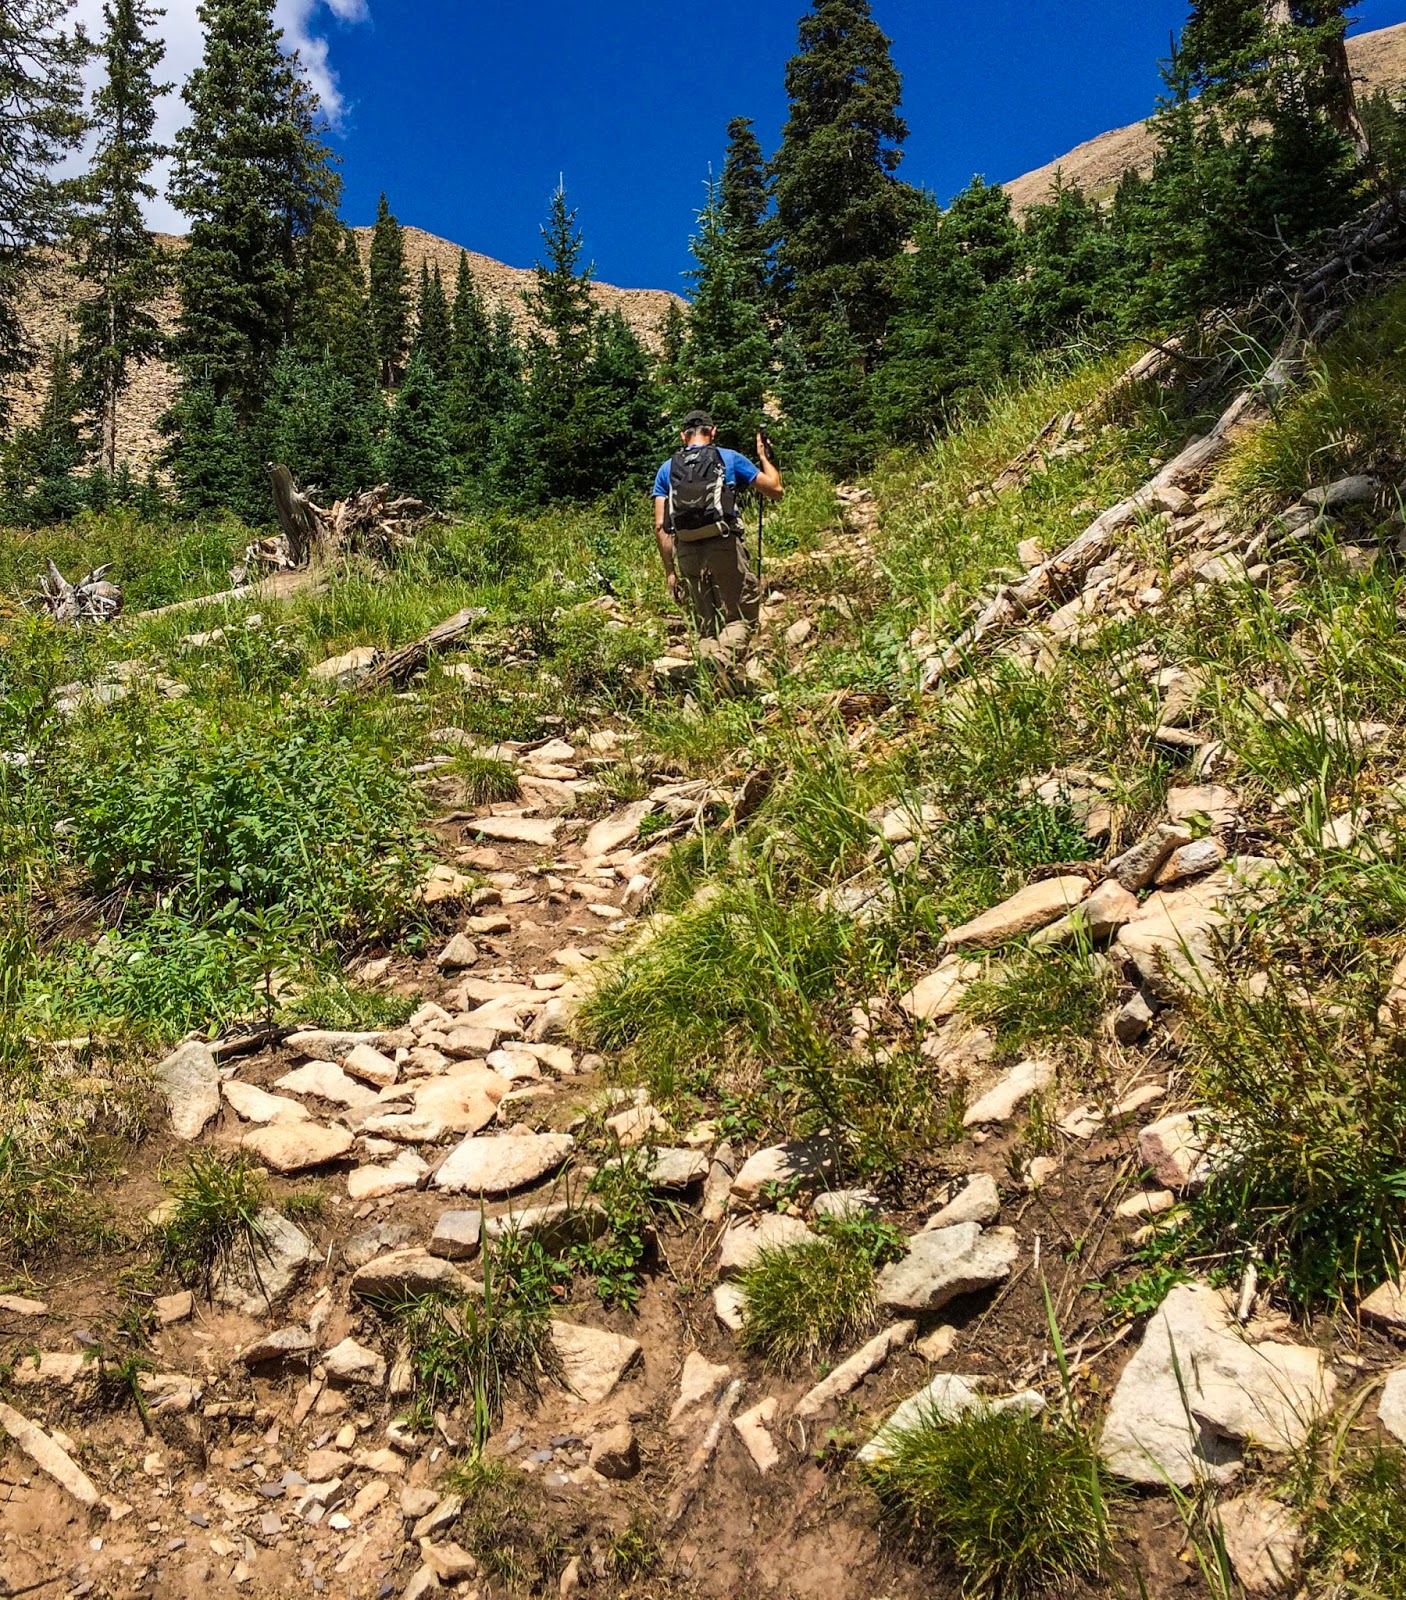
Me, headed back out on the long Purgatory Flats Trail; about eight or nine miles to go from here back to the trailhead, after having already descended around six miles from our camp the night before. (Photo by Dave)
As lovely as backpacking to and through amazing areas like Chicago Basin is (truly), there's something consistently magical about that moment you first see your car off in the distance and know that deliverance is nigh, so to speak.
Because we'd been blessed with good enough conditions and sufficient strength to make all our goal summits in the Chicago Basin area in just two days of hiking it was currently only Friday late morning or early afternoon when we hit the TH again at Purgatory Flats. Dave and I had decided we'd head out and get dinner in Montrose at my favorite place there, Pahgre's, then we'd head a bit back outside town and hope to catch an open spot up at the walk-in sites at the Black Canyon of the Gunnison National Park - which I've taken a liking to introducing new people to when I come out this way.
As Providence had it, we did get to enjoy a delicious meal at Pahgre's, we did find a suitable site out at the walk-in camping area (Loop C, for anyone's reference) next to some rowdy (probably mildly drunk/high) neighbors who reminded us why we both enjoy remote backcountry camping so much...To take the edge of the human-environmental unpleasantness, such as it was, the night sky was glorious - the moon wasn't visible, and the air quality was pristine - and the Milky Way was shining bright. The night sky wasn't the best I've ever seen - right now that's a two-way tie between two other areas I won't mention now (to help keep them from being overcrowded), but it was a oyous experience. Also, there was a meteor shower going on, which explains a bit of the itneresting crowd who'd come up to this area to stargaze. Dave and I stood out in the cool evening air for a while, talking and enjoying the amazing views above us.
Whenever I see night skies of this general quality (which is a comparative rarity, but an experience I feel everyone should seek out if at all possible because of its overall power and impact) it reminds me of the ancient scene, described in the Holy Bible, way back in Genesis where God instructs Abraham, as he looks up into the starry sky, "Look now toward heaven, and tell the stars, if thou be able to number them: and he said unto him, So shall thy seed be." The power of that imagery in this divine promise to Abraham becomes incredibly tangible on nights like this... (The Holy Bible: Genesis 5:15, KJV)
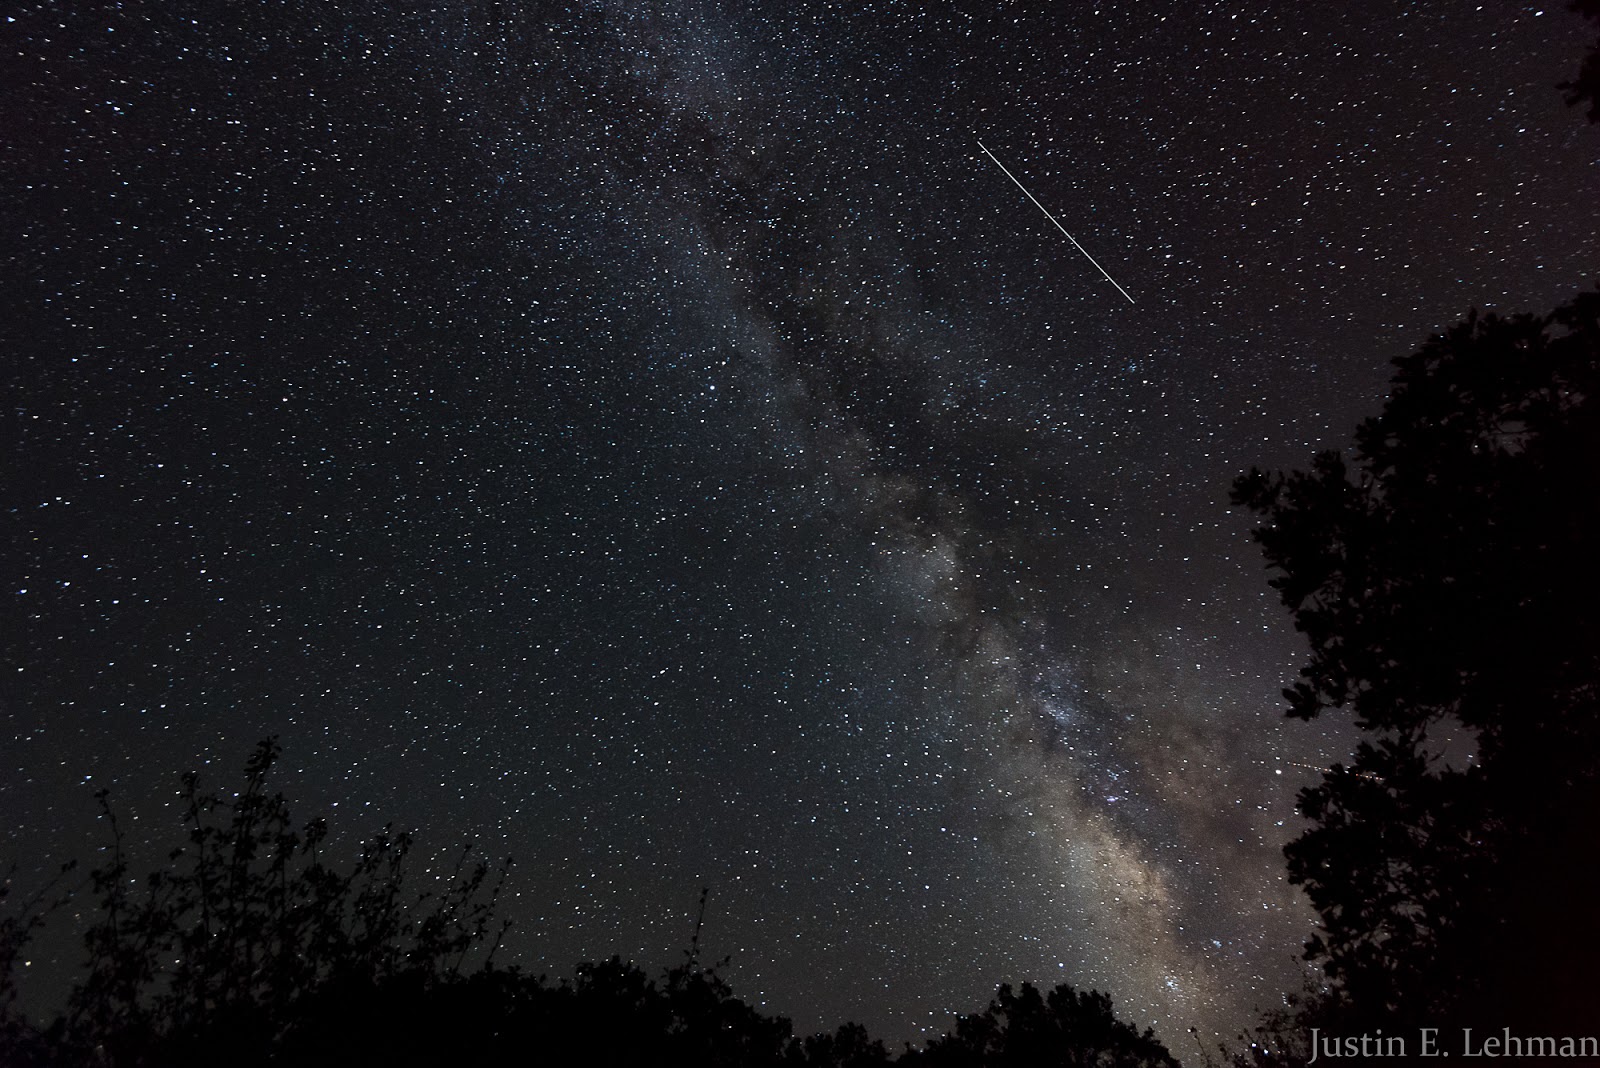
Shooting star and the Milky Way.
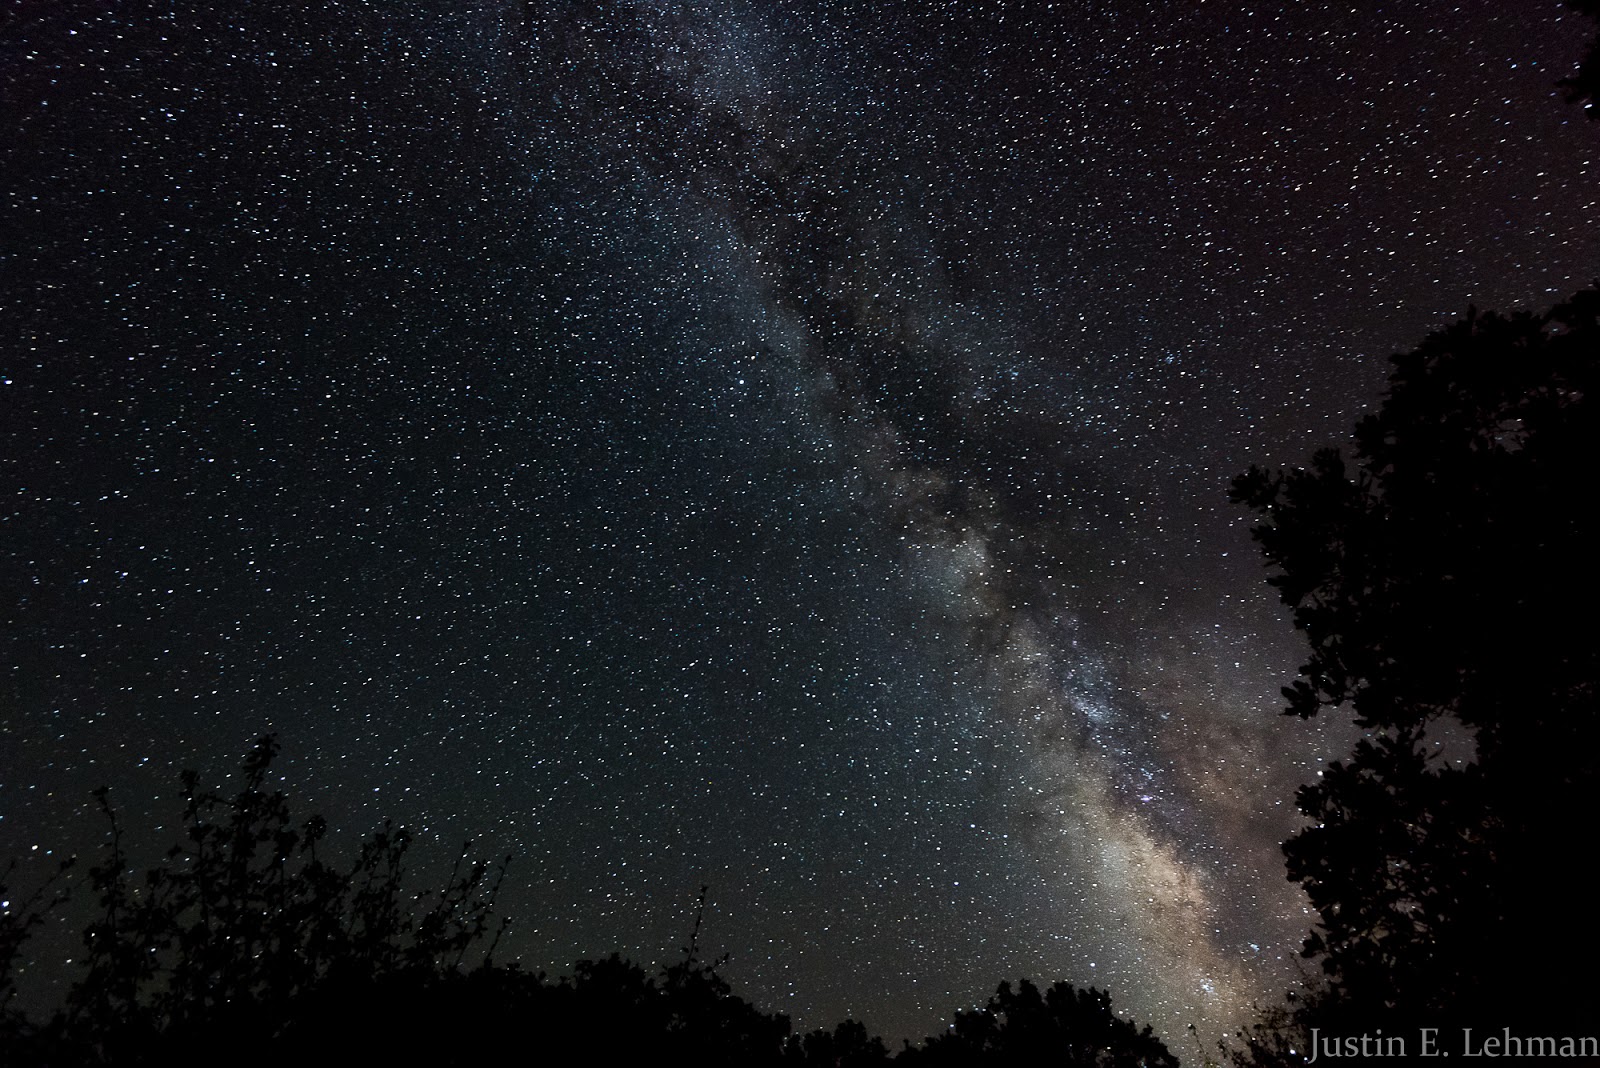
Milky Way without any shooting stars.
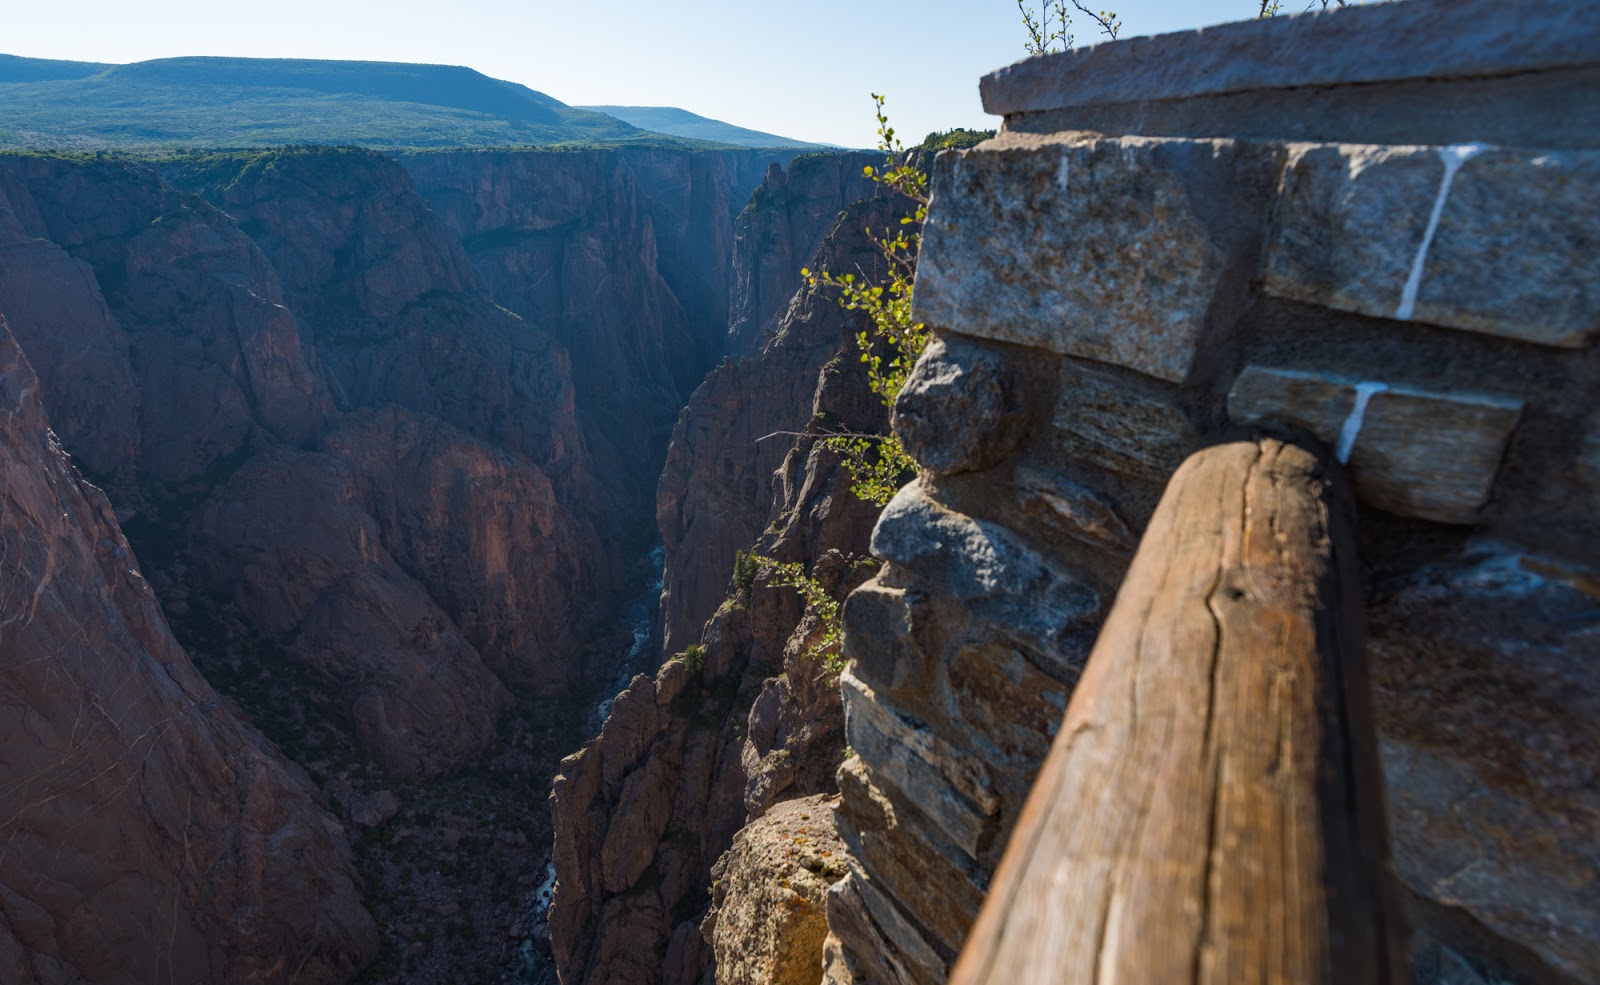
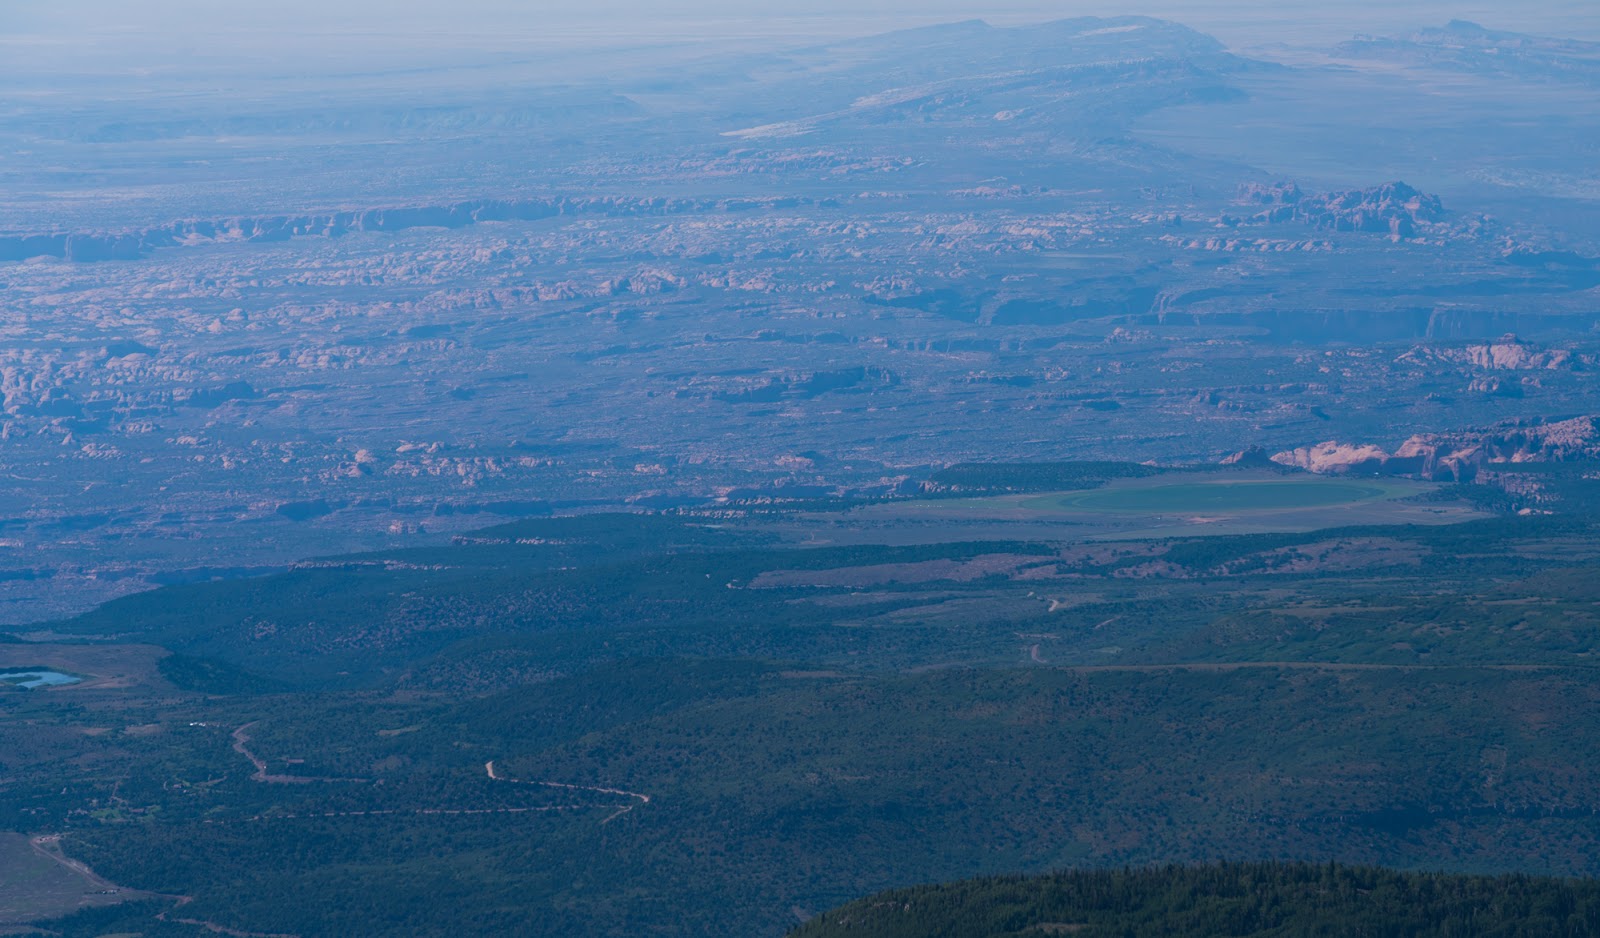
Looking down into part of the Black Canyon of the Gunnison.
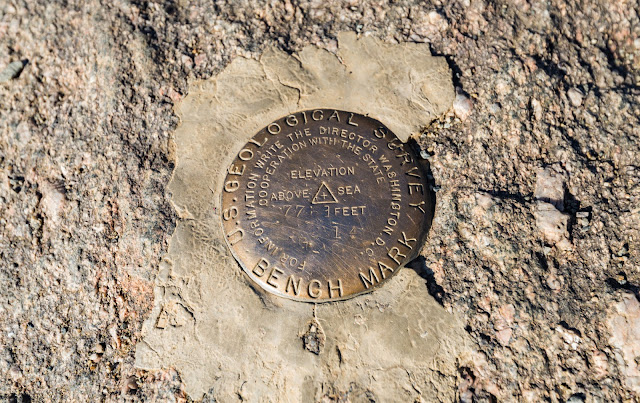
Benchmark along the canyon rim...I tried to photograph this last time I was here with Claron and Mitch after my first backpacking trip to Colorado this year (a couple of weeks before this one) but the photo I took then was a bit out of focus...got it this time.

Epic vistas at The Painted Wall, Colorado's tallest cliff (upper-right), in Black Canyon of the Gunnison National Park
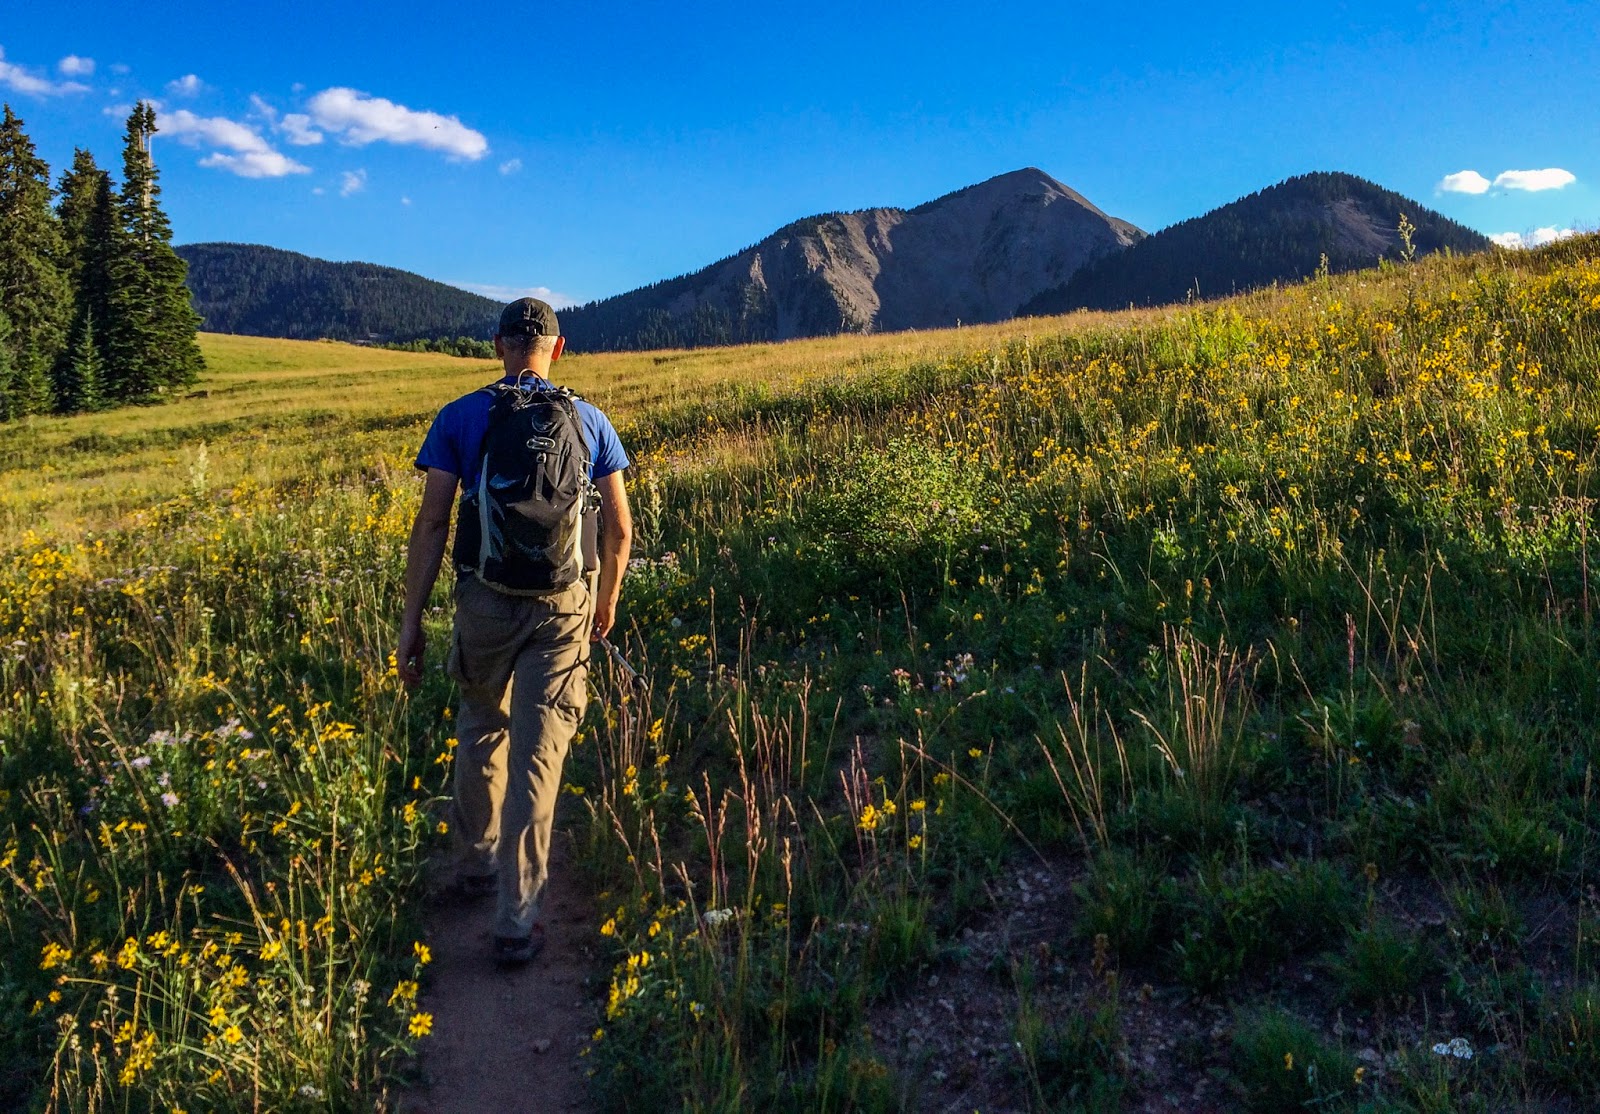
A few hours later we'd navigated the highway and ensuing dirt roads into La Sal Pass, up at 10,125 feet, ready to grab the highpoint of the La Sals and get Dave another ultra-prominence peak here in Utah - there are eight of them total: Kings Peak, Mount Peale, Mount Ellen, Deseret Peak, Mount Nebo, Flat Top Mountain, Mount Timpanogos, and Ibapah Peak - I've climbed all of them except Mount Ellen in the Henry Mountains and Flat Top Mountain in the Oquirrh Mountains - Ellen is hard to access without a high clearance vehicle and Flat Top just hasn't interested me enough to merit a trip out there yet, even though I see it almost every day...Honestly, if Mount Ellen and Flat Top Mountain weren't on the ultra-prominence list I wouldn't even have my eye on them. I do like summiting range high points, but generally the peaks I pursue I pursue both for their overall aesthetic value as well as for the interesting nature and challenge of the route required to summit.
Anyway, Mount Peale is a straightforward ascent, but the unique views from the top alone justify the ascent. Originally I did Mount Peale in combination with a traverse across the Razor Fang (an exposed, crumbly , serrated ridge in the range), and then up neighboring Mount Tukuhnikivatz before route-finding back down to La Sal Pass. Today we'd just be doing Mount Peale - and our plan was to get it done pretty quickly, since we planned to be back at our respective homes that night.
Anyway, Mount Peale is a straightforward ascent, but the unique views from the top alone justify the ascent. Originally I did Mount Peale in combination with a traverse across the Razor Fang (an exposed, crumbly , serrated ridge in the range), and then up neighboring Mount Tukuhnikivatz before route-finding back down to La Sal Pass. Today we'd just be doing Mount Peale - and our plan was to get it done pretty quickly, since we planned to be back at our respective homes that night.

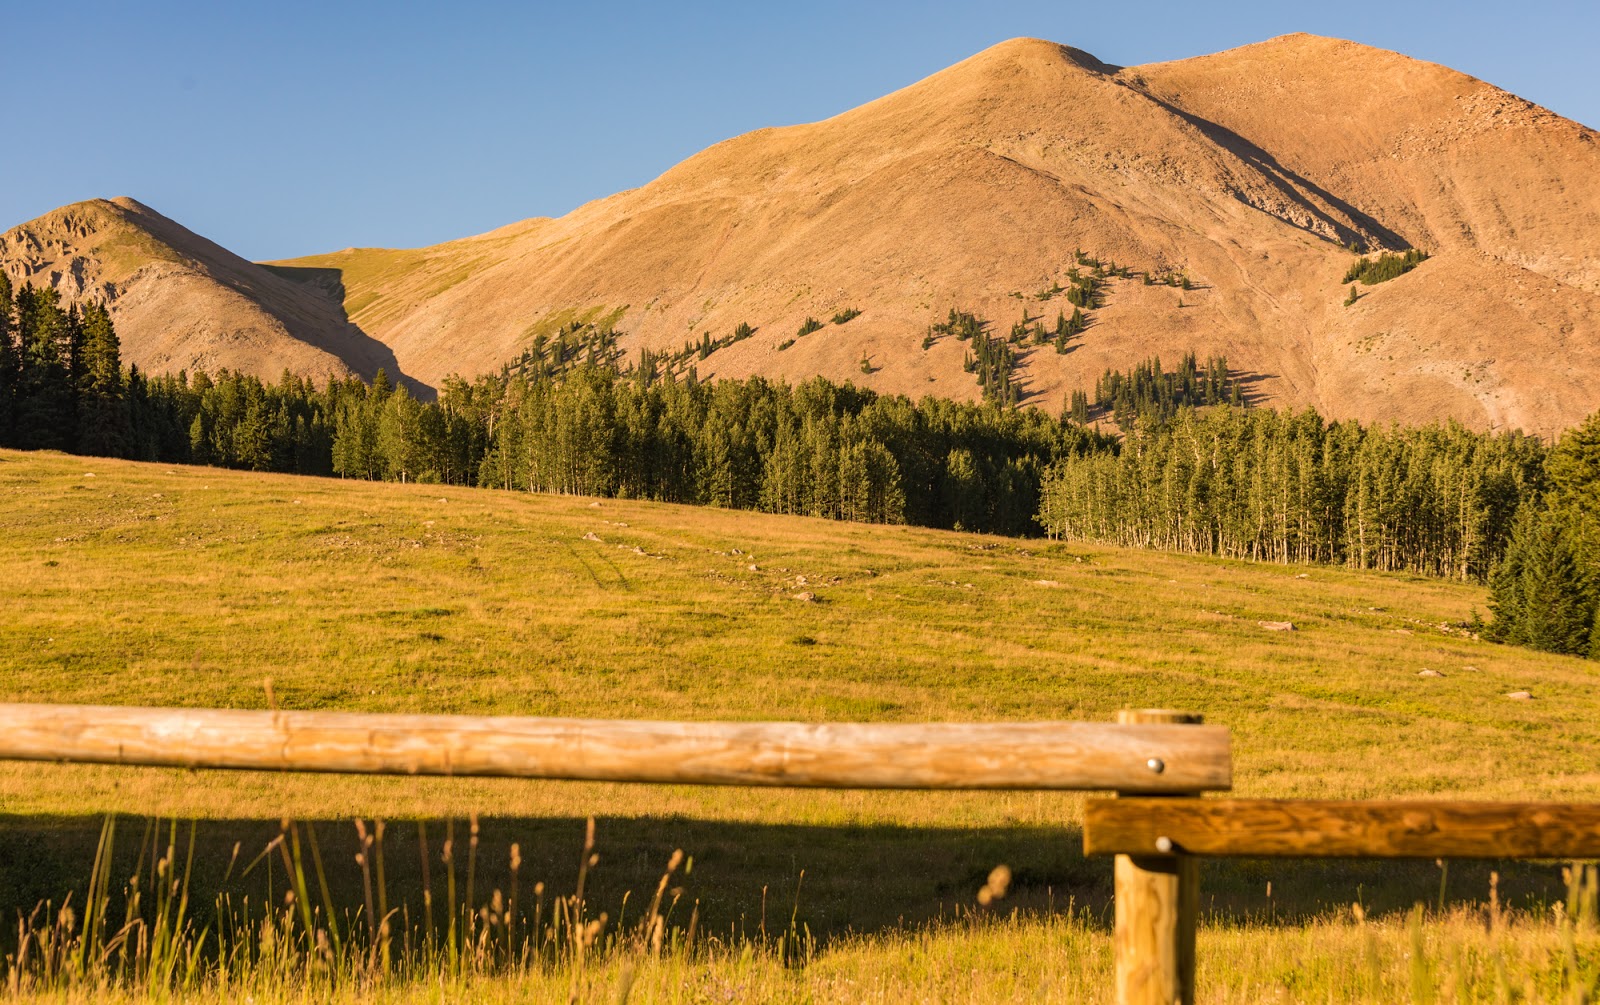
Mount Peale, seen from part of the large meadow you cross through when coming from La Sal Pass.
There were some thicker clouds when we first started up from La Sal Pass, not especially threatening, but the kind of clouds you learn to keep a close eye on when you're out in high elevation territory like this. Happily, the clouds cleared up for us and we hiked under halcyon skies all the way to the top.
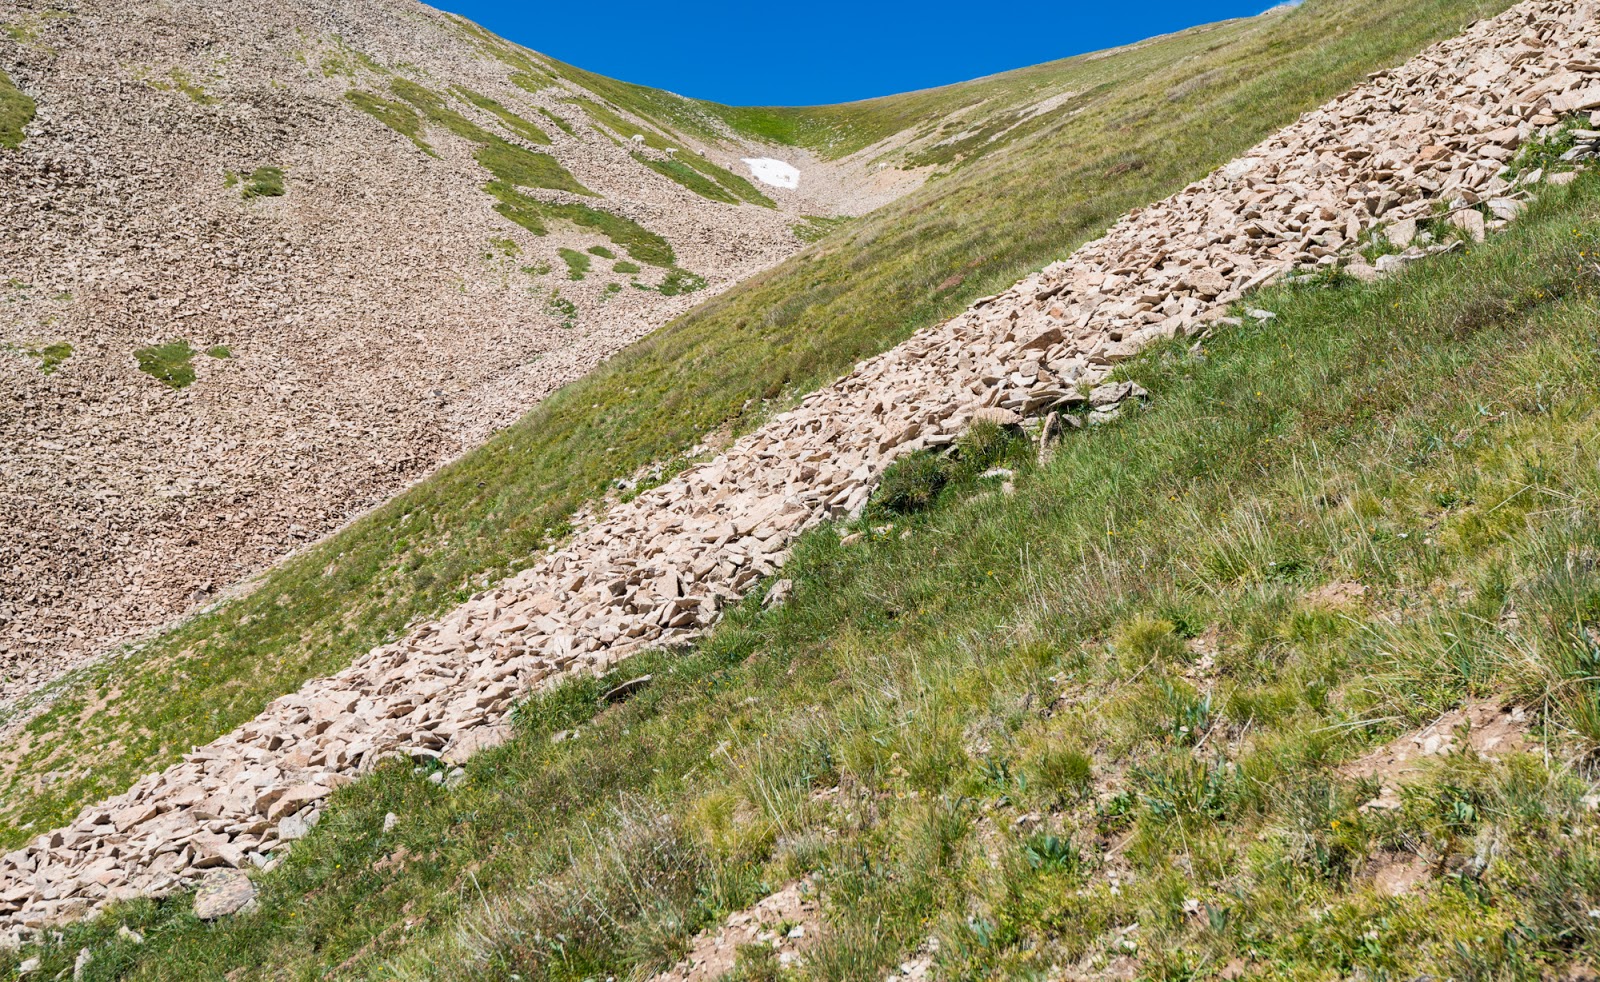
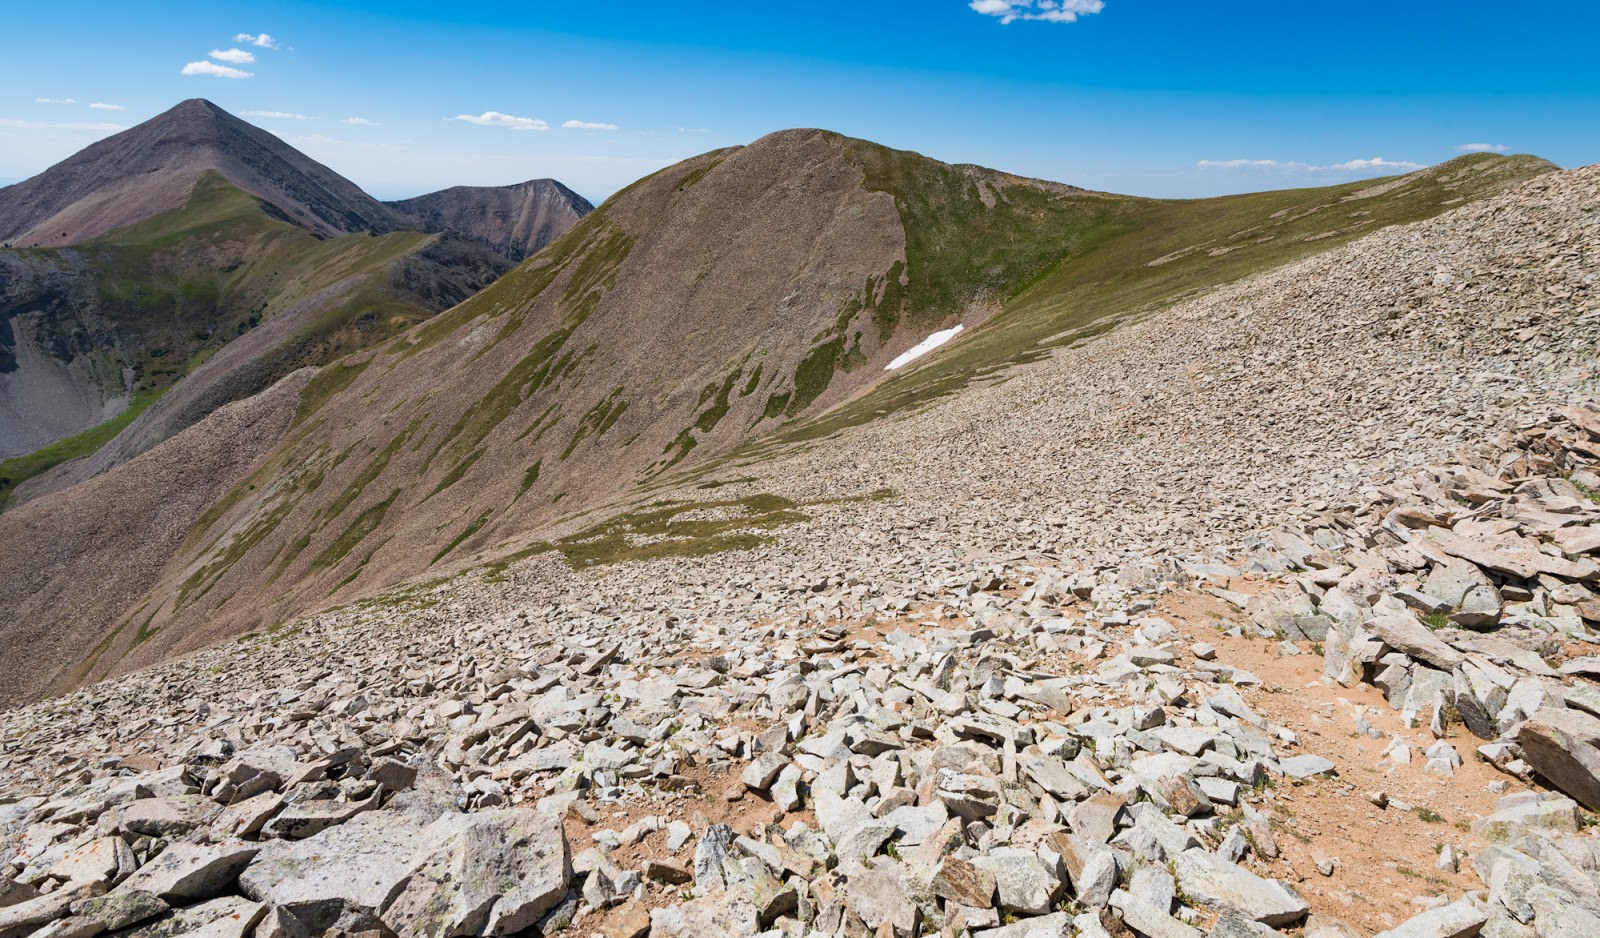
One tip I'll give, re-echoing other online sources of info on this peak, is that the best course to the summit of Mount Peale from La Sal Pass is to follow the prominent gully seen about top-center in the prior image nearly all the way to its crest - the earlier you exit this gully toward the main part of Mount Peale the more difficult your ascent will be - so keep it simple, eh?
One tip I'll give, re-echoing other online sources of info on this peak, is that the best course to the summit of Mount Peale from La Sal Pass is to follow the prominent gully seen about top-center in the prior image nearly all the way to its crest - the earlier you exit this gully toward the main part of Mount Peale the more difficult your ascent will be - so keep it simple, eh?
Me, ascending the lower stretches of the big gully on Mount Peale. (Photo by Dave)
Starting to get up near the talus now.
The trail, nicely keeps you off the problematic talus almost the whole way up the peak.
Dave ascending the huge gully that runs up the side of Mount Peale. If you go here you need to follow this gully just about as far up as you can; many times it seems you can/should leave the gully along the way, but keep going up here - the terrain is much firmer and enables a pretty quick ascent. When you start to get close to the top of the gully there are some decent exit points up steep, grassy ground.

High trail, a group of mountain goats, and two people enigmatically following them around as they moved across the slopes on the other side of the gully (near upper-center).

Me, continuing up the big gully as we ascend Mount Peale. (Photo by Dave)
More mountain goat views (near upper-center).
This is about how high I recommend going up the huge gully before you try to exit. You could go all the way to the very top, but that would lead you away from Mount Peale towards the small peak sometimes called "Talking Mountain" that stands just before the Razor Fang ridge that runs toward Mount Tukuhnikivatz from this area.

After fighting up some very steep grassy/rocky slopes we gained the high ridge leading to Mount Peale. The first high point here is a false summit, but the true summit is just a simple talus walk/occasional boulder hop beyond that.
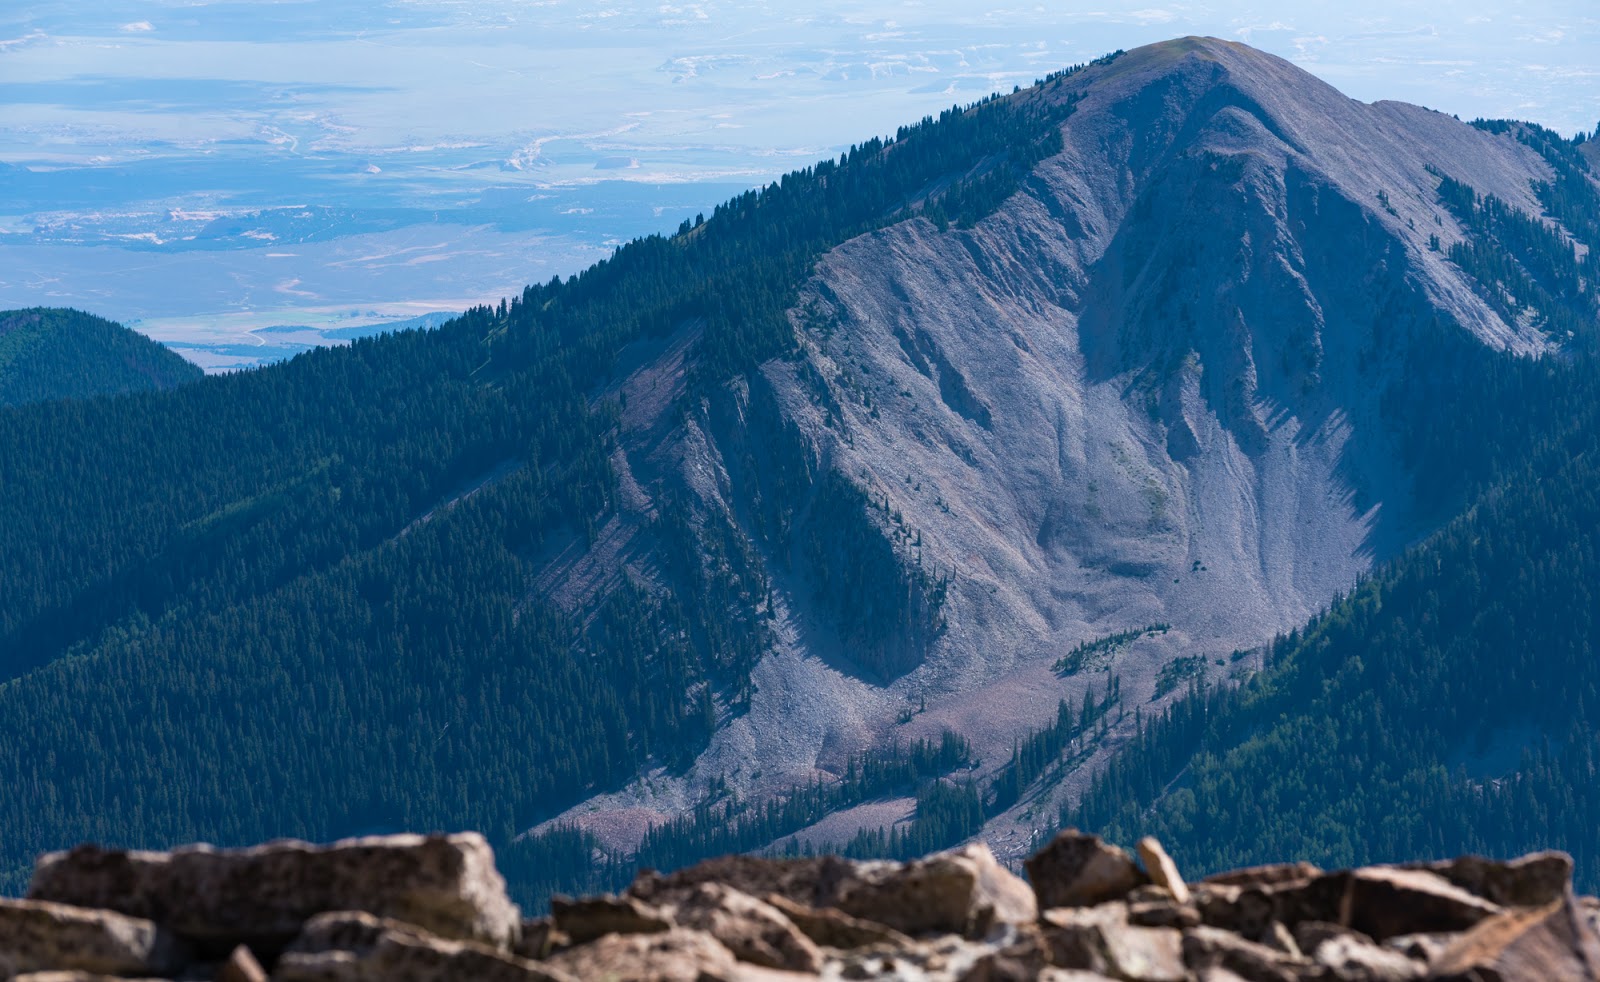
Big, open country way up here above treeline. Mount Tukuhnikivatz (12,482 feet), the range's third highest point, is in the top left here.
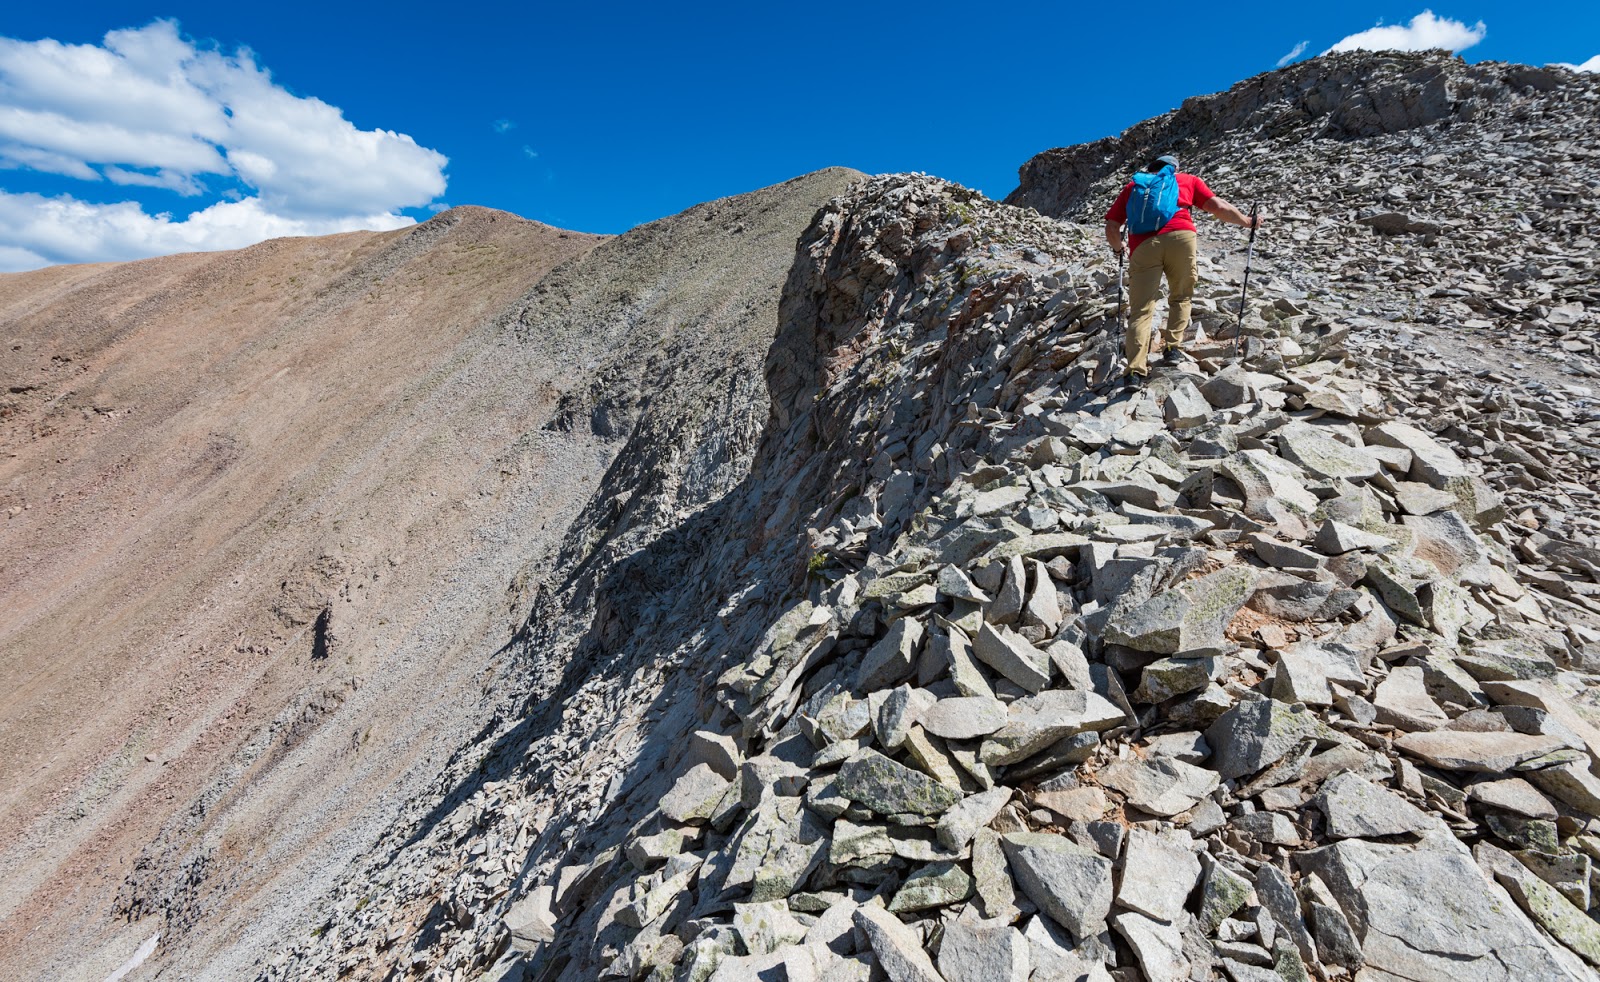
Dave works up the ridge toward Mount Peale (which is on the left here. This is about as scary as this ridge looks/gets, and this was only momentary. Most of the terrain is very straightforward and, if you look close, you can follow a use trail that's developed through the boulders to the top...
Interesting small area of blue-gray rock at a high saddle on Mount Peale - the rocks right here in this little section are a different color than all the surrounding rocks...Also, the much shorter South Mountain (11,817) is visible to the upper left here.

I love this view of the serpentine ridge curving back and forth between Mount Peale and Mount Tukuhnikivatz (the tall, pyramidal peak in the upper-left here), especially with the rugged canyon terrain below and beyond...Also, if you look closely you can see Dave just below the far center-left.

Dave took this picture of me just below the summit of Mount Peale as I was waiting for him so we could summit the last peak of our trip together.

Mount Tukuhnikivatz detail with canyon country beyond, from the summit of Mount Peale.
This is one of the reasons why the La Sals are one of the aesthetically neatest ranges anywhere to climb in. The La Sal Mountains are not particularly rugged, with the exception of the small Razor Fang area in the center section of the range, but the contrasts between high alpine terrain and world-class canyon views around it (and all the contrasting terrain changes in between those two extremes) make this a really visually-magical place.
Views over surrounding canyon country from the summit of Mount Peale.

Views over surrounding canyon country from the summit of Mount Peale.
South Mountain from the summit of Mount Peale.
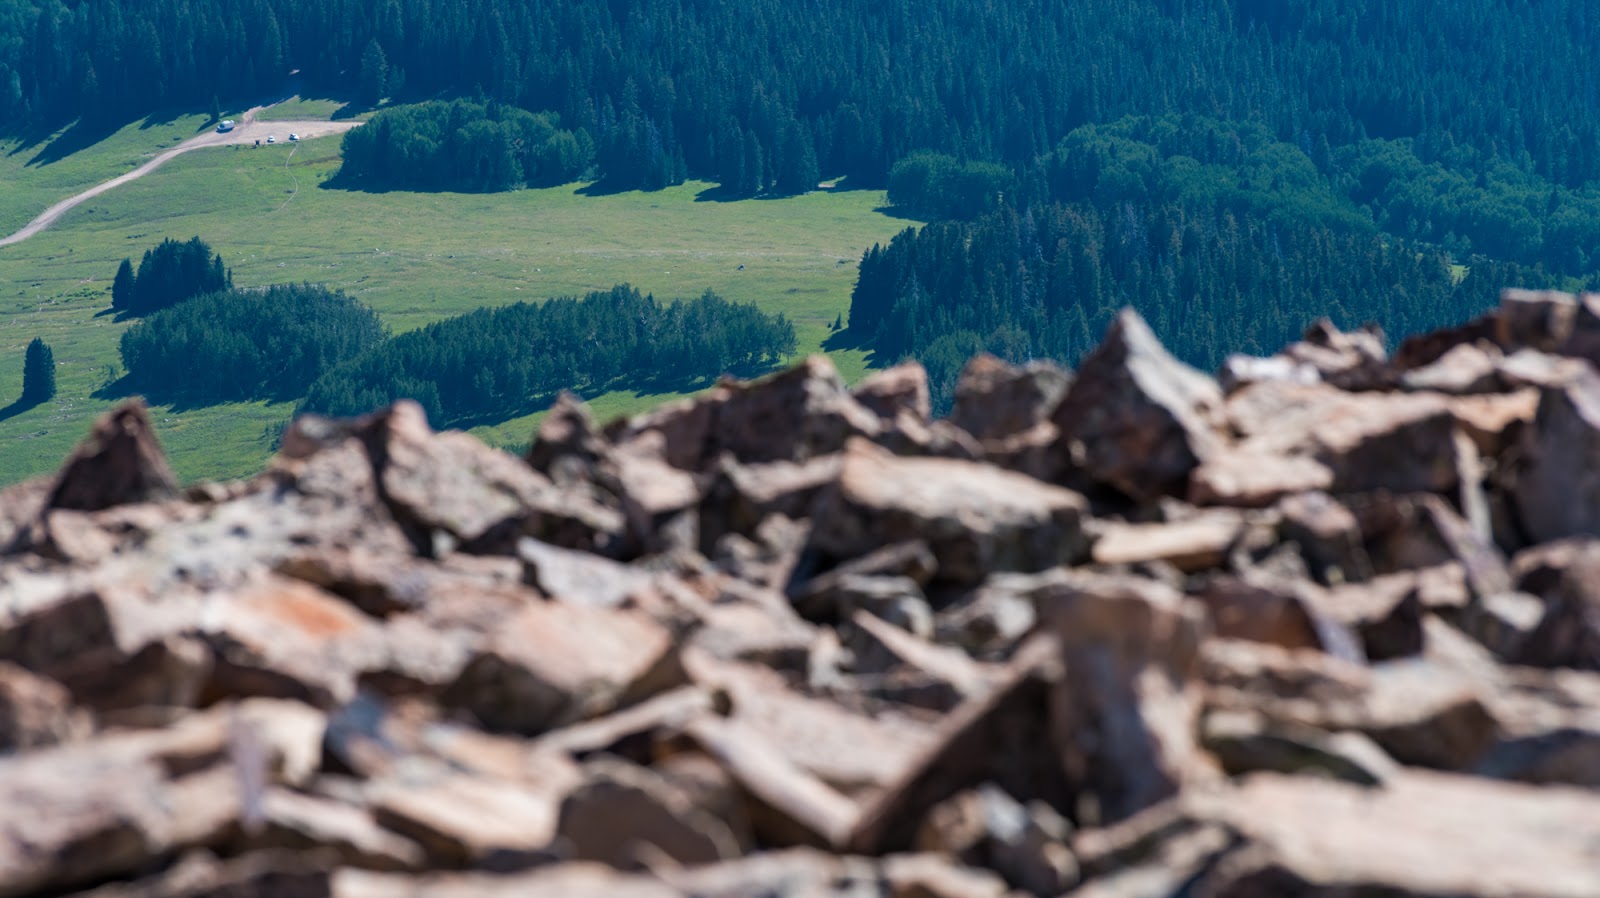
Neat contrasts between the summit of Mount Peale and the meadow far below, near which we parked. My car is the center one of the three closest to the meadow here. The zoom lens on the camera messes with the perspective a bit, but there's a good bit of horizontal distance between the parking area and the summit of Mount Peale.

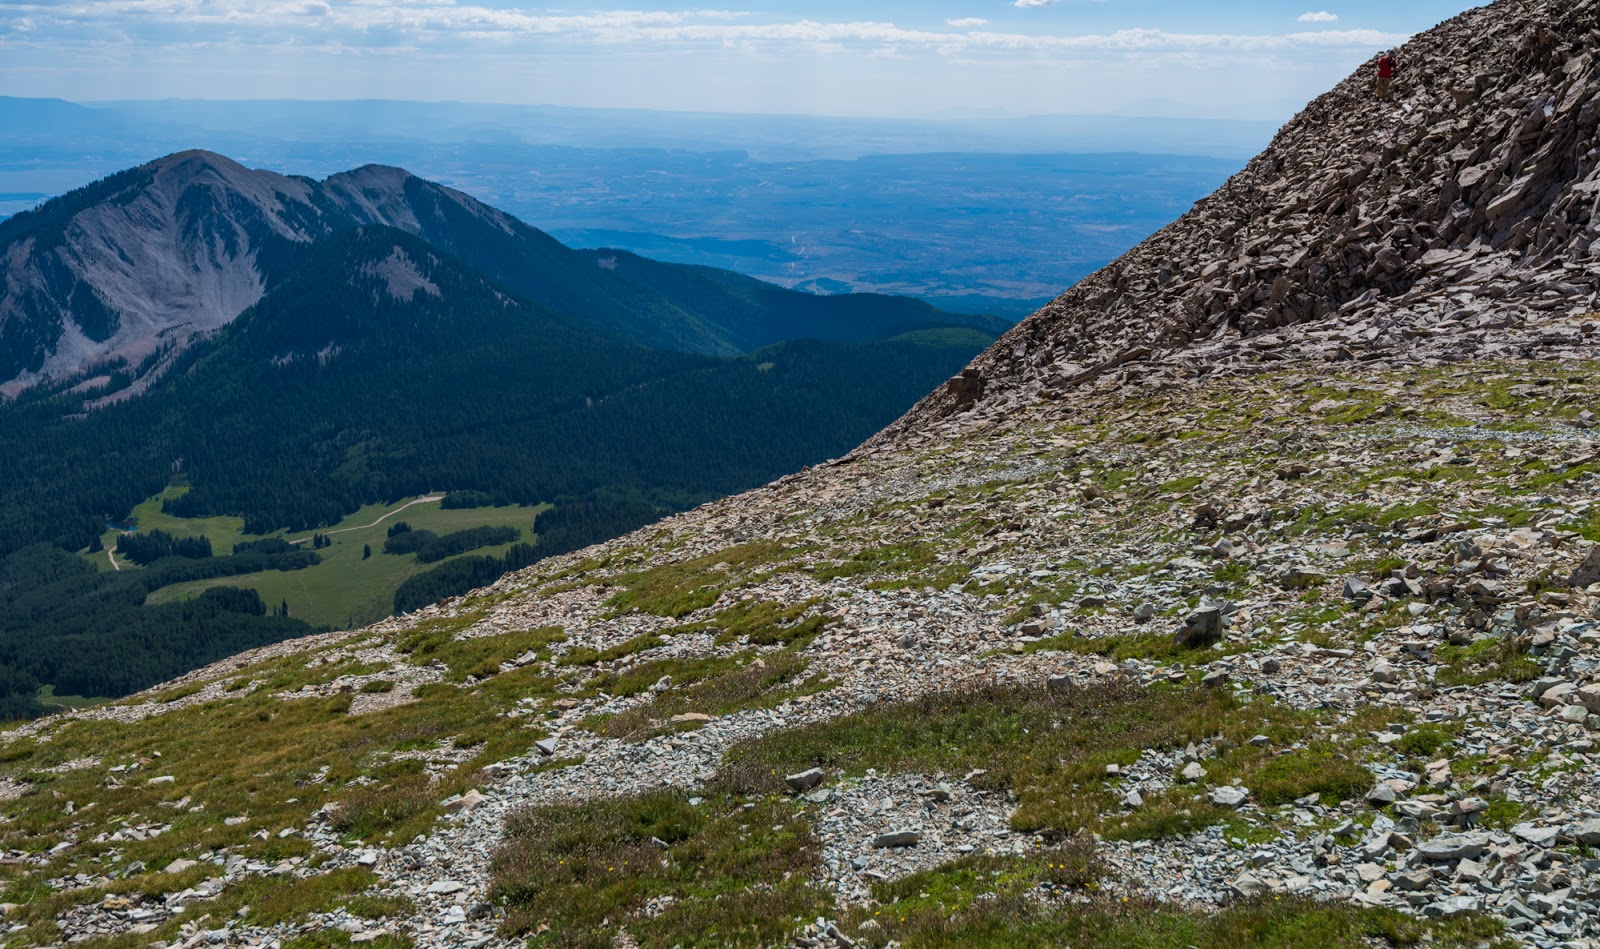
More terrain contrasts between the top of Mount Peale, the thickly forested terrain below, and some of the canyon areas beyond that.
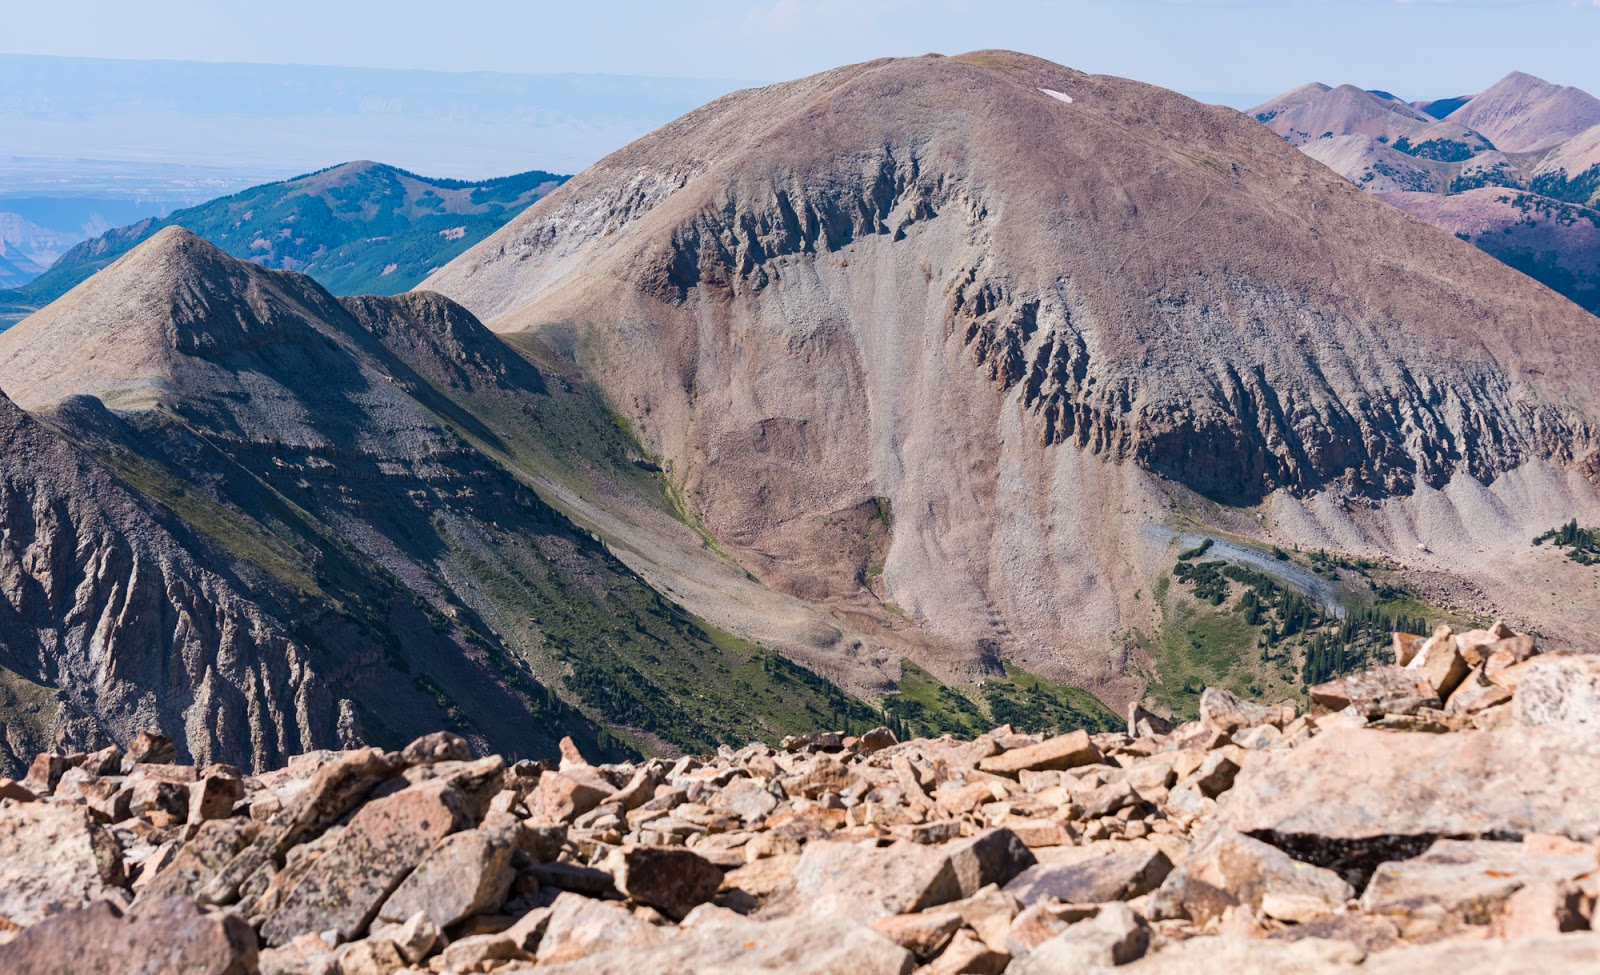
Mount Mellenthin (12,645 feet), the second tallest peak in the La Sal Range, and the only one of "the big three" out there I have yet to summit. I've now been on Peale twice and Tukuhnikivatz once. A dream hike of mine is traversing all three summits on the same hike. With an early start and a good pace it could be done...One of these days...

Dave, texting the Mrs. again.
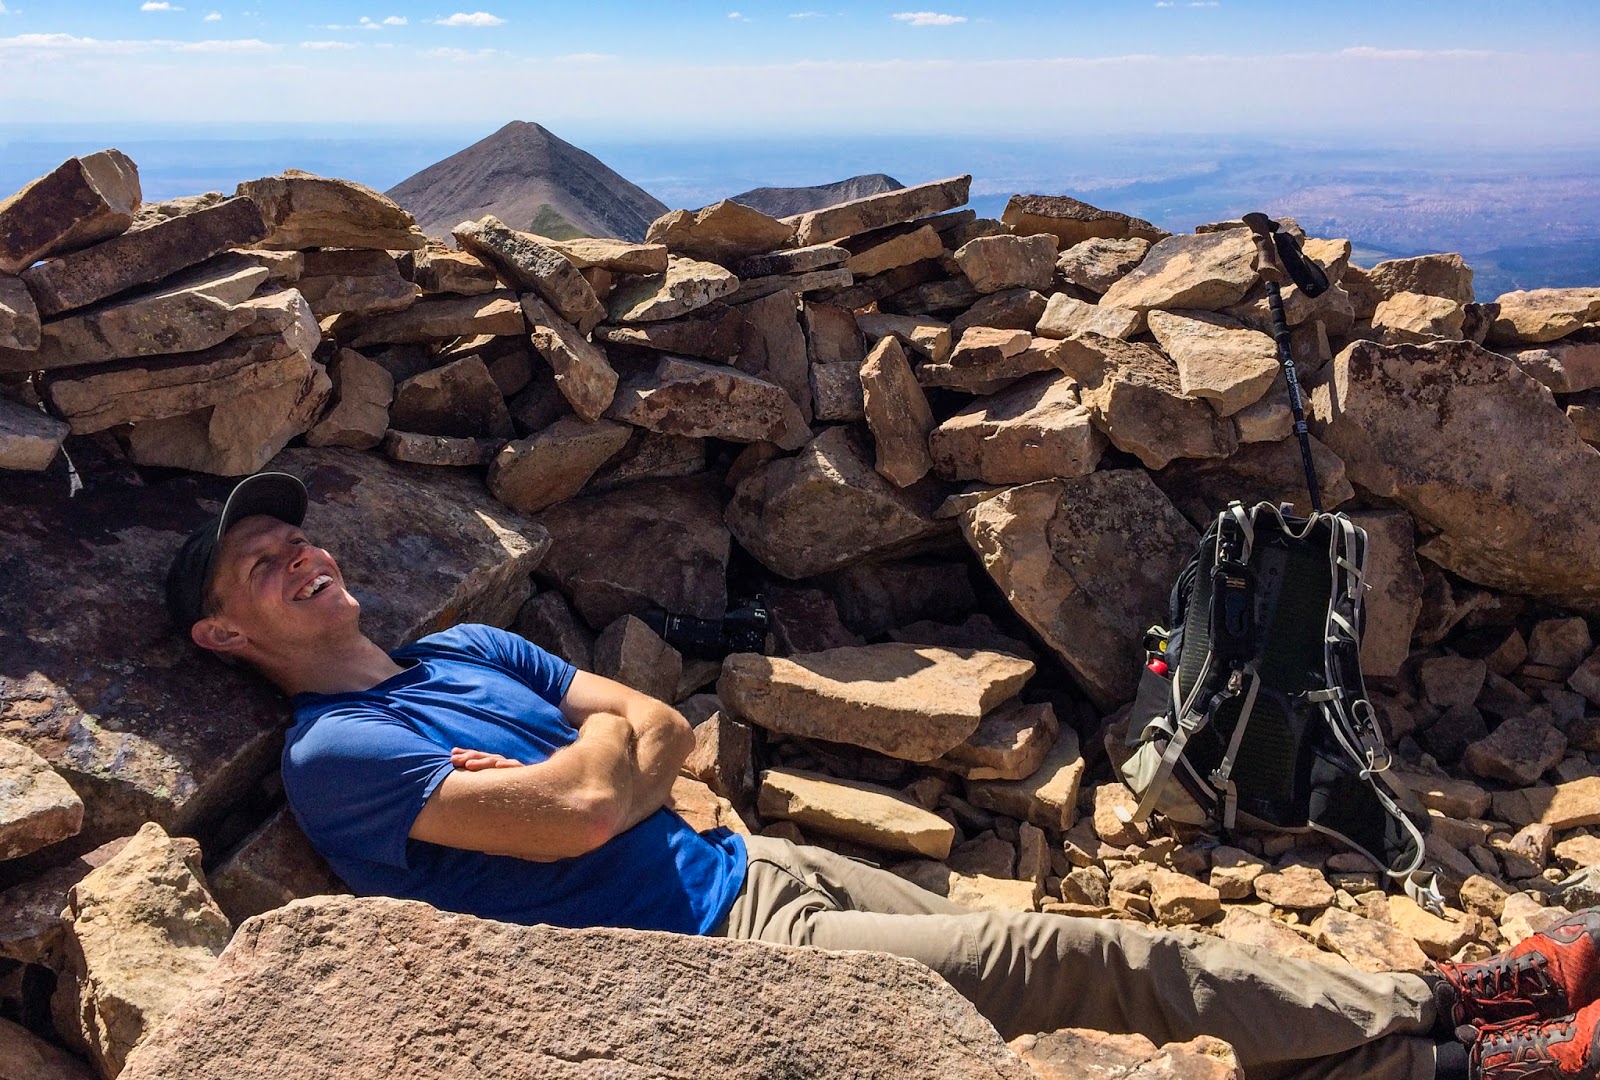
Mount Peale has, by far, the most comfortable summit wind shelter I've ever enjoyed on any peak...I was hoping this seemingly-perfectly-formed simple rock structure was still there. I loved this on my first ascent of this peak back in 2014 and remember commenting how it was comfortable enough up there to take a nap on if need be. I had to shift a rock or two out of the way that had been interpolated into the set-up unnecessarily over the years, but this picture well-captures the bliss I felt at once again enjoying the most comfortable recliner I've ever found on a mountain.
(Photo by Dave)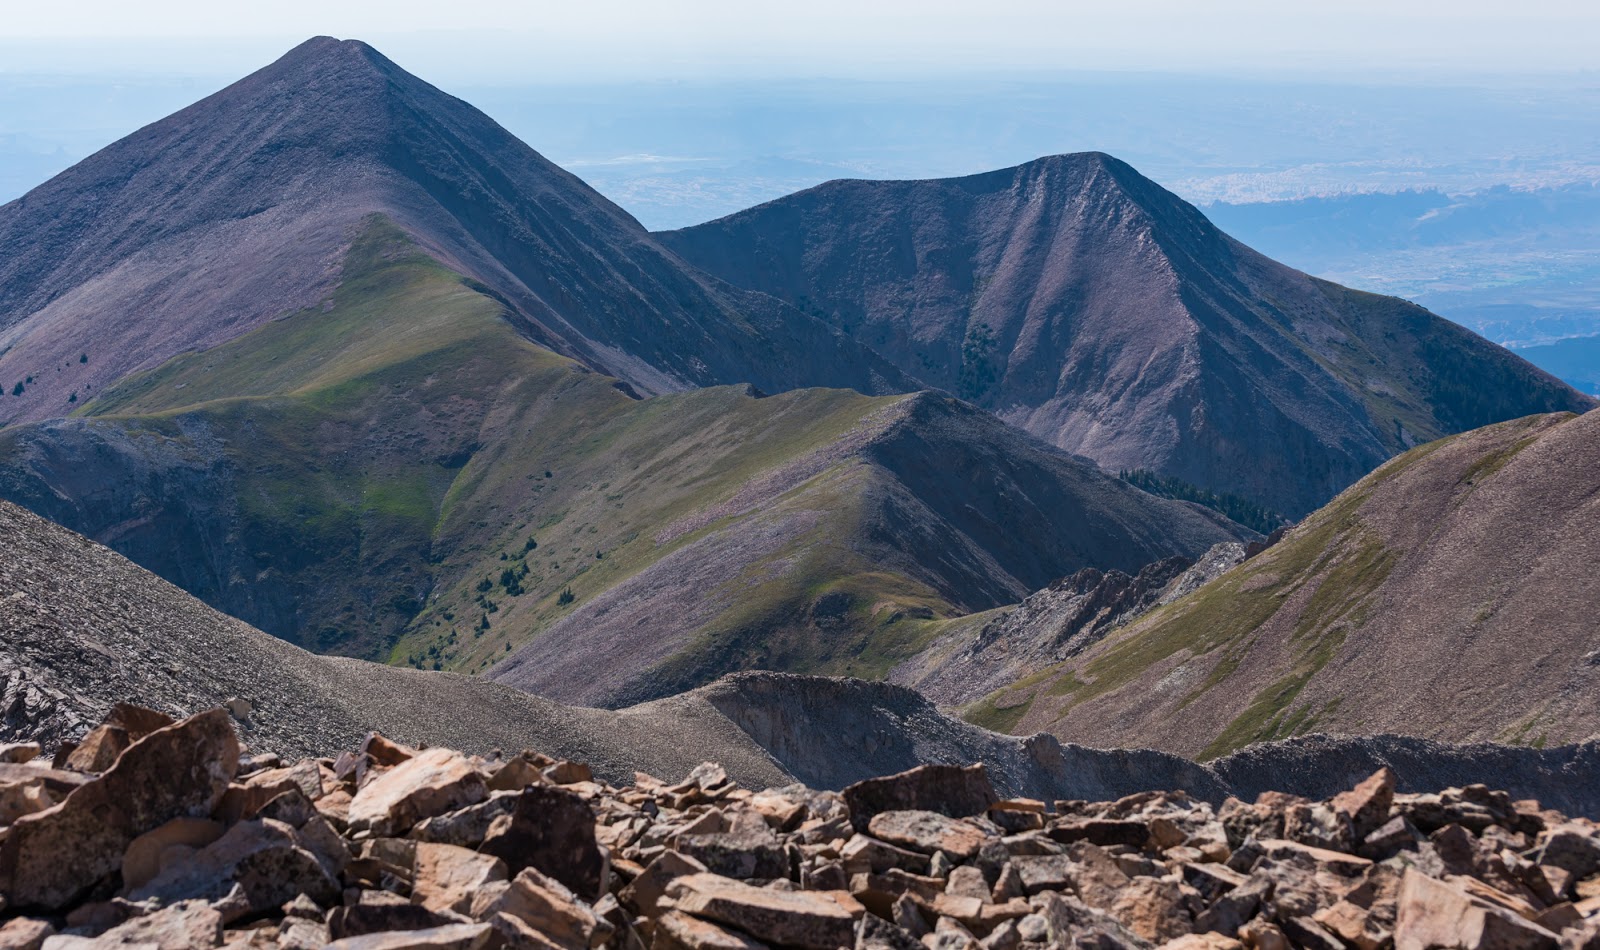
Nice angle on Mount Tukuhnikivatz.

More neat contrasts.

Zoomed perspective on La Sal Range high country and Moab, UT in the distance, with canyon areas stretching on beyond that.
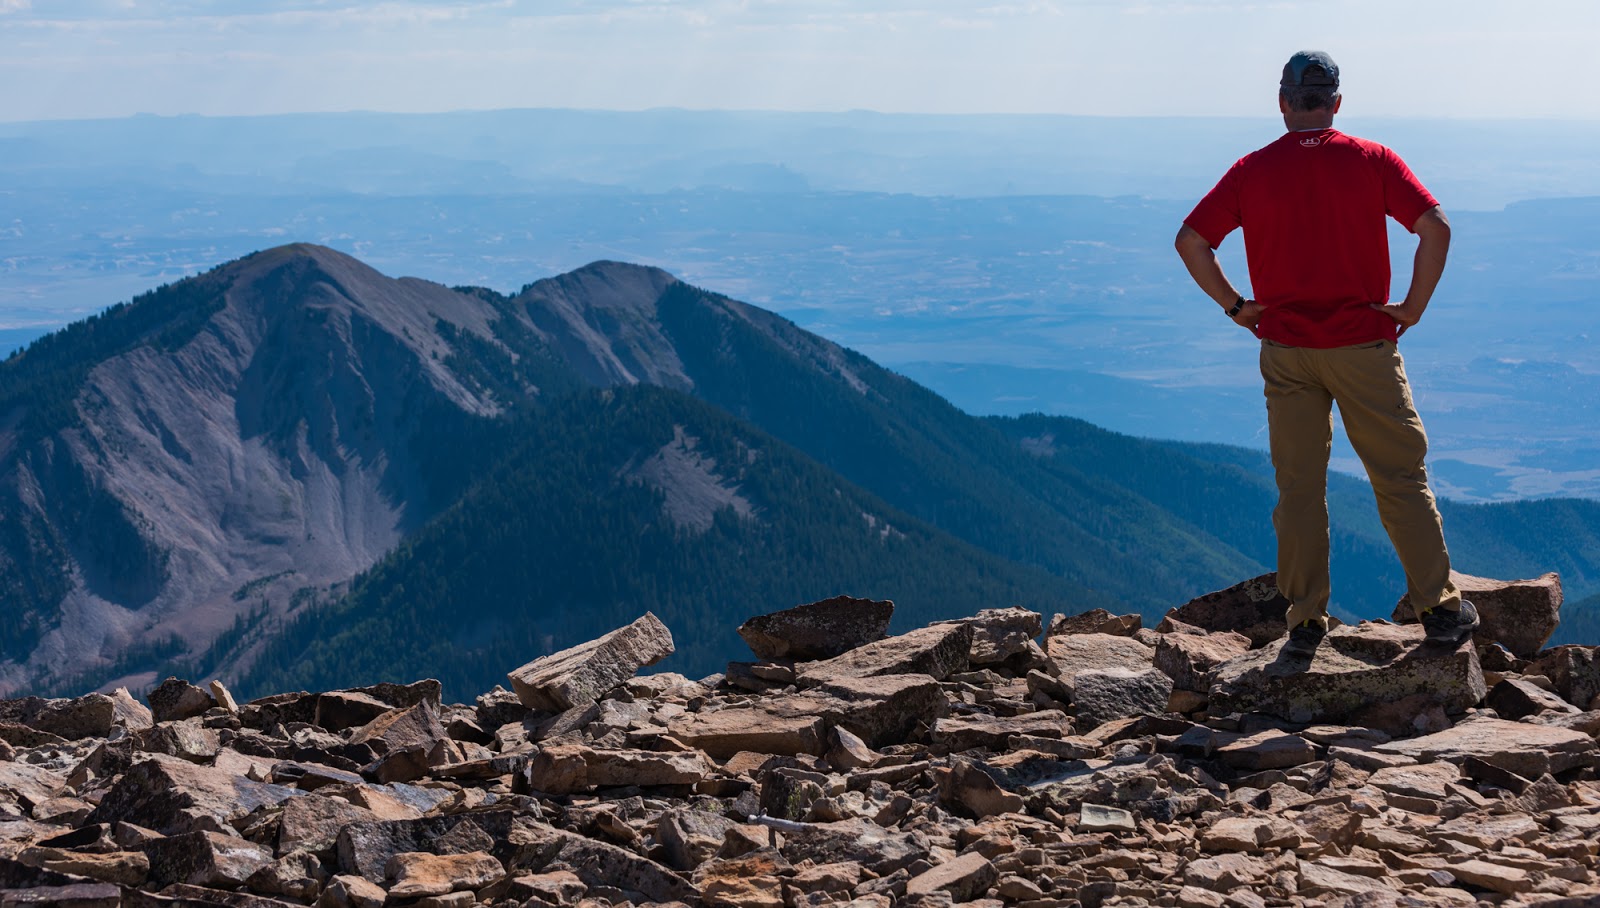
Dave surveys the scene.
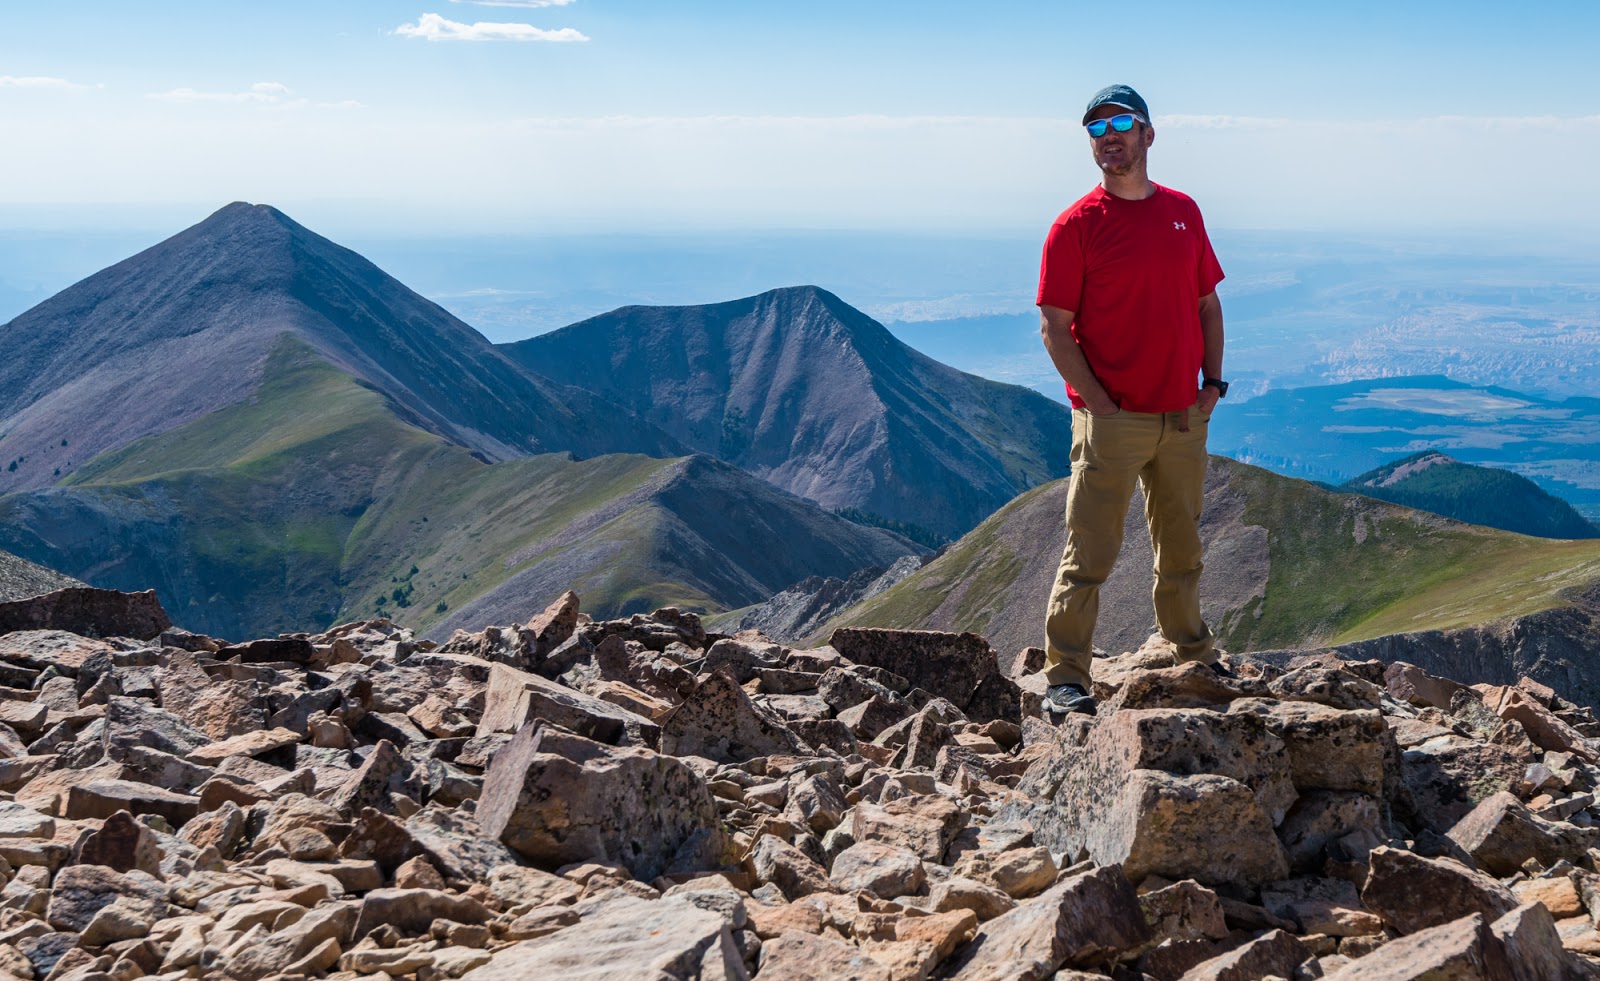
Dave strikes a "mountain model" pose.
Dave and I on the summit of Mount Peale (12,726 feet above sea level!) - what a fun hike, and stellar views!

"I'm pretty Mount Sneffels is right there..." (Dave was fascinated, as we left Colorado, in locating Mount Sneffels; I told him some of the western San Juan Range in Colorado could, on a clear enough day, be seen from certain areas within Utah's La Sal Range. We could definitely see the San Juans (just barely) through the haze, and we think we saw Mount Sneffels among those peaks, which is possible, but I couldn't see it well enough to say for sure how it appears from that perspective.

Dave was nice enough to take this picture of me atop Mount Peale; this was my second summit of this peak.

Just plain lovely.

Me, with Mount Mellenthin in the background. As I was descending, Dave asked me to backtrack just a few steps and told me when to stop, and then he took this picture. Nicely done, eh?
We ended up spending quite a lot of time on the summit of Mount Peale - probably about an hour - because the weather was good and the scenery was beautiful. Once we'd taken all the pictures we'd wanted to take we made a quick descent. On the way down we passed two gentlemen that worked for the forest service who had been out studying the impact of the mountain goats we'd seen on our ascent. Apparently the state of Utah had thought it would be a good idea to introduce mountain goats into this range - they're not native here, and the La Sals are surrounded by vast tracts of complex desert terrain that would've stopped any natural migration of the critters to the area on their own. The La Sals, like the Deep Creek Range in far-western Utah and the Wheeler Peak area of Nevada, are sometimes called "sky islands" because they are so much higher than the surrounding area they literally have a different climate than the entire area around them and species of plants and animals that couldn't survive the harshness of the desert thrive up there...The forest service counseled against bringing in the goats, arguing that they would have a negative/invasive role on the extant environment out there in the La Sals, but the state brought the goats in anyway - by helicopter! Anyway, these two had been out there the whole time we were on Mount Peale (and likely for some time before that) studying the physical impact of the goats on the area, so we chatted with them a bit about that stuff before continuing our descent past them down the huge gully.
On our way down I enticed Dave into stopping for a few minutes in part of the beautifully thick aspen forest that surrounds this area so I could take a few evening pictures in the lovely golden light before we continued out into the meadow on the other side of the thick woods you pass through.
On our way down I enticed Dave into stopping for a few minutes in part of the beautifully thick aspen forest that surrounds this area so I could take a few evening pictures in the lovely golden light before we continued out into the meadow on the other side of the thick woods you pass through.

Enjoying some moments of lovely late-afternoon light in the thick aspen forest the trail passes through on our descent from Mount Peale.
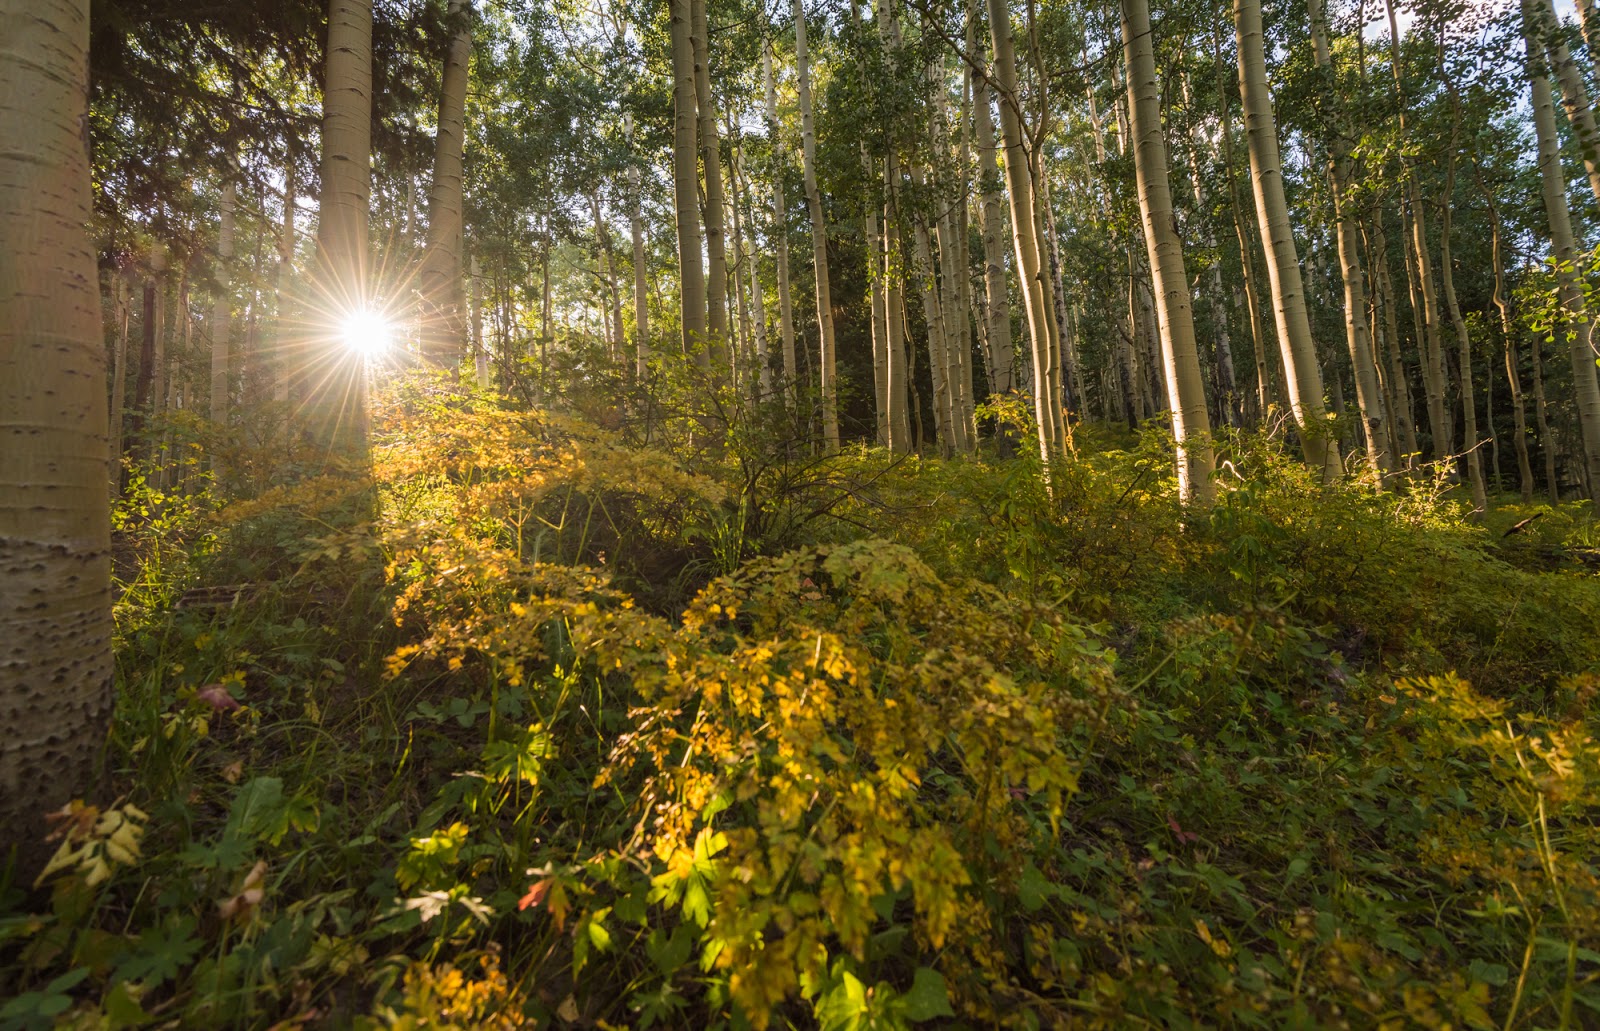
Enjoying some moments of lovely late-afternoon light in the thick aspen forest the trail passes through on our descent from Mount Peale.
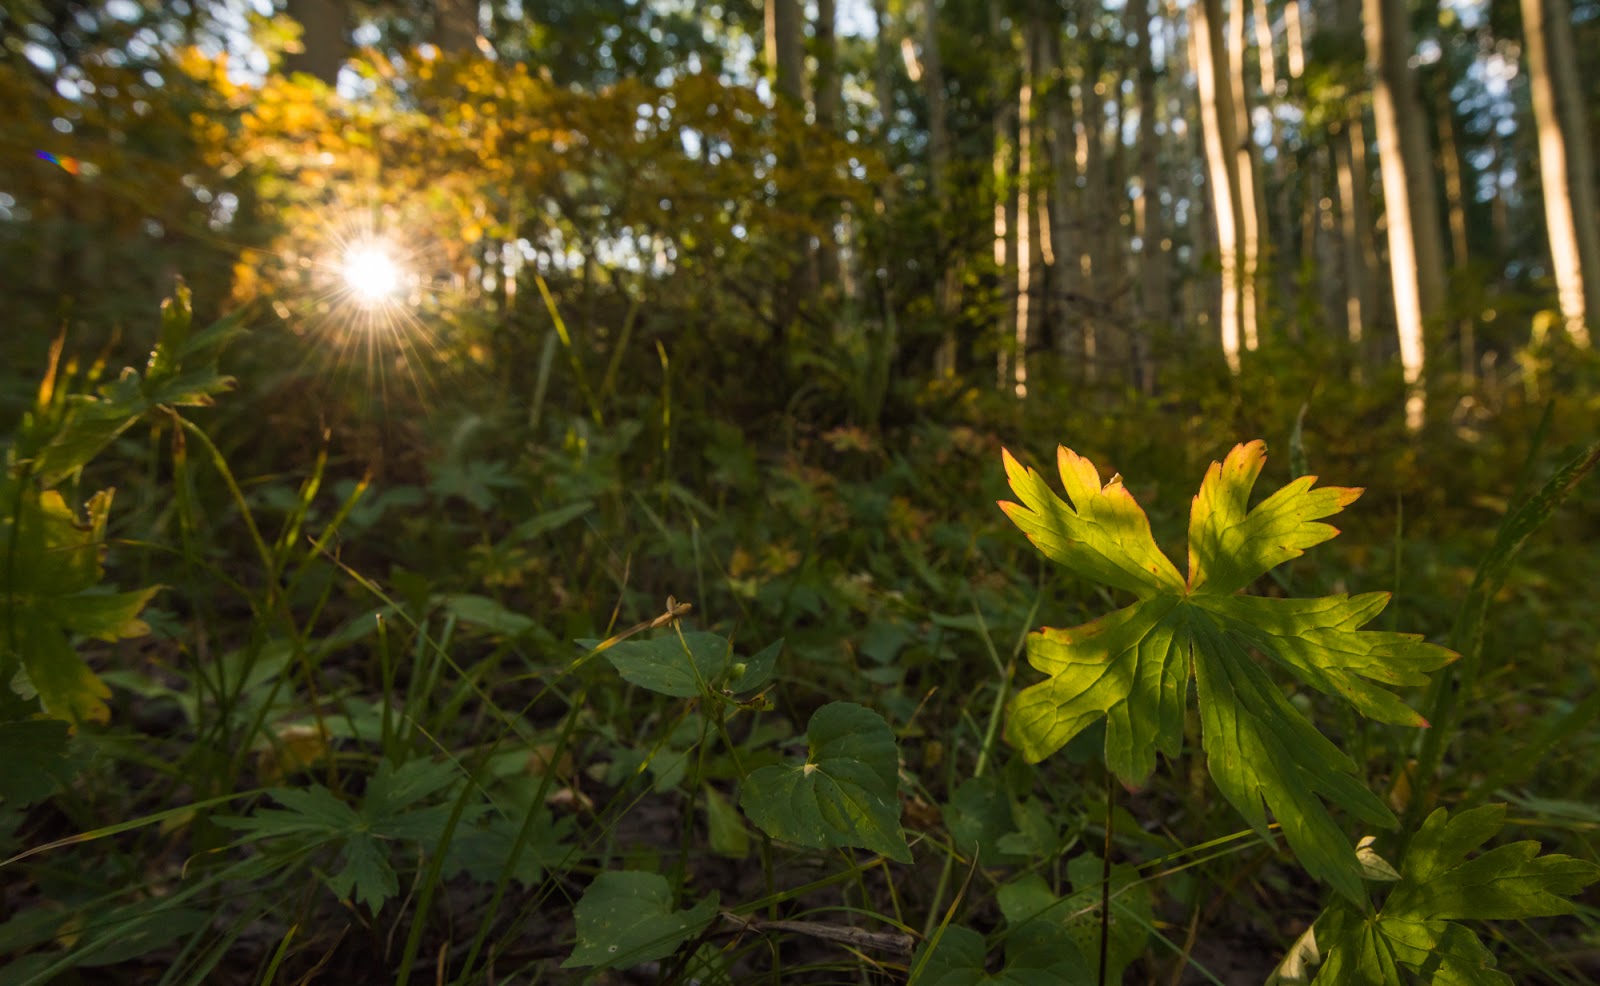
Enjoying some moments of lovely late-afternoon light in the thick aspen forest the trail passes through on our descent from Mount Peale.
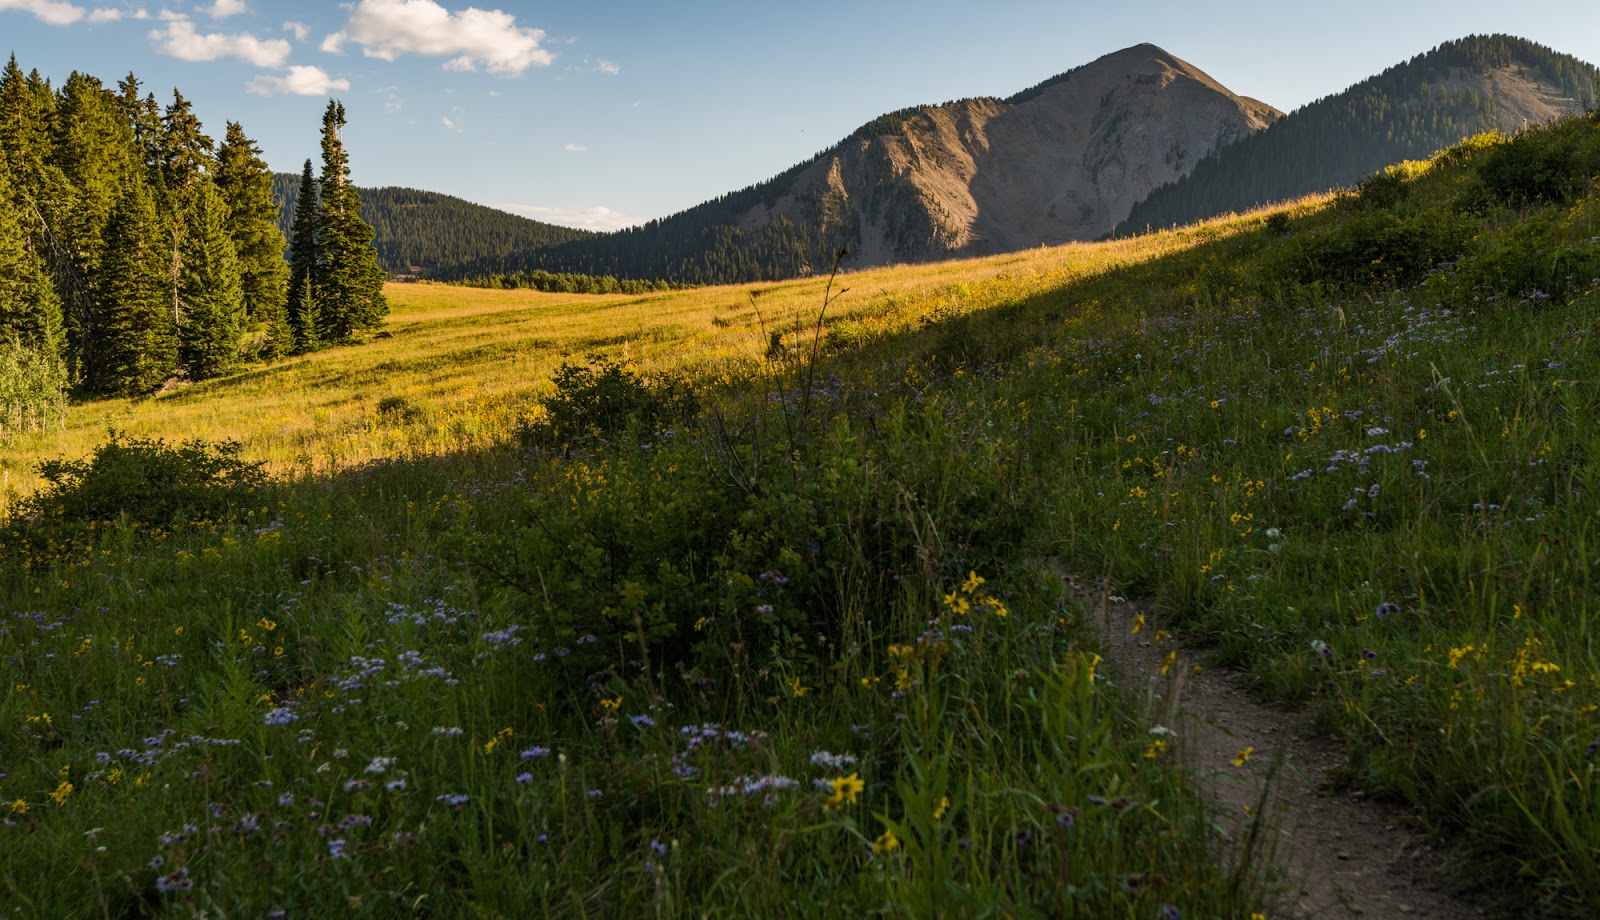
Coming back through the flower-laden meadow toward South Mountain and the car. I was a bit surprised with how many flowers there still were at this stage in August up at this elevation, but the late-snow season probably pushed their blooming time back a number of weeks. Broad fields of wildflowers are a lovely treat whenever you can find and spend some time with them.
Dave caught me walking out into the sunlight into the meadow in the gorgeous golden evening light.
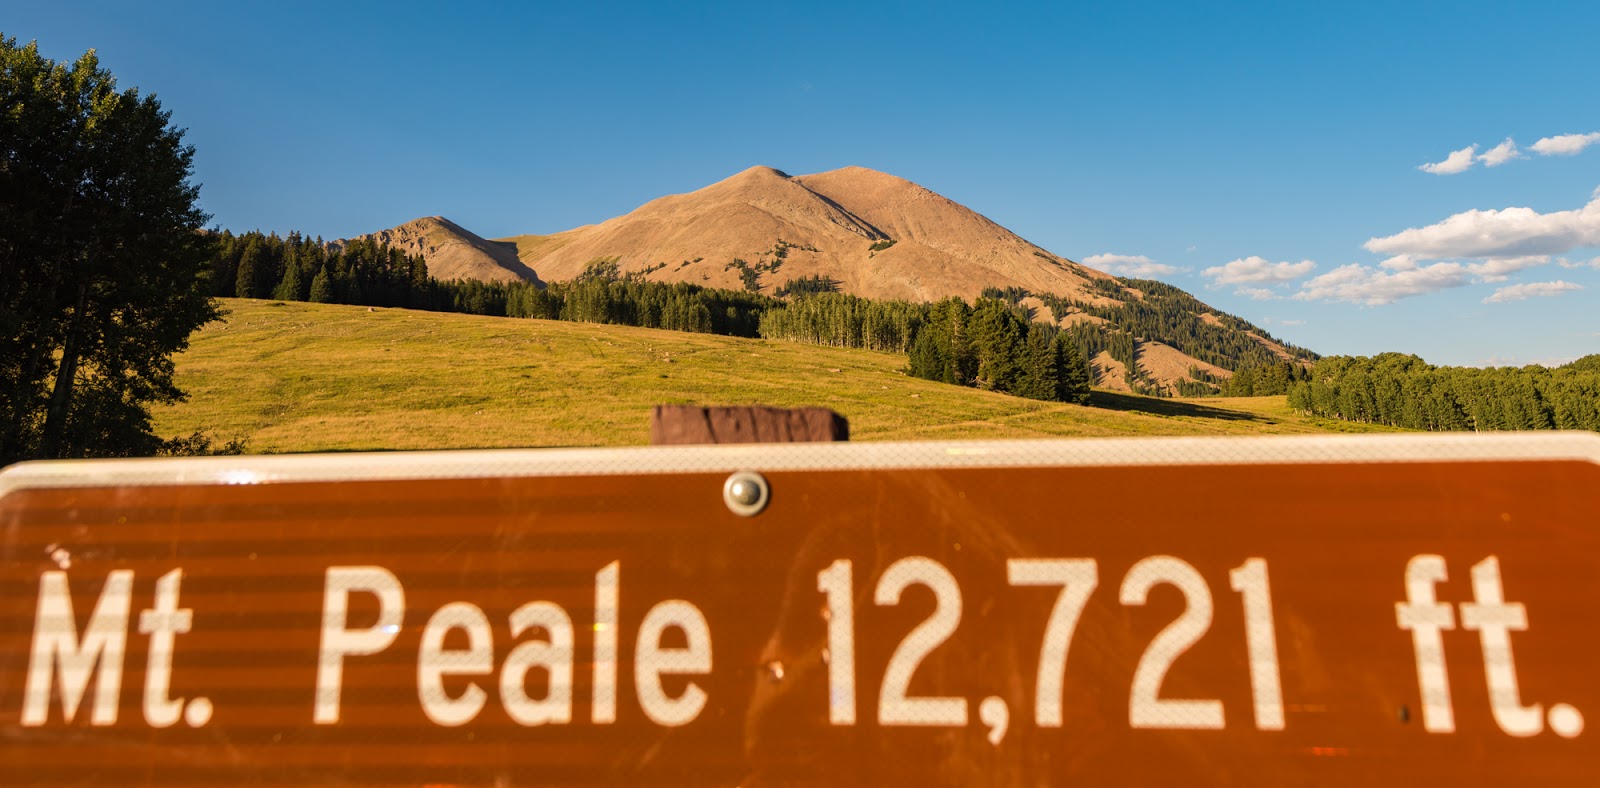
Snagged this picture of the sign and Mount Peale shortly before getting into the car to head to Maob for dinner, and - from thence - homeward. There used to be a much more interesting wooden sign in this area but someone stole it, so they installed this metal one...You may recall me listing the summit elevation of Mount Peale at 12,726 feet. Well, sometime after this sign was put in, a new survey of the land via satellite was done that showed a lot of the mountains across the western US were about five feet higher than previously listed...so...not a huge difference, but if it means I climbed a bit higher than I previously thought I did that's not a bad thing...
One more shot of Mount Peale in the glorious late afternoon light. The large gully we ascended is partially shaded on the far left, in case you were still wondering where that general access point up the peak is.