- Joined
- Jul 23, 2013
- Messages
- 1,665
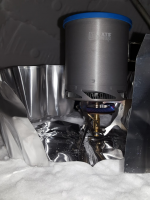
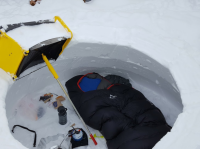
With all the snow the last couple weeks, I was itching to get out and do an igloo camp. Plans to go out with a friend Friday night fell through so I settled for my backyard. I only got a little more than halfway done with the igloo on Friday night before I called it quits for the night. It still needed a roof. With temperatures expected to get down to single digits over night, I greeted it as an opportunity. I had acquired a new EN comfort rated 0 degree down bag from Teton Sports last spring and had yet to put it to a real winter test. This would be as good a night as any. I also had new gear in an MSR Windpro II stove picked up for winter and group use (by far the most I've ever spent and hope to ever spend on a stove), an OliCamp XTS pot w/ heat exchanger, and a new ultralight insulated Klymit Static V with a 4+ R value I recently ordered through a Massdrop that all deserved to be tested out in such cold temperatures.
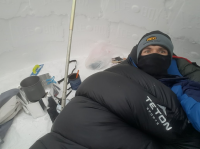
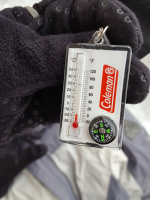
I'm happy to report that the stove performed admirably in heating up water to fill a Nalgene to serve as a heater for my bag, and then again in heating up some of that same water for oatmeal and a hot drink upon waking up the next morning. Even more impressive though was the sleeping bag itself. Combined with some merino wool base layers, my lightweight down jacket, a thin fleece balaclava with an extra fleece beanie over the top, the heated Nalgene bottle, all on top of the new Klymit pad doubled over a Therm-a-Rest Z-lite SOL, I did not get one shiver. I was unbelievably warm and comfortable all through the night and was surprised to have slept over an hour beyond dawn. The only time I ever awoke in the night, unfortunately, was to answer a nature call. For what it's worth, my keychain thermometer showed a temperature at right about 0 F when I awoke. So now I know I can take my bag to its comfort limit and actually be comfortable, even if it takes a few extra little tricks to ensure its comfort.
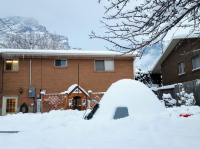
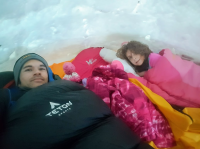
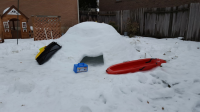
I was able to close in the roof and finish the igloo on Saturday at which point one of my daughters wanted to have another igloo camping experience -- We had done a backyard igloo campout last winter too. Knowing the temperatures would be warmer both inside the now enclosed igloo, and on the outside that night, I obliged. In fact, we went to bed with it snowing that night and woke up with it raining outside. Sadly, that rain has continued on over the last few days and has eroded and melted away much of the igloo since.
The new MSR Windpro and Olicamp pot in action
Waking Up from 1st night
0 degrees
No roof
All finished now
Waking up from the 2nd night out
Melting away
For those who may be curious about the tool I use to make the Igloo, it is called the Ice Box by Grand Shelters. I was fixing to splurge for one new from their site a few years ago, but then got lucky when I searched out KSL Classifieds and found a used one for less than half the new cost at that time. Still had to drive an hour away to retrieve it, though. It had all the parts and everything looked like it was in good shape. Score!
I'm happy to report that the stove performed admirably in heating up water to fill a Nalgene to serve as a heater for my bag, and then again in heating up some of that same water for oatmeal and a hot drink upon waking up the next morning. Even more impressive though was the sleeping bag itself. Combined with some merino wool base layers, my lightweight down jacket, a thin fleece balaclava with an extra fleece beanie over the top, the heated Nalgene bottle, all on top of the new Klymit pad doubled over a Therm-a-Rest Z-lite SOL, I did not get one shiver. I was unbelievably warm and comfortable all through the night and was surprised to have slept over an hour beyond dawn. The only time I ever awoke in the night, unfortunately, was to answer a nature call. For what it's worth, my keychain thermometer showed a temperature at right about 0 F when I awoke. So now I know I can take my bag to its comfort limit and actually be comfortable, even if it takes a few extra little tricks to ensure its comfort.
I was able to close in the roof and finish the igloo on Saturday at which point one of my daughters wanted to have another igloo camping experience -- We had done a backyard igloo campout last winter too. Knowing the temperatures would be warmer both inside the now enclosed igloo, and on the outside that night, I obliged. In fact, we went to bed with it snowing that night and woke up with it raining outside. Sadly, that rain has continued on over the last few days and has eroded and melted away much of the igloo since.
The new MSR Windpro and Olicamp pot in action

Waking Up from 1st night

0 degrees

No roof

All finished now

Waking up from the 2nd night out

Melting away

For those who may be curious about the tool I use to make the Igloo, it is called the Ice Box by Grand Shelters. I was fixing to splurge for one new from their site a few years ago, but then got lucky when I searched out KSL Classifieds and found a used one for less than half the new cost at that time. Still had to drive an hour away to retrieve it, though. It had all the parts and everything looked like it was in good shape. Score!
Last edited:
