John Fowler
Member
- Joined
- Jan 17, 2012
- Messages
- 217
Six years ago I hiked the Upper Muley Twist (UMT) trail. Last month I took my friend and photographer Federica on the same hike. I told her that it would be the hardest hike on our photo trip through the southwest, but that also it might be the most enjoyable. If you want to consider this hike, I suggest that you read the fine trail guide by ashergrey here on backcountrypost.com. You can also find some useful information on the Internet.
For the most part, the trail is easy but long (nine miles by the guide, 10.5 by my gps). There is some mild scrambling with modest exposure in a couple of places. Don’t count on finding water anywhere. To reach the trailhead, take the signed (for Strike Valley Overlook) turnoff to the north from the Burr Trail Road, about a mile west of the switchbacks that lead down to Notom Road. A mile after the turnoff, there is a place to park. The next two miles should be attempted only by 4WD high-clearance drivers. Near the end we came upon a fellow who was filling in the potholes with rocks to get his low-clearance vehicle through.
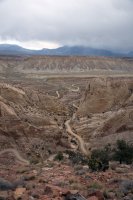
The Switchbacks from near the top
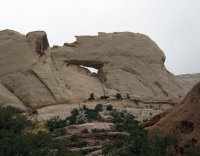
Near where you leave the Burr Trail, you can see Peek-a-boo Arch prominently displayed.
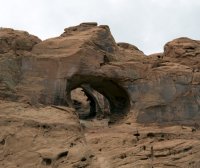
Then, just before you reach the Strike Valley parking area, you can see Double Arch on the left wall.
The hike departs from the Strike Valley Overlook parking area and proceeds north up the creek bed. After a couple of miles you will see a sign indicating the place where you will come down from the ridge to the east on your way back. Nearby you can see Saddle Arch.
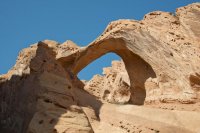
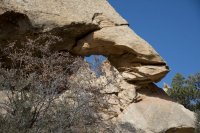
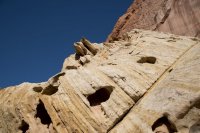
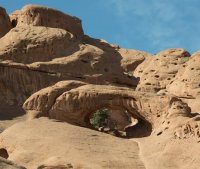
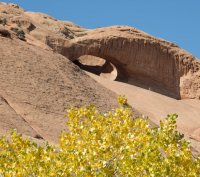
You will pass many fascinating rock formations and more arches along the way.
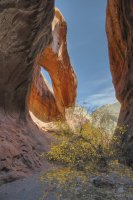
The Slot from above
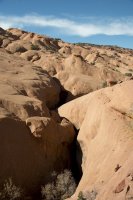
Eventually the creek bed will slot up and you will have to detour by climbing around to the right. The way is cairned but still not easy to follow in places. If you take a wrong turn it will soon become evident. Even if you follow the course correctly, you will be faced with the occasional scramble over a boulder or up a steep place.
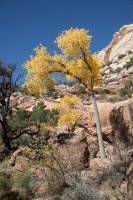
Same tree from above
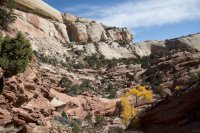
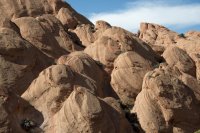
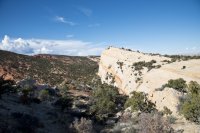
Eventually the path comes back down, but almost immediately it starts up again to the east toward the long ridge that you will hike to the south on the return. This is roughly the halfway point on the hike.
Once you reach the ridge, you will have a great view to the east of the Henry Mountains and the Strike Valley.
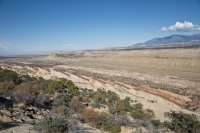
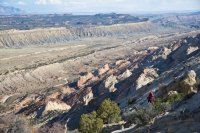

As you head back south you will encounter a steep climb up slickrock that might give you second thoughts unless you have done it before. It is less daunting than it looks. Then, later there is a quick descent and ascent that takes a bit of scrambling. The trail is well-marked though.
As you get about halfway back, the trail descends steeply to the west back to the previously-mentioned sign in the creek bed, and from there you backtrack to your vehicle.
The hike took us about seven hours, but we had planned for an all-day adventure and stopped many times to take pictures.
Late October is a fine time to take this hike, especially if the weather is good.
Featured image for home page:

For the most part, the trail is easy but long (nine miles by the guide, 10.5 by my gps). There is some mild scrambling with modest exposure in a couple of places. Don’t count on finding water anywhere. To reach the trailhead, take the signed (for Strike Valley Overlook) turnoff to the north from the Burr Trail Road, about a mile west of the switchbacks that lead down to Notom Road. A mile after the turnoff, there is a place to park. The next two miles should be attempted only by 4WD high-clearance drivers. Near the end we came upon a fellow who was filling in the potholes with rocks to get his low-clearance vehicle through.
The Switchbacks from near the top

Near where you leave the Burr Trail, you can see Peek-a-boo Arch prominently displayed.

Then, just before you reach the Strike Valley parking area, you can see Double Arch on the left wall.

The hike departs from the Strike Valley Overlook parking area and proceeds north up the creek bed. After a couple of miles you will see a sign indicating the place where you will come down from the ridge to the east on your way back. Nearby you can see Saddle Arch.

You will pass many fascinating rock formations and more arches along the way.


The Slot from above

Eventually the creek bed will slot up and you will have to detour by climbing around to the right. The way is cairned but still not easy to follow in places. If you take a wrong turn it will soon become evident. Even if you follow the course correctly, you will be faced with the occasional scramble over a boulder or up a steep place.

Same tree from above


Eventually the path comes back down, but almost immediately it starts up again to the east toward the long ridge that you will hike to the south on the return. This is roughly the halfway point on the hike.
Once you reach the ridge, you will have a great view to the east of the Henry Mountains and the Strike Valley.


As you head back south you will encounter a steep climb up slickrock that might give you second thoughts unless you have done it before. It is less daunting than it looks. Then, later there is a quick descent and ascent that takes a bit of scrambling. The trail is well-marked though.
As you get about halfway back, the trail descends steeply to the west back to the previously-mentioned sign in the creek bed, and from there you backtrack to your vehicle.
The hike took us about seven hours, but we had planned for an all-day adventure and stopped many times to take pictures.
Late October is a fine time to take this hike, especially if the weather is good.
Featured image for home page:

