Album Photo Processing Comparisons

Nick, I would like to see what you did to the sky to bring out the Milky Way.

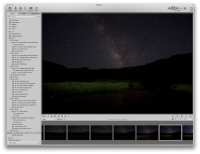
I don't remember exactly what I did so I just did a quick re-process while taking screen shots.

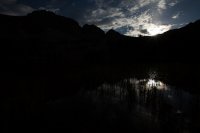
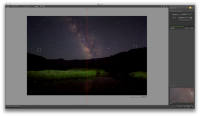
RAW Image:
Screen Shot 2012-08-16 at 7.40.50 AM.png

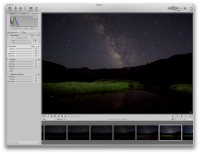
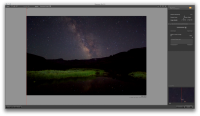
Bumped the exposure up a bit
Screen Shot 2012-08-16 at 7.41.03 AM.png

Applied the Detail Extractor filter from the Nik Color Efex Pro software (within Aperture)
Screen Shot 2012-08-16 at 7.41.36 AM.png
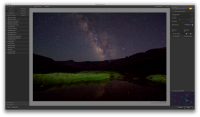
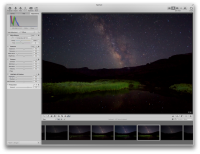
Added negative control points so that the major extraction was only occuring on the milky way itself. All the little dots you see in the photo below are a negative control point.
Screen Shot 2012-08-16 at 7.42.17 AM.png
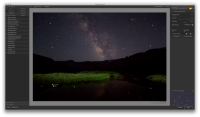
Reduced noise in Dfine 2.0
Screen Shot 2012-08-16 at 7.43.10 AM.png
A bit of sharpening...
Screen Shot 2012-08-16 at 7.43.50 AM.png
Brushed in some saturation... (the screen shot didn't capture the brush)
Screen Shot 2012-08-16 at 7.44.17 AM.png
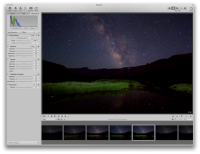
Cooled it down a bit. I should have done this first. But you get the point...
Screen Shot 2012-08-16 at 7.44.49 AM.png
 
Just saw this deal for LR4 for PC or MAC for $109!

For its newsletter subscribers only, newegg offers the Adobe Photoshop Lightroom 4 for Windows and Mac for $149. Coupon code "EMCNBJF27" cuts it to $109. With free shipping, that's the lowest total price we could find by $31, although we saw it for $10 less bundled with a 4GB SDHC card in June. This program offers a variety of photo editing tools. Coupon expires August 20
 
Thanks to both ashergrey and nick for the fine detailed explanation. Time to find some money for some software.
 
I find myself being more and more drawn to high contrast compositions. Perhaps I enjoy blinding myself while looking through my viewfinder into the sun as it sets over a peak, or maybe I just like making processing as complicated as possible. Probably both. Of course, most of these situations call for some form of tone-mapping, which I'm perfectly comfortable with. I went the graduated filter route for a while, but rare was the instance when I found myself working with a flat horizon, and I still found myself doing a crazy amount of dodging or burning in order to get the contrasting areas to cohesively work together. Stacking and hand-blending images in PS can get tedious fairly quickly, and I still had the problem of merging contrasting tones in a natural way. I gave Photomatix a try for a spell, but I couldn't get anything to not come out wonky and over-baked. Frustrated, I was ready to return to the hand-blending route when I stumbled upon a program called SNS-HDR. Simply put, It's the best HDR software that I've played with yet--very intuitive and simple UI, minimal ghosting, the ability to layer and mask--and most importantly, results come out au natural. Dropped $38 for it, and I'd say it was worth every penny. Check it out here: http://www.sns-hdr.com/

The three bracketed images:

IMG_9924.jpg

IMG_9925.jpg

IMG_9926.jpg

As you can tell, my brightest image was a still a bit dark--ideally those shadows would have a little more detail in them. Ah well. After SNS did it's thing, I imported directly into PS 6, where the rest of the magic happened. For dodging and burning (and now, sharpening too), I use and fully endorse a set of actions developed by Tony Kuyper. Based on luminosity masks, they more or less allow you to isolate tonal ranges in your image and work on them and only them. Makes the native dodge and burn tool in PS feel and look like a stone tool. Read the tutorial here: http://goodlight.us/writing/luminositymasks/luminositymasks-1.html. Highly, highly recommended. Once I feel the tones are all straightened out, I'll make any local saturation adjustments that are needed--sometimes with the saturation tool, sometimes with selective color. If things feel right, I'll save my progress as a TIFF file, and be ready for the final step: sharpening. In the past I've either relied on the Marc Adamus technique (resize, sharpen, sharpen, resize) or used Smart Sharpen, depending on the image. But lately I've been taking advantage of another one of Tony Kuyper's actions--this one for sharpening--and have been loving it. Anyhow, here's the final result:

Sharpened version.jpg
 

Attachments

  • IMG_9926-HDR(3)3.jpg
    IMG_9926-HDR(3)3.jpg
    745.7 KB · Views: 113
Here's a quick and dirty example of how post processing a raw image can help provide some pop. I'm by no means a professional and this is not meant to indicate the "right" way of doing things... only the method by which I currently process most shots.

Thanks ashergrey. That was most instructive and illuminating!
 
Sorry for the repost. I'm posting this in 3 relevant threads. Using the link below benefits BCP. There's a $400 coupon on Photoshop that knocks 73% off the price, bringing it down to about $190. Good through 8/31. Go find this forum's Amazon referral link Photoshop CS6, add PS CS6 Win or Mac to your cart, and apply coupon code KNDJ-6E6ADN-6A93NF at checkout.
 
The Uintas Backcountrypost Fest a few weeks ago was my first time taking RAW photos. I set my camera to take RAW and JPEG versions so I could see what the difference between the two looks like. I wanted to upload a couple examples of photos I took to get feedback on whether I'm doing okay processing them or if they need more help. I'm just doing basic edits right now (exposure, recovery, fill light, blacks, clarity, vibrance, and a medium contrast boost).I'll show four examples of each photo, unedited JPEG, unedited RAW, RAW with edits, and JPEG with edits for comparison. Here goes!


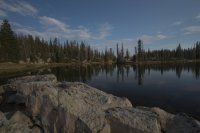
rsz_img_1061.jpgPhoto 1 Unedited JPEG

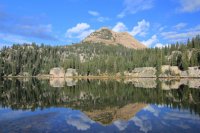
rsz_img_1061-5.jpg
Photo 1 Unedited RAW

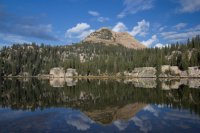
rsz_img_1061-3.jpg
Photo 1 RAW with edits

rsz_img_1061-4.jpg
Photo 1 JPEG with edits

rsz_img_1074.jpg
Photo 2 Unedited JPEG

rsz_img_1074-5.jpg
Photo 2 Unedited RAW

rsz_img_1074-2.jpg
Photo 2 RAW with edits

rsz_img_1074-3.jpg
Photo 2 JPEG with edits
 
I prefer your edited raws to the edited jpg versions. The tones, especially the skies, look more natural. On a well exposed shot I rarely need to touch recovery, fill light or blacks.

Why does the first photo unedited look underexposed when compared with the OOC jpeg?
 
I prefer your edited raws to the edited jpg versions. The tones, especially the skies, look more natural. On a well exposed shot I rarely need to touch recovery, fill light or blacks.

Why does the first photo unedited look underexposed when compared with the OOC jpeg?

Thanks! I prefer the way the edited raw versions look, too. I'm not sure why the unedited raw looks so underexposed on the first image. Some of the raws were quite a bit darker than the jpegs, and some weren't that different.
 
Are you shooting Canon? Do you have a picture style (or equivalent for other vendors) set in camera? That will apply sharpening/saturation changes before the jpg ever hits your computer... but not to the raw files.
 
Are you shooting Canon? Do you have a picture style (or equivalent for other vendors) set in camera? That will apply sharpening/saturation changes before the jpg ever hits your computer... but not to the raw files.

Yes, Canon. I think we have the same camera, actually. The T2i. I often shoot my outdoor photos in Landscape mode unless conditions are tricky because I like the way it makes the colors pop. The default style that mode uses is L for vivid blues and greens. Is that something I should avoid shooting RAW or do you think it won't make much of a difference? Also it wasn't terribly bright out when I shot that picture since it wasn't long after a storm and it was early evening, but it wasn't as dark as the picture suggests either.
 
Well the picture styles aren't applied to your raw files in camera the way they are with the jpg, so that could explain why the examples above have such a brightness difference. As an experiment, try shooting with the neutral picture style and see if the raw and jpg files come out closer to the same.
 
Well the picture styles aren't applied to your raw files in camera the way they are with the jpg, so that could explain why the examples above have such a brightness difference. As an experiment, try shooting with the neutral picture style and see if the raw and jpg files come out closer to the same.

I'll try that and see if they're closer. I suspect they will be.

Sent from my DROIDX using Tapatalk 2
 
Well the picture styles aren't applied to your raw files in camera the way they are with the jpg, so that could explain why the examples above have such a brightness difference. As an experiment, try shooting with the neutral picture style and see if the raw and jpg files come out closer to the same.
Ahhh, that's probably why I've seen the same thing with my Nikon...

Thanks
 
The Watchman from the bridge, in Zion, Oct. 12, 2012 -- SOOC:

sooc_DSC4023.jpg

After changing leaf color, adding contrast to Watchman face, putting some fog on far horizon, darkening the river, and cropping:

small_a_DSC4023.jpg
 
Back
Top