fossana
Member
- Joined
- Jan 11, 2018
- Messages
- 1,038
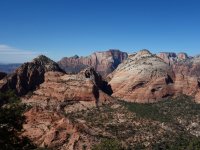
I had wanted to do Destination Peak after first eyeing it on the approach to G2. Our original plan was to do both Destination and Gifford Peaks, but we realized on route that things had not yet dried out from the recent storms and we didn't think we could safely solo the 5th class headwall on Gifford. Instead we hooked around the end of Gifford Canyon to peek into Crawford and Parunuweap Canyons.
the Route
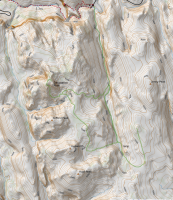
The approach for Destination Peak is the same you would use for Bridge Mountain or G2, but you cut off before the slab that bypasses the pour-off in the Hepworth Wash connector canyon. Destination Peak sits on the right at the mouth of that canyon. There is an obvious right-leaning ramp class 2-3 with trees on the subsidiary peak just left of the main peak. At the top of the ramp the route moves into a short chute, then follows chossy ledges to the top. From a distance the route looks far steeper than it is, but contains only a single 4th class move in the upper chute. Descend the same way.
To do the optional Crawford Canyon viewpoint, drop into Gifford Canyon using the drainage between Hepworth and Roof Peaks. Take the vegetated ramp on the left side of the canyon staying as high as possible. At the head of the canyon enter a small slot and climb the short 4th class headwall to the rim.
Logistics
Start/end: Canyon Overlook parking lot
Navigation: could get by with a paper map and beta
Rating: class 4 (barely)
Other difficulties: exposed slab climbing
Filterable water: Gifford Canyon after rainfall
Potable water: south entrance visitor center, museum
Backcountry permits (overnight trips): visitor center
Bathrooms: Canyon Overlook parking lot, museum, south entrance visitor center
Dogs: not allowed
Nearest town/gas: Springdale, UT
Report
After our recent storms Gifford Canyon was much wetter than my earlier trip to G2 and much time was spent dodging quicksand traps. Fortunately the sloggy part soon ended as we made our way up the slabs that lead to the saddle high above Gifford Canyon.
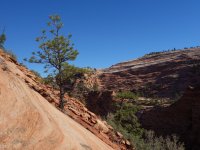
In the upper bowl I cut right this time to check out the hoodoos.
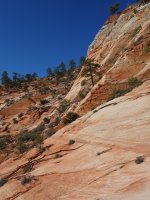
At the top of the saddle majestic Destination Peak came into full view. The chartreuse dot marks the small ridge that must be surmounted to reach both the SE chute on Destination Peak or Bridge Mountain.
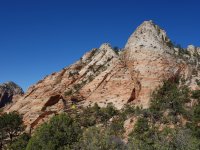
As we got closer to the base of the route the ramp appeared much lower angle.
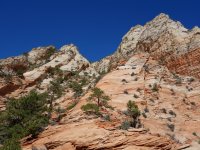
Views from the summit were expansive. Looking west toward Zion Canyon.

And north toward East Temple
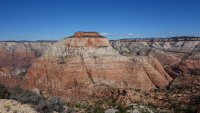
and a N/NE pano

After Destination we decided to take a side trip over to the head of Gifford Canyon, passing Gifford, Hepworth and Roof Peaks along the way.
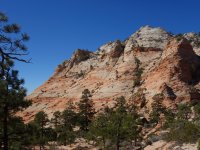
Staying high on the Gifford Canyon rim seemed tedious (if possible) given the convoluted terrain, so we dropped down the drainage between Roof and Hepworth peaks. I had no beta for how to get up the other side of Gifford Canyon, but there was a ramp that looked like it would work.
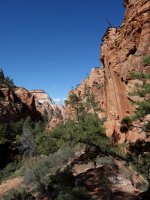
At the head of the canyon was a short slot and luckily there was a chossy 4th class exit that lead to the rim. We topped out to colorful rock formations.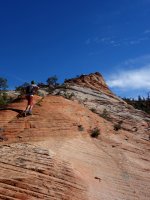
and more sweeping views of East Temple,
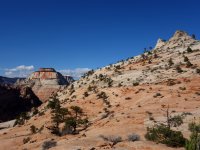
Parunuweap Canyon,
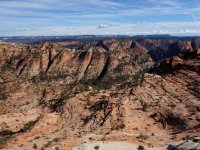
and Crawford Wash.
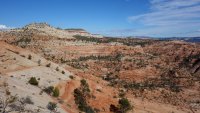
We bid the lovely 360 views farewell and headed back to the car.
the Route
The approach for Destination Peak is the same you would use for Bridge Mountain or G2, but you cut off before the slab that bypasses the pour-off in the Hepworth Wash connector canyon. Destination Peak sits on the right at the mouth of that canyon. There is an obvious right-leaning ramp class 2-3 with trees on the subsidiary peak just left of the main peak. At the top of the ramp the route moves into a short chute, then follows chossy ledges to the top. From a distance the route looks far steeper than it is, but contains only a single 4th class move in the upper chute. Descend the same way.
To do the optional Crawford Canyon viewpoint, drop into Gifford Canyon using the drainage between Hepworth and Roof Peaks. Take the vegetated ramp on the left side of the canyon staying as high as possible. At the head of the canyon enter a small slot and climb the short 4th class headwall to the rim.

Logistics
Start/end: Canyon Overlook parking lot
Navigation: could get by with a paper map and beta
Rating: class 4 (barely)
Other difficulties: exposed slab climbing
Filterable water: Gifford Canyon after rainfall
Potable water: south entrance visitor center, museum
Backcountry permits (overnight trips): visitor center
Bathrooms: Canyon Overlook parking lot, museum, south entrance visitor center
Dogs: not allowed
Nearest town/gas: Springdale, UT
Report
After our recent storms Gifford Canyon was much wetter than my earlier trip to G2 and much time was spent dodging quicksand traps. Fortunately the sloggy part soon ended as we made our way up the slabs that lead to the saddle high above Gifford Canyon.

In the upper bowl I cut right this time to check out the hoodoos.

At the top of the saddle majestic Destination Peak came into full view. The chartreuse dot marks the small ridge that must be surmounted to reach both the SE chute on Destination Peak or Bridge Mountain.

As we got closer to the base of the route the ramp appeared much lower angle.

Views from the summit were expansive. Looking west toward Zion Canyon.

And north toward East Temple

and a N/NE pano
After Destination we decided to take a side trip over to the head of Gifford Canyon, passing Gifford, Hepworth and Roof Peaks along the way.

Staying high on the Gifford Canyon rim seemed tedious (if possible) given the convoluted terrain, so we dropped down the drainage between Roof and Hepworth peaks. I had no beta for how to get up the other side of Gifford Canyon, but there was a ramp that looked like it would work.

At the head of the canyon was a short slot and luckily there was a chossy 4th class exit that lead to the rim. We topped out to colorful rock formations.

and more sweeping views of East Temple,

Parunuweap Canyon,

and Crawford Wash.

We bid the lovely 360 views farewell and headed back to the car.

